Setting the plunge depth, Offset from a surface, By router bit profile – Festool Plunge OF 2200 EB User Manual
Page 10
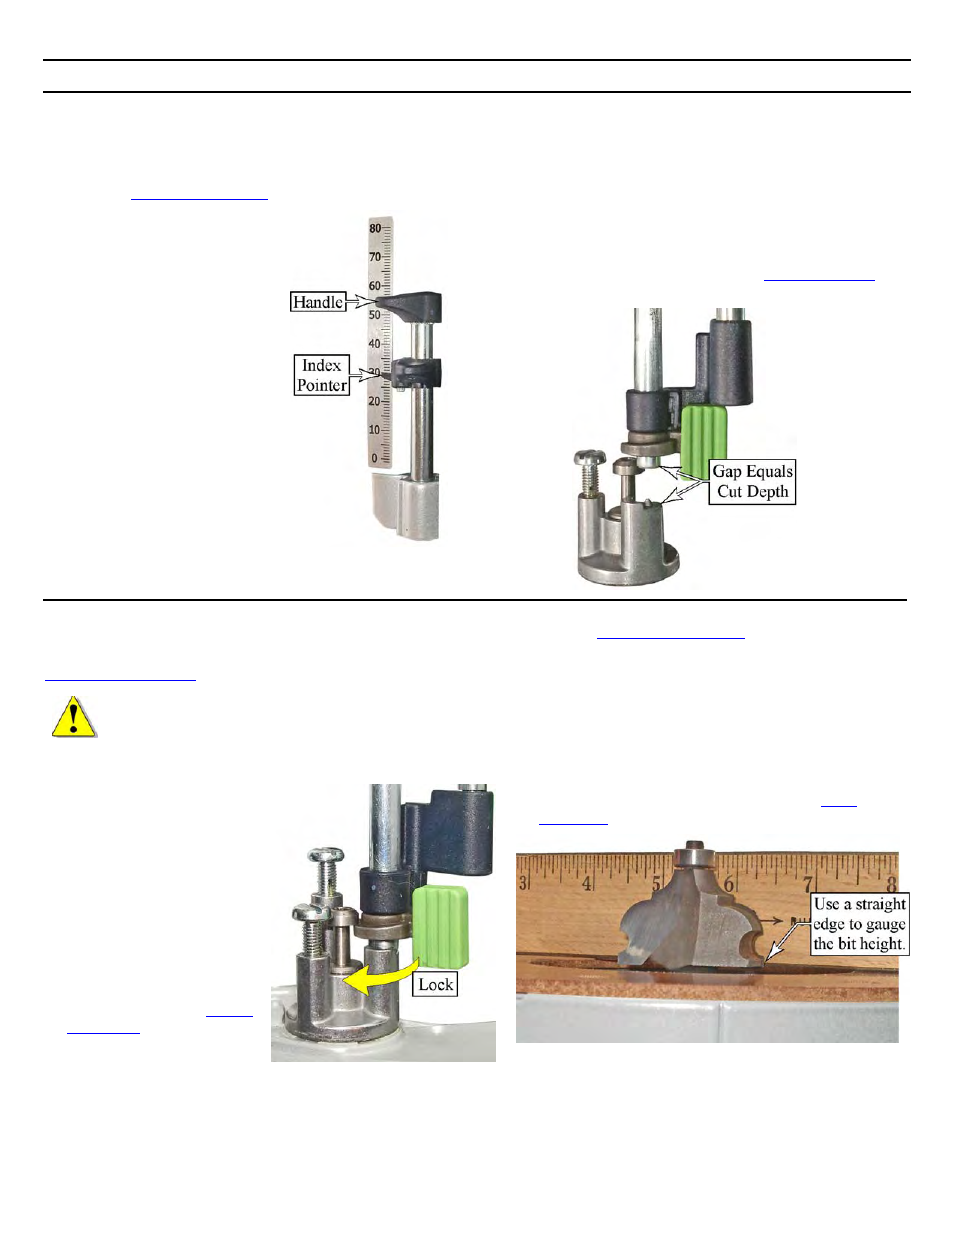
Setting the Plunge Depth
Offset from a Surface
Setting the plunge depth as an offset from a surface is
used when making plough or dado cuts at a specific
depth below the surface of the workpiece.
Refer to the
1.
Unplug the router for safety.
10
OF 2200 EB Router
2.
Rotate the turret to the base position.
3.
With the plunge lock knob
released, gently plunge the
router until the router bit
touches the surface of the
workpiece, and retighten the
plunge lock knob.
4.
Loosen the depth stop lock
lever and lower the post
until it rests on the turret base
position.
Slide the index
5.
pointer down to the
6.
d tighten the depth
stop lock lever.
zero position.
Raise the depth stop post until the
index pointer is pointing the desired
plunge depth, an
7.
If desired, you may use the fine adjustment dial to fine
tune the setting.
►
The resulting gap between the depth stop post and the
turret represents the depth below the surface that the
router will plunge to.
8.
Release the plunge lock knob and raise the router to its
normal position.
9.
Operate the router as described in the “
Basic Operation
”
section on page 9.
By Router Bit Profile
Normally, setting the depth of a plunge router based on the
profile of the router bit can be problematic. However, the
WARNING! To reduce the risk of injury,
unplug the router when working near an
exposed router bit.
1.
Rotate the turret to the Base Position.
2.
Loosen the depth stop locking lever
and lower the post down to the Base
Position on the turret.
3.
4.
th stop
5.
ge
Rotate the turret latching
lever toward the turret to
lock the post to the turret.
Plunge the router down to
the approximate depth you
wish for the bit profile, and
tighten the dep
locking lever.
Plun
Lock Knob
6.
Lay a straightedge across the router’s base for reference.
7.
released.
Use the
(page 8) to raise or
8.
If a plunging action is required, then release the
lower the bit to the desired depth.
turret latching lever.
9.
If a plunging action is not required, then engage
the plunge lock knob. The plunge lock engages both
plunge posts, and the router operation will be more
stable.
10.
Operate the router as described in the “
Operation
” section on page 9.