FUNAI VHS 31B-254 User Manual
Page 11
11
EN
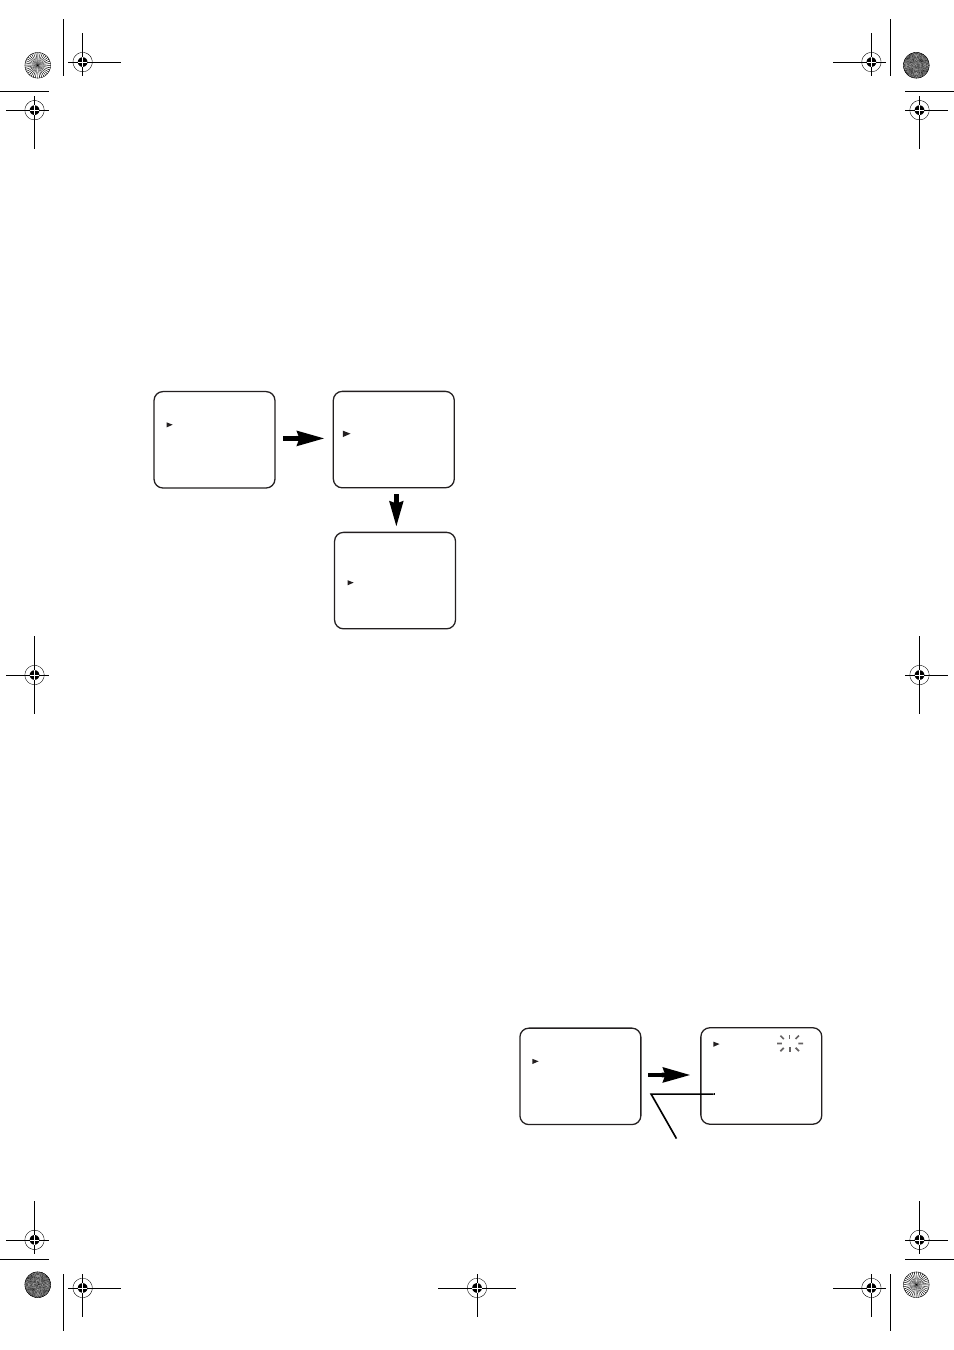
Picture Select
This function enables you to select the picture quality of a
tape.
• Use the remote control for this procedure.
1) Press
MENU
.
2) Press
PLAY
/
K
or
STOP
/
L
to select “SET UP”, then press
F.FWD
/
B
.
3) Press
PLAY
/
K
or
STOP
/
L
to select “PICTURE”.
4) Press
F.FWD
/
B
until the desired mode (NORMAL,
SOFT, or SHARP) is indicated on the TV screen.
5) Press
MENU
to exit.
Note:
Once you select the Picture Select mode, it stays in
effect even after you turn off the VCR.
Automatic Operations
Automatic Rewind, Eject, Off
When the end of a tape is reached during recording, playback,
or fast-forward, the tape will automatically rewind to the
beginning. After that, the VCR will eject the tape and turn
itself to off.
• The tape will not auto-rewind during Timer Recording or
One Touch Recording.
• When the Counter Memory is activated, the tape will
rewind to the M0:00:00 position and the VCR will enter
the Stop mode.
Tape Eject
A tape can be ejected with the VCR power on or off (but the
VCR must be plugged in).
• If a Timer Recording is set, a tape can only be ejected with
the power on.
Real Time Tape Counter
• This shows the elapsed recording or playback time in
hours, minutes, and seconds (Nothing is shown in the case
of blank portion).
• The “ – ” indication will appear when the tape is rewound
further than the tape counter position “0:00:00”.
Timer Recording
You may programme the VCR to start and end a recording
while you are away. You can set 8 programmes to record on
specific days, daily or weekly within a 1-year period.
• Use the remote control for this procedure.
• Insert a cassette tape with its erase prevention tab in place.
(If necessary, rewind or fast forward the tape to the point at
which you want to begin recording.)
1) Press
MENU
.
2) Press
PLAY
/
K
or
STOP
/
L
to select “TIMER”, then press
F.FWD
/
B
.
Note:
If you have not set the clock yet, “CLOCK” setting
menu appears. If so, follow the steps outlined in the
“Setting the Clock” section. Then, set the timer.
• When you press
F.FWD
/
B
after pressing
PLAY
/
K
or
STOP
/
L
during steps
3)
to
9)
, the input mode will move to
the next step.
• If you do not press
F.FWD
/
B
within 5 seconds of setting an
item, the input mode will move to the next step.
• Press
REW
/
s
to go back one step from the current setting
during steps
4)
to
10)
. If
REW
/
s
is pressed when the
TIMER NUMBER is flashing, the entire programme
contents will be erased.
3) Programme number flashes. Press
PLAY
/
K
or
STOP
/
L
repeatedly until the desired programme number appears.
Then, press
F.FWD
/
B
.
4)
For once-only recording
: Press
PLAY
/
K
or
STOP
/
L
repeatedly until the relevant month appears.
For daily recording
: To record a TV programme at the
same time on the same channel from Monday through
Friday. While the month digit is flashing, press
PLAY
/
K
or
STOP
/
L
repeatedly to select “MO-FR”.
For everyday recording
: To record a TV programme at
the same time on the same channel everyday. While the
month digit is flashing, press
PLAY
/
K
or
STOP
/
L
repeatedly to select “MO-SU”.
For weekly recording
: To record a TV programme at the
same time on the same channel every week. While the
month digit is flashing, press
PLAY
/
K
or
STOP
/
L
repeatedly to select “W-MO” (Example: every monday).
5)
For once-only recording only
: Press
PLAY
/
K
or
STOP
/
L
repeatedly until your desired day appears.
6) Press
PLAY
/
K
or
STOP
/
L
repeatedly until the relevant
start hour appears. Next, enter the minute digit.
7) Press
PLAY
/
K
or
STOP
/
L
repeatedly until the relevant
end hour appears. Next, enter the minute digit.
8) Press
PLAY
/
K
or
STOP
/
L
repeatedly until the relevant
channel number appears.
9) Press
PLAY
/
K
or
STOP
/
L
repeatedly until the desired tape
speed appears.
10)(31B-254 and 31B-454 only)
Press
PLAY
/
K
or
STOP
/
L
repeatedly to set PDC “ON” or
“OFF”.
11)Press
F.FWD
/
B
. Programme is now completed.
•To set another timer programme, repeat steps
3)
to
11)
.
12)Press
MENU
to exit.
13)Press
FUNCTION
to activate the timer.
The TIMER indicator on the front panel comes on.
MENU
TIMER
SET UP
INITIAL
MENU
TIMER
SET UP
INITIAL
SET UP
AUTO REPEAT
[ON]
PICTURE
[NORMAL]
AUTO RETURN
[ON]
MENU
TIMER
SET UP
INITIAL
TIMER NUMBER 1
START
END
DATE
CHANNEL
SPEED
--/--
--:--
--:--
--
--
--
PDC
For models 31B-254/31B-454
HM210BD(EN).fm Page 11 Thursday, March 2, 2006 6:07 PM