System configuration – Harman-Kardon AVR 147 User Manual
Page 19
SYSTEM CONFIGURATION 19
ENGLISH
System Configuration
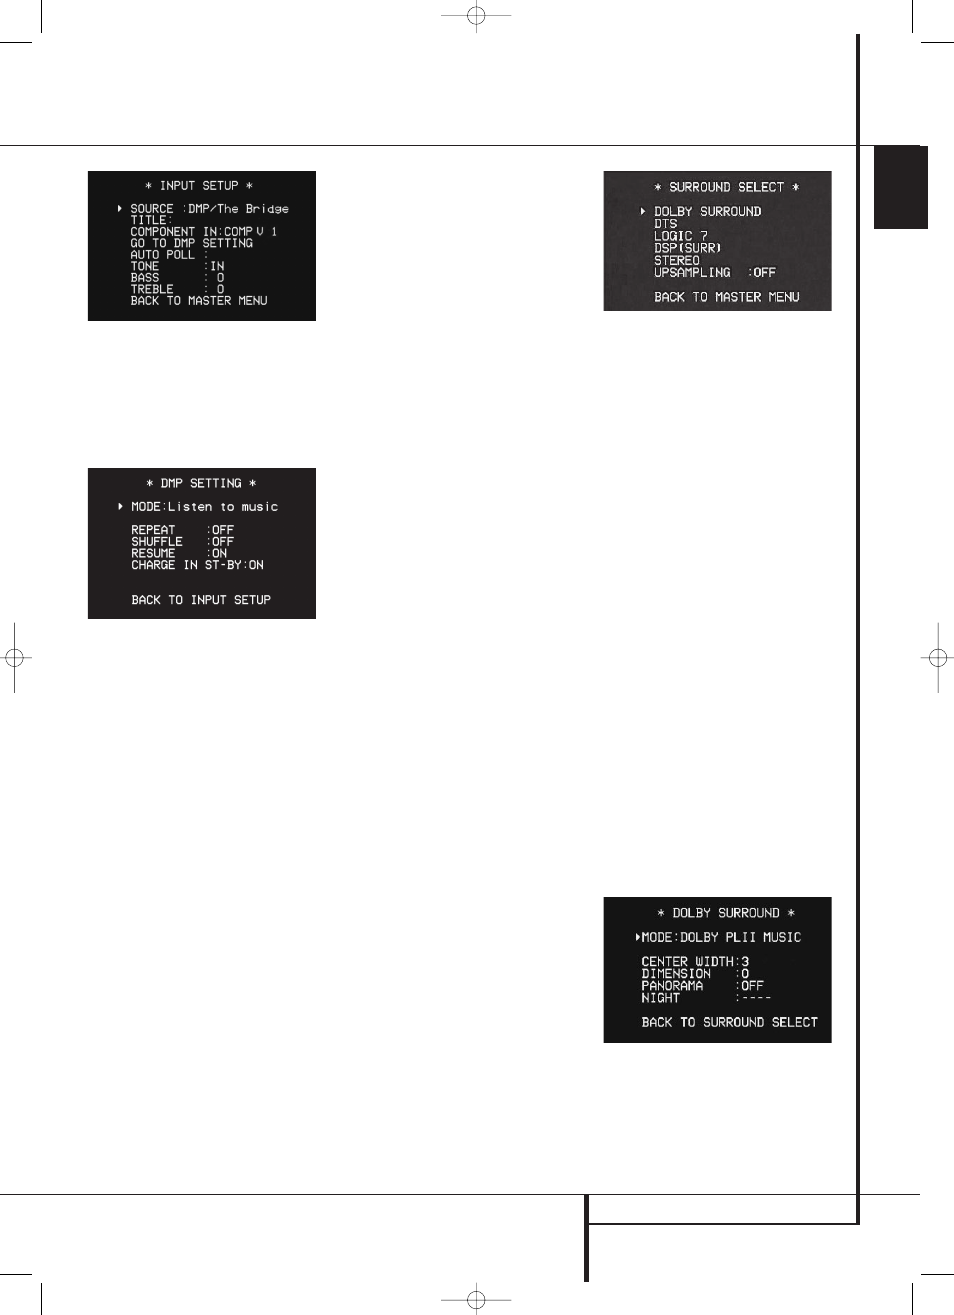
Figure 3
Since The Bridge is connected to the AVR using a
dedicated audio connection, it isn’t possible to
select a different audio input for this source.
However, there are several special settings used
only with The Bridge. Selecting
G O T O DMP
SETTING
displays the
DMP SETTING
menu (see Figure 4).
Figure 4
MODE: The first line of the
DMP SETTING
menu indicates that the iPod will be used to listen
to music (or other audio materials) or view videos
or still images, if you have a video or photo iPod.
REPEAT: Set
REPEAT
to
ONE
,
ALL
or
OFF
to repeat one track, all tracks in an album or
playlist, or not to repeat any tracks.
SHUFFLE: Set
SHUFFLE
to
SONGS
to play
all songs on the iPod in random order. The
ALBUMS
setting plays all albums in random
order, with each album’s tracks played in album
order.
RESUME: Set
RESUME
to
O N
to resume
playback of a track from the point where it was
interrupted by turning off the AVR, switching
sources on the AVR, or removing the iPod from
The Bridge. Set
RESUME
to
OFF
if you wish to
restart play from the beginning of the track after
interruptions.
CHARGE IN ST-BY: Your iPod will automatically
charge its battery while docked in The Bridge with
the AVR turned on. Set
CHARGE I N ST-BY
to
O N
to enable charging even when the AVR is
in Standby mode (but not completely off). When
CHARGE I N ST-BY
is set to
OFF
, the iPod
will only charge when the AVR is turned on.
Note: In order to access the
DMP SETTING
menu, you need to press the AVR Selector on the
remote so that it operates the AVR 147. You may
then press the OSD Button and use the
Navigation and Set Buttons, as usual, with the
on-screen menu system. When you are ready to
return to operation of your iPod using the remote,
remember to press the DMP/The Bridge Selector
so that the transport and other controls operate
The Bridge.
To simplify use, you may wish to program two
macros on your remote, one to select the AVR and
issue the commands within the OSD system to
display the
DMP SETTING
menu, and a
second macro to remove the menu from the
display and return the remote to operation of The
Bridge. See the Macros section of the Advanced
Functions section of the manual for more
information on programming macros.
The next lines in the Input Setup menu control
whether or not the bass/treble tone controls are
in the signal path. The normal default is for them
to be in-line, but if you wish to remove them from
the circuit for “flat” response, first make certain
that the
➞ cursor is pointing to the
TONE
line
on the menu and press the
‹
/
›
Navigation
Button
E so that
OUT
is highlighted in
reverse video.
If you wish to leave the tone controls in the signal
path, the amount off boost or cut for bass and
treble may be adjusted by pressing the
⁄
/
¤
Navigation Button
D so that the ➞ cursor is
next to the line for the setting you wish to adjust.
Next, press the
‹
/
›
Navigation Button
E
until the desired setting is shown.
When all needed adjustments have been made,
press the
¤
Button
D until the
➞
cursor is
next to
BACK T O MASTER MENU
to contin-
ue with the system configuration.
Surround Setup
The next step for that input is to set the surround
mode you wish to use with that input. Since
surround modes are a matter of personal taste,
feel free to select any mode you wish – you may
change it later. The Surround Mode chart on page
30-32 may help you select the mode best suited
to the input source selected. For example you may
select Dolby Pro Logic II or Logic 7 for most
analog inputs and Dolby Digital for inputs con-
nected to digital sources. In the case of inputs
such as a CD Player, Tape Deck or Tuner, you may
wish to set the mode to Stereo, if that is your pre-
ferred listening mode for standard stereo sources,
where it is unlikely that surround encoded
material will be used. Alternatively, the 5 Channel
Stereo or Logic 7 Music mode may also be a good
choice for stereo-only source material.
It is easiest to complete the surround setup using
the full-OSD on-screen menus. From the
MASTER
menu (Figure 1), press the
⁄
/
¤
buttons
D until the
➞
cursor is next to the
SURROUND SELECT
menu. Press the
Set Button
F so that the
SURROUND
SELECT
menu (Figure 5) is on the screen.
Figure 5
Each of the option lines on this menu (Figure 5)
selects the surround mode category, and within
each of those categories there will be a choice of
the specific mode options.
Note: When a Dolby Digital or DTS source is
selected and playing, the AVR will select the
appropriate surround mode automatically, no
matter which surround mode was selected for
that input as default. Then no other surround
modes will be available, except all Pro Logic II
modes with Dolby Digital 2 channel (2.0)
recordings (see page 33).
To select the mode that will be used as the initial
default for an input, first press the
⁄
/
¤
buttons
D until the on-screen cursor is next to the
desired mode’s master category name. Next, press
the Set Button
F to view the sub-menu. Press
the
‹
/
›
Buttons
Ea to scroll through the
available choices, and then press the
¤
Button
D so that the cursor is next to
BACK TO
MASTER MENU
to continue the setup process.
On the
DOLBY SURROUND
menu (Figure 6),
the selection choices include Dolby Digital, Dolby
Pro Logic II Music, Dolby Pro Logic II Cinema,
Dolby Pro Logic II and Dolby 3 Stereo. A complete
explanation of these modes is found on Page 30-
31. Note that when the Dolby Digital mode is
selected there are additional settings available for
the Night mode that are associated with the
surround mode only, not with the input. That´s
why these settings must be made only once, not
with each input in use. They are described later in
the next main chapter (see below).
Figure 6
When the
➞ cursor is pointing to the
MODE
line, press the
‹
/
›
Navigation Buttons
Ea to select the desired Dolby surround
mode, again remembering that the choice of
available modes will vary with the type of
program material being played and the number of
speakers in your system configuratioin.
33639_AVR147_ENG 10/07/07 13:45 Side 19