Pp-cu ff2 – HoMedics BPA-101 User Manual
Page 8
14
13
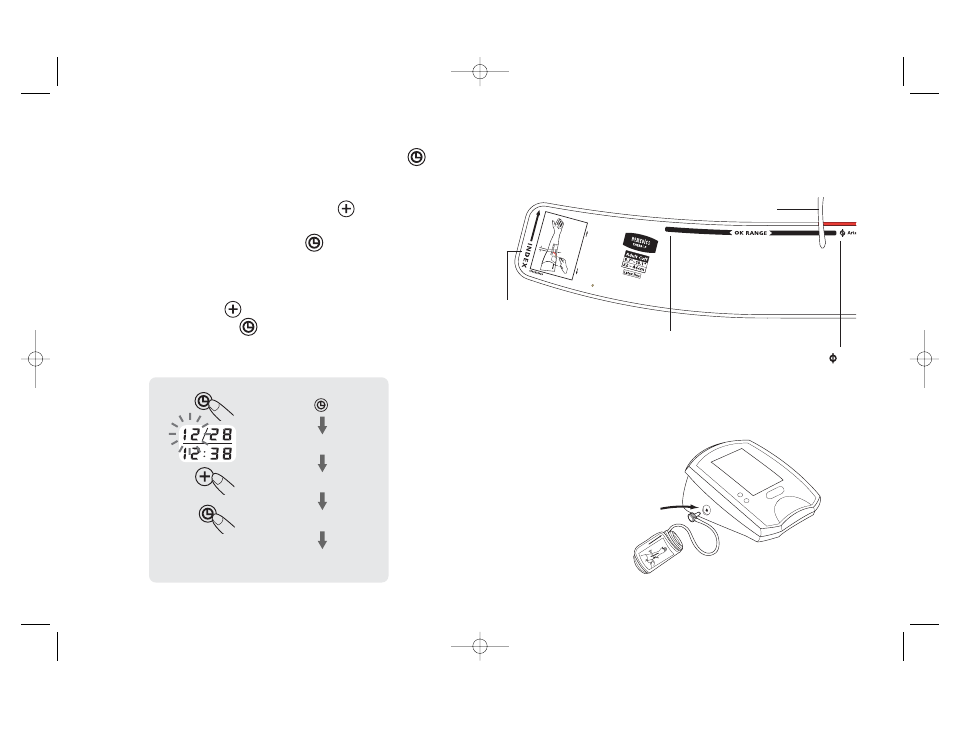
DATE & TIME SET PROCEDURE
1.To adjust the date/time, press the Set button
,
located next to the LCD display. The unit will
show a blinking number showing the month.
2.Change the month by pressing the button. Each
press will increase the number by one in a cycling
manner. Press the Set button again to confirm the
entry, and the screen will show a blinking number
representing the day of the month.
3.Change the date and time as described in Step 2
above, using the button to change the numbers
and the Set button
to confirm the entries.
4. A “0” will reappear as the blood pressure monitor is
ready for measurement again.
0.8˝ ~1.2
˝
2 ~ 3 cm
Main
Artery
LEFT A
RM
Tube
SH
O
U
LD
ER
I
E
LBOW
1) Positio
n Cuff -
Bottom edg
e should
be 0.8
˝–1.2˝ (2
– 3 cm
)
above elbow
with
tube positioned
ove
r middle of a
rm.
2) Locate
brachial
artery - P
ress
with two finge
rs
approximate
ly 1˝
(2 cm
) above bend
of elbow on inside of
left arm. Dete
rmine
where pulse can be
felt the st
rongest
.
3) Positio
n red a
rea of
cuff o
n insid
e of left
arm with a
rtery
symb
ol ( ) ove
r the
brachial a
rtery.
PP-CU
FF2
Artery Symbol ( )
OK Range
Indicator
Tube
Index
Insert plug here
IN
D
EX
LE
FT
AR
M
M
ain
Arter
y
2~
3 c
m
(0
.8
”~
1.2
”)
APPLYING THE CUFF
Please see the illustration below for a description of
the arm cuff.
1. Plug the cuff tube into the left side of the unit.
Press the button
blinking month
increasing month
confirm the entry
repeat process to set date and time
BPA-101IB_ENGSP.qxd 10/24/05 11:00 AM Page 13