Installation, Cooktop installation – Wolf Contemporary 36 Inch Induction Cooktop Installation Guide User Manual
Page 10
10 | Wolf Customer Care 800.222.7820
Cooktop Installation
Remove the cooktop and components from the shipping
package and recycle packing materials.
STANDARD INSTALLATION
1
Apply the foam tape to the bottom perimeter of the
cooktop.
2
Insert the cooktop into the opening, then verify
the cooktop is aligned with the front edge of the
countertop.
3
Insert the grommets into the square holes on the
bottom of the cooktop.
4
Place the clip-on nut to the end of the hold down
bracket.
5
Secure the bracket to the cooktop with the provided
screws.
6
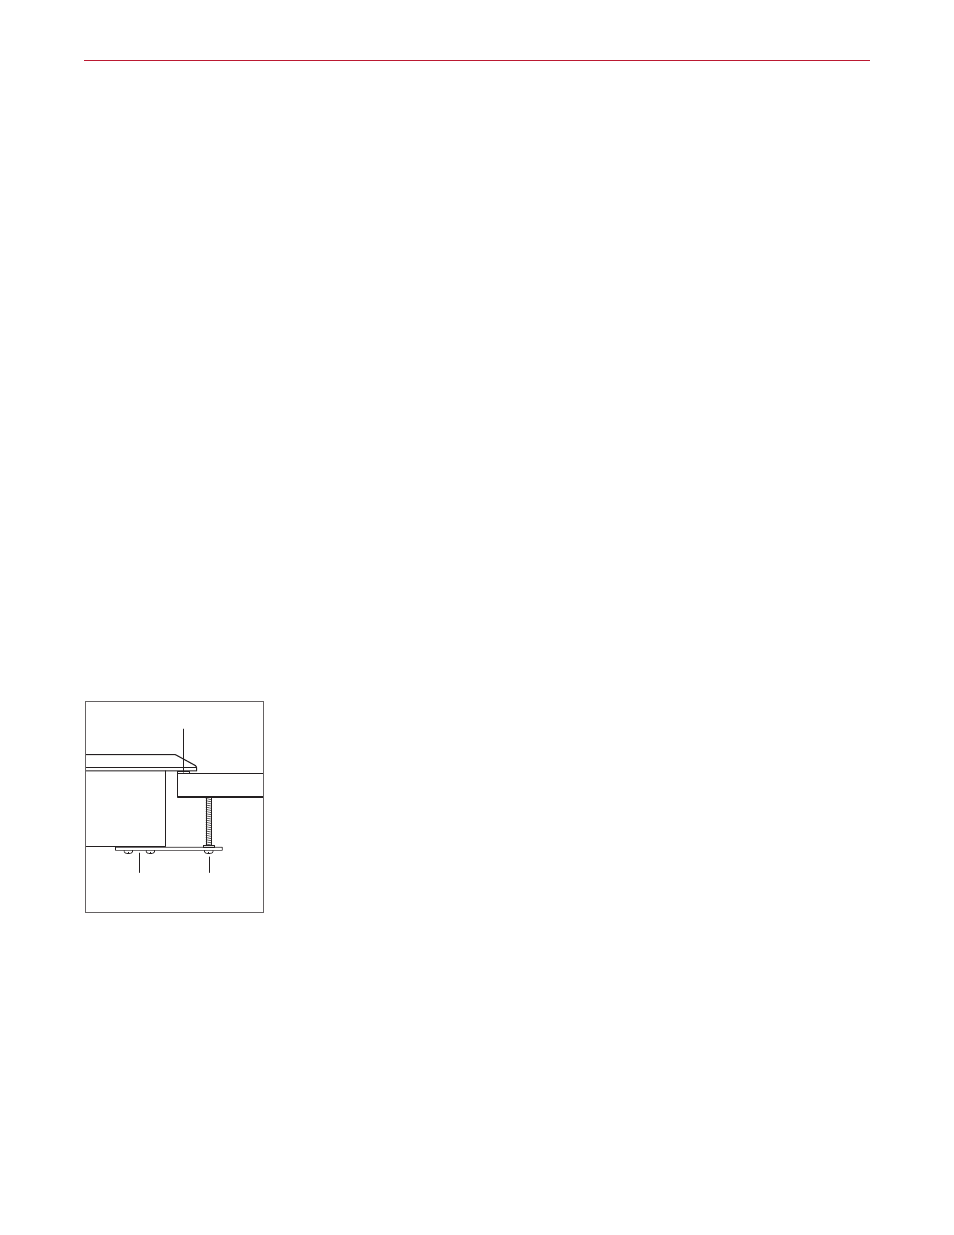
Insert the clamping screw into the clip-on nut, then
tighten the screw until it contacts the bottom of
the countertop. Do not over tighten. Refer to the
illustration below.
FOAM STRIP
COUNTERTOP
BRACKET
CLAMPING
SCREW
Cooktop installation
Installation
FLUSH INSTALLATION
IMPORTANT NOTE:
The foam tape included with the
cooktop is not required for a flush installation.
1
Insert the cooktop into the opening.
2
Cut small pieces of the shim material and place around
the routed edge where necessary.
3
Remove the cooktop from the opening and place face
down on a protected work surface.
4
Apply a layer of petroleum jelly to the bottom edge of
the glass and support frame.
5
Apply a bead of RTV around the perimeter of the
recessed opening.
6
Insert the cooktop into the opening.
7
Apply RTV to the reveal between the cooktop and the
countertop.
8
Use the plastic scraper or denatured alcohol to remove
excess RTV. The RTV fully cures after 24 hours.
9
Insert the grommets into the square holes on the
bottom of the cooktop.
10
Place the clip-on nut to the end of the hold down
bracket.
11
Secure the bracket to the cooktop with the provided
screws.
12
Insert the clamping screw into the clip-on nut, then
tighten the screw until it contacts the bottom of the
countertop. Do not over tighten.