Custom settings – Nissin MF18 Macro Ring Flash for Sony User Manual
Page 6
For Nikon cameras
MF18 offers this function at TTL mode. Focus the main subject and
press < > button on the camera (or < FEL > button on some
cameras. Exposure value on the main subject is memorized in the
flash. Aim the viewfinder center over the main subject and release the
shutter.
FE.
Lock
Those customized value and conditions are effective on all modes and
memorized even when the flash unit is switched off.
To reset the customized value or conditions, select
Reset
, choose “Yes” and
set . All the memorized data is cancelled and MF18 is reset to the
default value and condition.
Set
A variety of custom settings enable you to customize your MF18.
TTL exposure level is accurately calibrated for standard
balance in accordance with Nissin’s standard. If any
adjustment is however required, or if you like to set your
own preferable level, it can be adjusted for about ±3Ev. by
every 1/3 steps.
Press Set to enter the Custom setting page.
Select the item to be customized and set the value to customize.
6 custom settings are prepared.
Custom settings
Set
TTL Exposure level custom setting
Rotate
Cancel the rotating action and keep the image fixed.
The screen won’t rotate.
To save battery energy, or imply to avoid the display
illumination, the display screen can be switched off when not
in operation. Set it off, and the display goes off in 8 seconds
after the last operation. The display will not be woken up by
the camera’s shutter release. The display can only be woken
up by the operation button of MF18.
Display
Display can be set off if it’s not necessary.
My TTL
FE Lock
Auto Off
Reset
All the custom settings are reset to the
default values and conditions which are
provided and set at the factory.
Firmware
Auto off timing can be selected from 10min.
15min, 30min, 45min, 60min or off (cancel).
Navigate the cursor to
Firmware
, the current
version is shown at the bottom. To update the
latest firmware version, connect the MF18
with your compauter via an USB cable,
press and then press Set to confirm.
Set
MF18 offers this function at TTL mode. Default the Fn button to FV
lock. Press the Fn button to lock flash value. Press again to cancel Fv
lock. Exposure value on the main subject is memorized in the flash.
Aim the viewfinder center over the main subject and release the
shutter.
FV Lock
FV
Lock
19
20
21
22
Other shutter functions by camera setting
For Canon cameras
An ADVANCED CUSTOM SETTING enables you to enjoy creative flash
photography. For advanced flash photography, the following functions can be
set on your flash or camera according to the camera model.
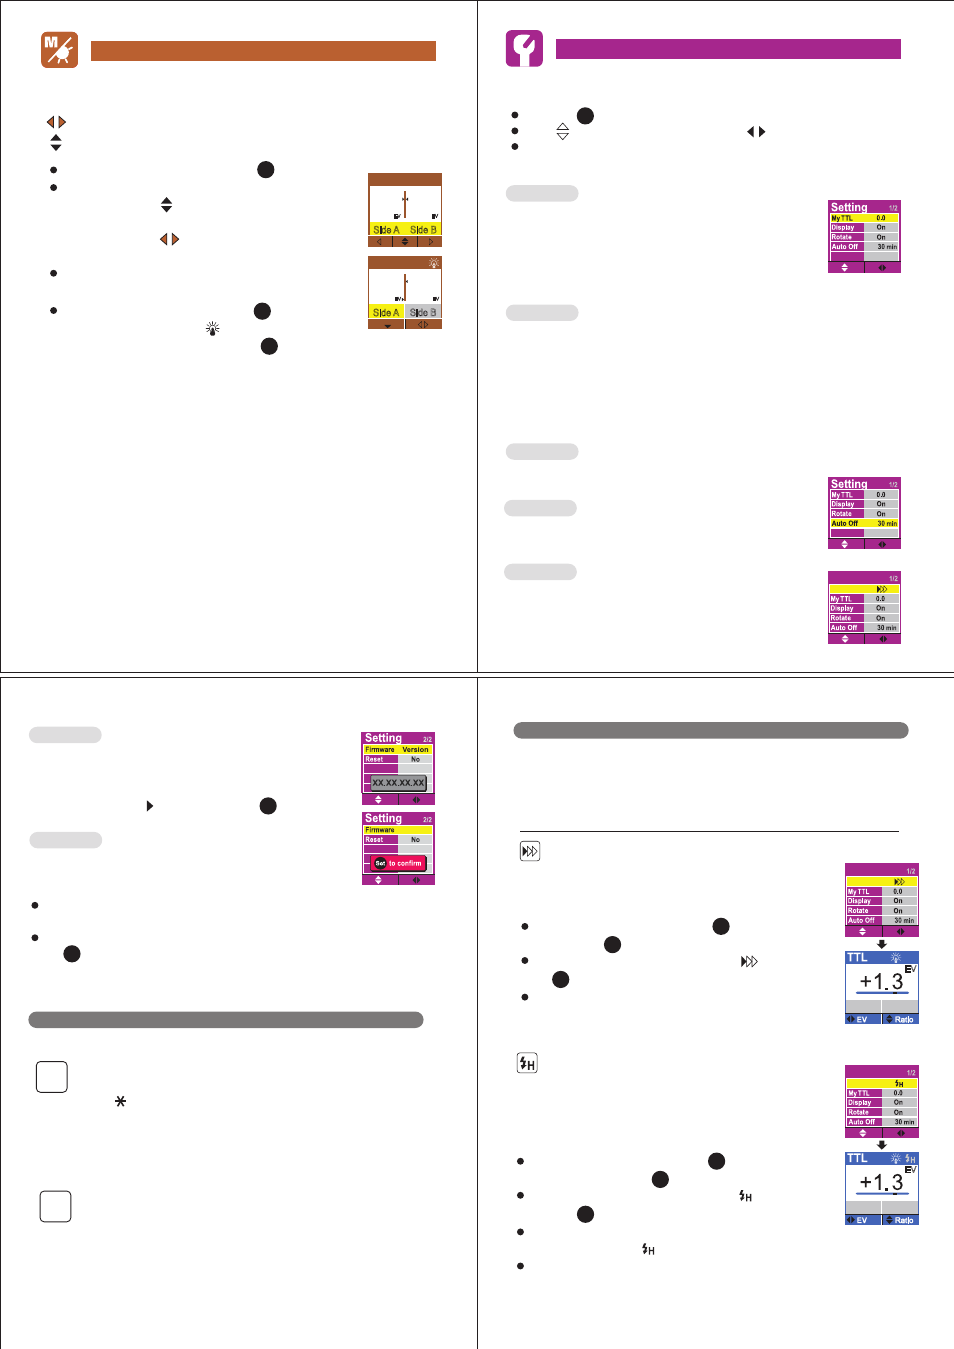
ADVANCED CUSTOM SETTING
For Canon
EV
A:B 1:2.8
Return to the main menu, press set . Select SETTING
and press set .
Navigate the cursor to Shutter and select , then press
set .
Set the EV compensation value and power ratio level you
desire .
Set
Set
Set
Return to the main menu, press set . Select
SETTING and press set .
Navigate the cursor to Shutter and select , then
press set .
Select TTL in the main menu, the High speed
synchronization icon ( ) switches on.
Set the EV compensation value and power ratio level
you desire.
Set
Set
Set
EV
A:B 1:2.8
Setting
Shutter
1st curtain synchronization
High speed shutter synchronization
Usually, the flash fires immediately after the first curtain has
fully opened. This is called 1st curtain. This method is usually
used during flash shooting.
MF18 synchronizes to the highest shutter speed set on the
camera. To capture subject with softening off the back ground
in daylight synchronization photography, the shutter speed is to
set at higher than the regular synchronization speed.
(Shutter functions setting by flash)
Manual Mode
Manual
Side A Side B
1/64
-2/3
EV
1/4
-1/3
EV
The Manual mode provides the setting of power ratio from 1/1 (full) to 1/64
-2/3EV
or OFF (Side A or B)with 1/3 EV steps.
Select Manual in main menu, press set .
To set the desired power ratio of both Side A and B,
navigate the cursor to adjust the power ratio
OR
To set the desired power ratio of either Side A or B,
navigate the cursor to select and set the power ratio
individually.
The power ratio can be selected from 1/1 to 1/64 (or OFF)
with 1/3 EV steps.
To switch on the modeling LED, press for 2 seconds
until the modeling LED icon ( ) is on. The icon switches
off automatically after fired or press the button for 2
seconds to switch off.
Set
Cursor navigation
Value adjustment
Set
Set
Side A Side B
1/4
-1/3
EV
Manual
1/4
-1/3
EV
Shutter
Shutter functions can be selected from 1st
Curtain synchronization, High Speed
synchronization and Rear curtain
synchronization.
For Canon only
Setting
Shutter
Setting
Shutter
Update