Installation and connection – Alto Professional ACOM2 User Manual
Page 9
9
INSTALLATION AND CONNECTION
Read this section carefully. Not paying enough attention to the input signal's level, routing, or assignment of
can result in unwanted distortion, a corrupted signal or no sound at all.
Audio Connection
ACOM2's compressor/limiter/gate is equipped with balanced XLR connectors. It can be connected to other
units in a variety of ways to support a vast range of applications without experiencing a signal loss.
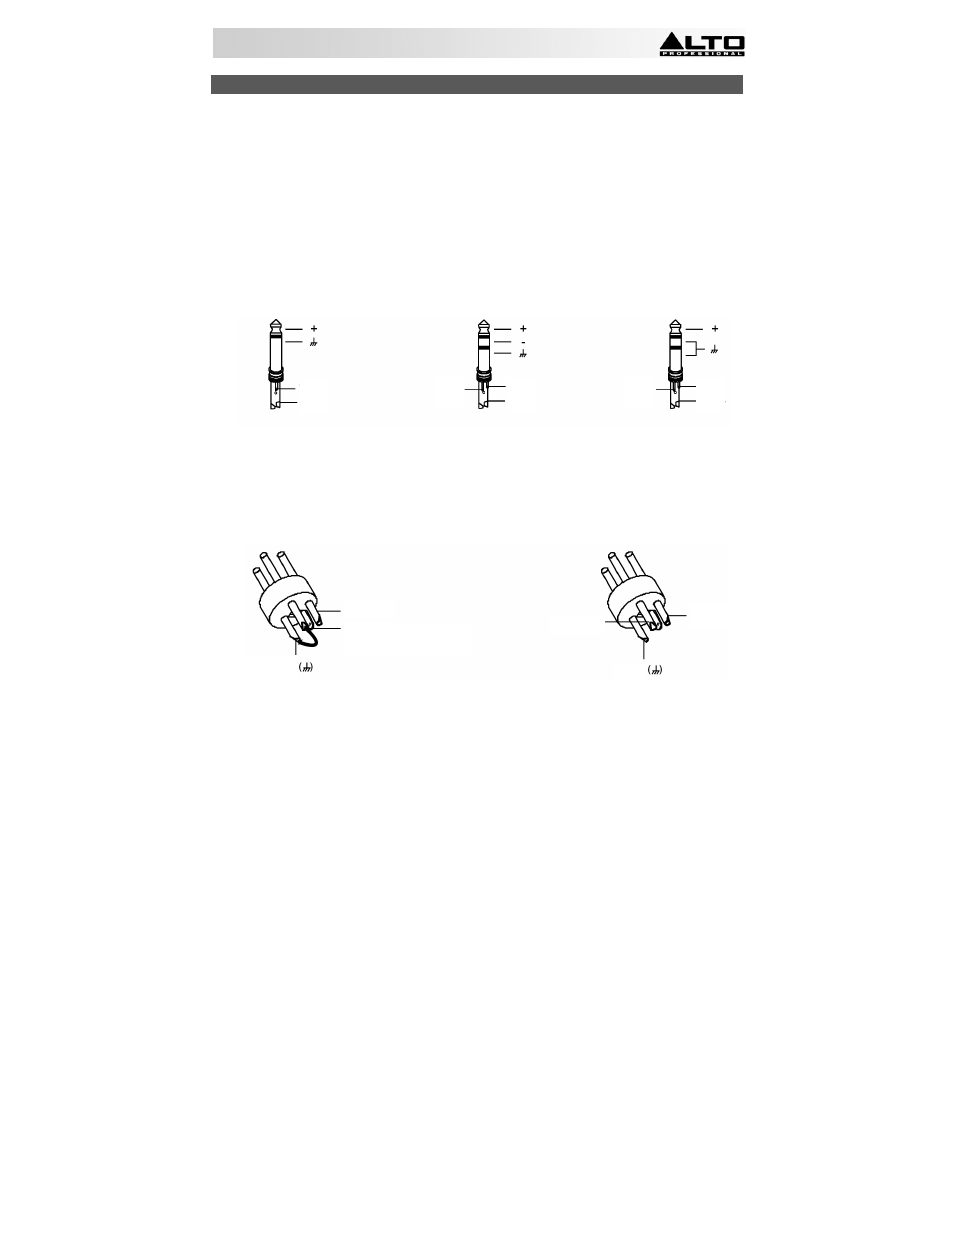
Wiring Configuration
ACOM2 has both balanced and unbalanced connections, ensuring compatibility with other common audio
processors and mixers.
Please see following drawings for details:
•
For 1/4" Phone jack
•
For XLR connector
TS Type
Unbalanced
TRS Type
Balanced
TRS Type
Unbalanced
XLR Type Unbalanced
XLR Type Balanced
Tip
Sleeve
Tip
Sleeve
Tip
Sleeve
Ring Ring
Pin2 (+)
Pin3 (-)
(Linked to Pin1
manually
Pin1
Pin3 (-)
Pin2 (+)
Pin1