Contact our sales team for further information – Lingenfelter Harrop GTO Short Throw Shifter MT User Manual
Page 2
Inside the vehicle, pull back the remote shifter lever boot and tuck back under rear of
console to gain access to the top of the gearbox. Remove three screws from plastic dust
cover, then remove four remote shifter to gearbox mounting socket head bolts, and
remove remote shifter from vehicle.
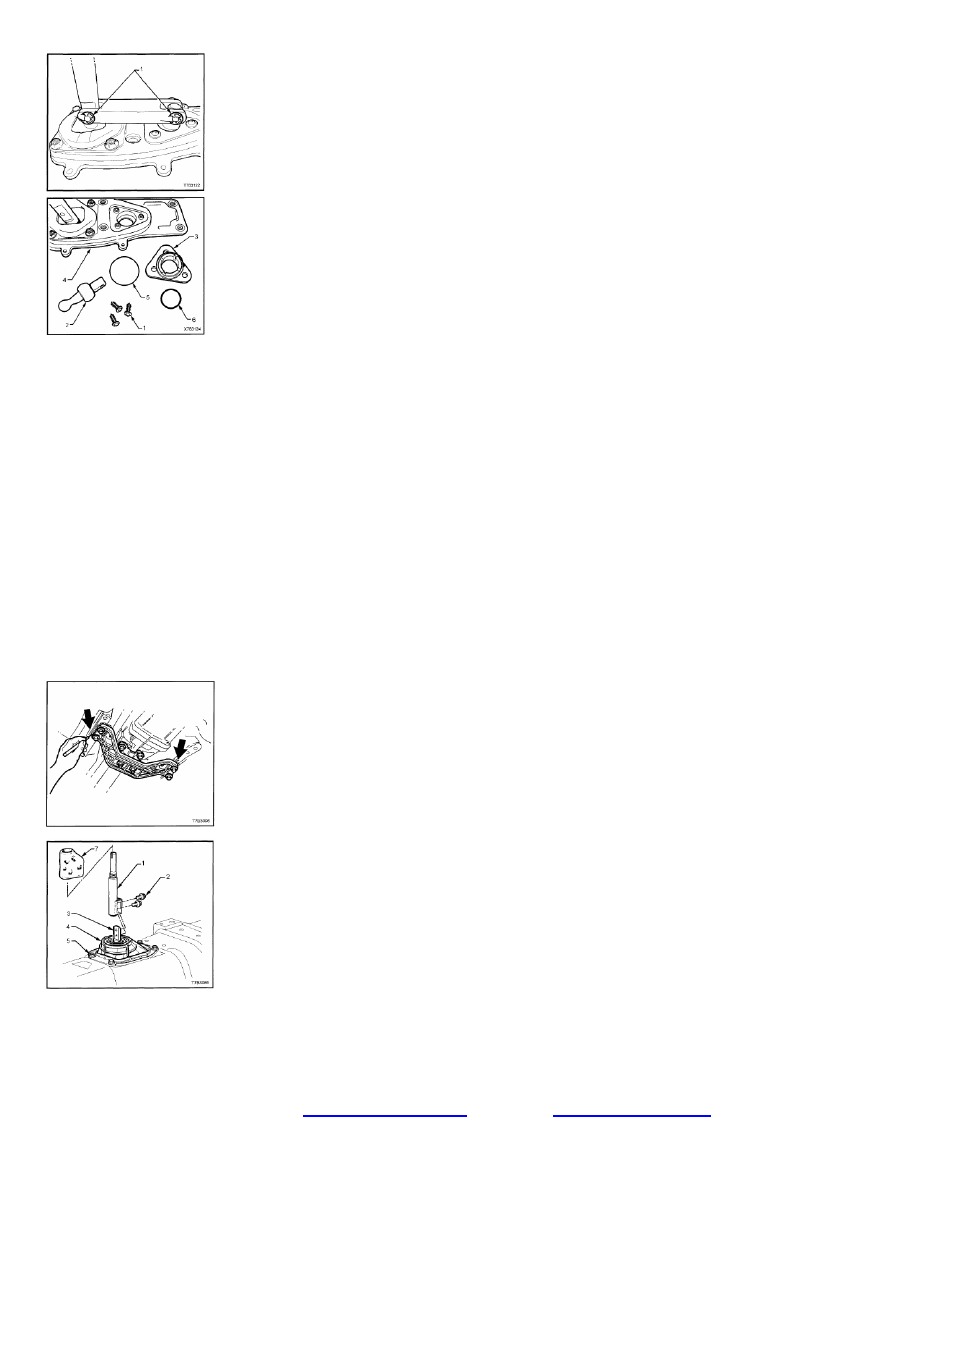
Remove the “E” clip from the front pivot shaft. CAUTION: Wear safety glasses to avoid
possible eye injury.
Remove the front pivot pin from the bridging piece. These pins are an interference fit
into the bridging piece so care must be taken not to damage the pin as it is used for
reassembly.
Disassemble the front pivot assembly by removing the three self tapping screws. By
grasping the remote selector pivot, pull the pivot and seat assembly from the baseplate.
Separate the selector pivot from the seat assembly by supporting the seat assembly
over the open jaws of a vice assembly, then tap the ball end of the selector pivot free
from the seat.
Reassemble the front pivot assembly using NLGI No.4 EP grease to the ball socket of the front selector pivot,
then reassemble by tapping the new black front selector pivot into the plastic ball socket. Reinstall the front
selector pivot assembly with the reinforcement plate to the baseplate, install the three retaining screws and
tighten securely.
Install the bridging piece to the pivot assembly. Install bushes to bridging piece after lubricating with NLGI No.4
grease. Install pivot pin and tap home with hammer. NOTE: These pins are designed to be an interference fit
to the pivot and not be free floating. Fit “E” clip to secure pin. CAUTION: Wear safety glasses to avoid eye
injury.
Remove rubber gasket from remote shifter mounting face, and fit to lower spacer face opposite “O” ring
groove.
Inside vehicle, reinstall remote shifter to gearbox, using longer bolts supplied in the kit. Ensure pivot ball is in
the correct position in the gearbox selector pivot. Torque bolts to 25Nm.
Refit plastic dust cover and tighten three screws firmly. Refit rubber insulation boot over remote lever and
under steel retaining ring.
From under the vehicle, refit the four insulator ring nuts and tighten firmly.
Slowly and carefully raise the transmission, then refit the four engine rear cross-
member to side frame attaching bolts, ensuring correct alignment with the original
scribed lines. Refit the four exhaust to catalytic converter bolts.
Using a 10mm socket, refit the two bolts securing the control lever to the remote shifter
shaft. Slip the insulator sock onto the control lever
Refit the transmission console and refit the two screws next to the power socket.
Reconnect power window loom plug to switch base. Refit the gear knob and boot
assembly.
Lower vehicle and test drive to ensure correct fitment.
Enjoy.
Contact our Sales Team for further information.
Harrop Engineering Australia Pty. Ltd.
96 Bell Street Preston Melbourne Australia 3072
Telephone: (03) 9474 0900 Fax: (03) 9474 0999
E Mail:
Website:
www.harrop.com.au