Chapter 2 – Dish Network Solo 811 User Manual
Page 33
Page 28
Chapter 2
Receiver Description and Installation
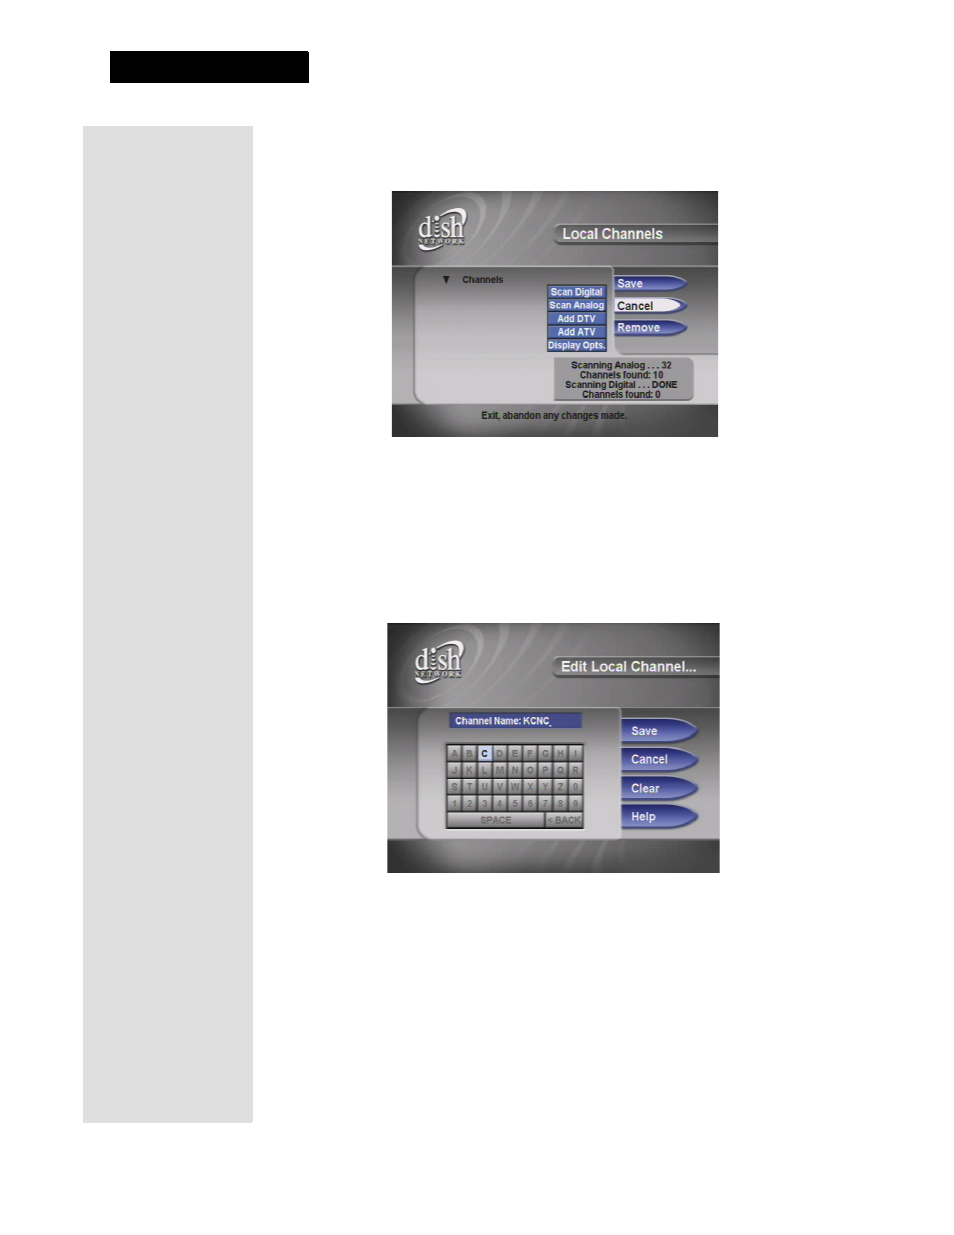
2. Use the
Scan Analog
selection to add the local channels to the
Program
Guide
automatically or select the
Add Analog
option on the
Local
Channel Setup
menu. This opens the
Add Local Analog Channel
menu.
3. Enter the channel number in the
Ch. Num
field.
Note
: Be sure to enter two digits. For single digit numbers, place a zero in
front of it.
4. To assign the channel to one of the major broadcast networks, select an
Affiliation
option. Or, select the
None
option if you do not want to assign
the channel to a broadcast network.
5. To edit the name of the channel, select the
Save
option. This opens the
Edit
Local Channel Name
menu:
6. Highlight a letter and press the SELECT/OK button.
7. Do this again to spell out the channel name. You can enter up to five
characters. If you need to, use the
SPACE
option to insert a space or the
option to correct a letter. When you are done entering the channel
name, select the
Save
option. The receiver displays the
Local Channel
Setup
menu again.
8. Repeat the above steps 3 through 7 if you want to add another local analog
channel.
9. To delete one or more channel(s), select the channel(s) in the
Channels
list
and then select the
Remove
option.