Attaching the monitor stand, Troubleshooting – Interlogix TVM-2150 User Manual
Page 13
User Manual
11
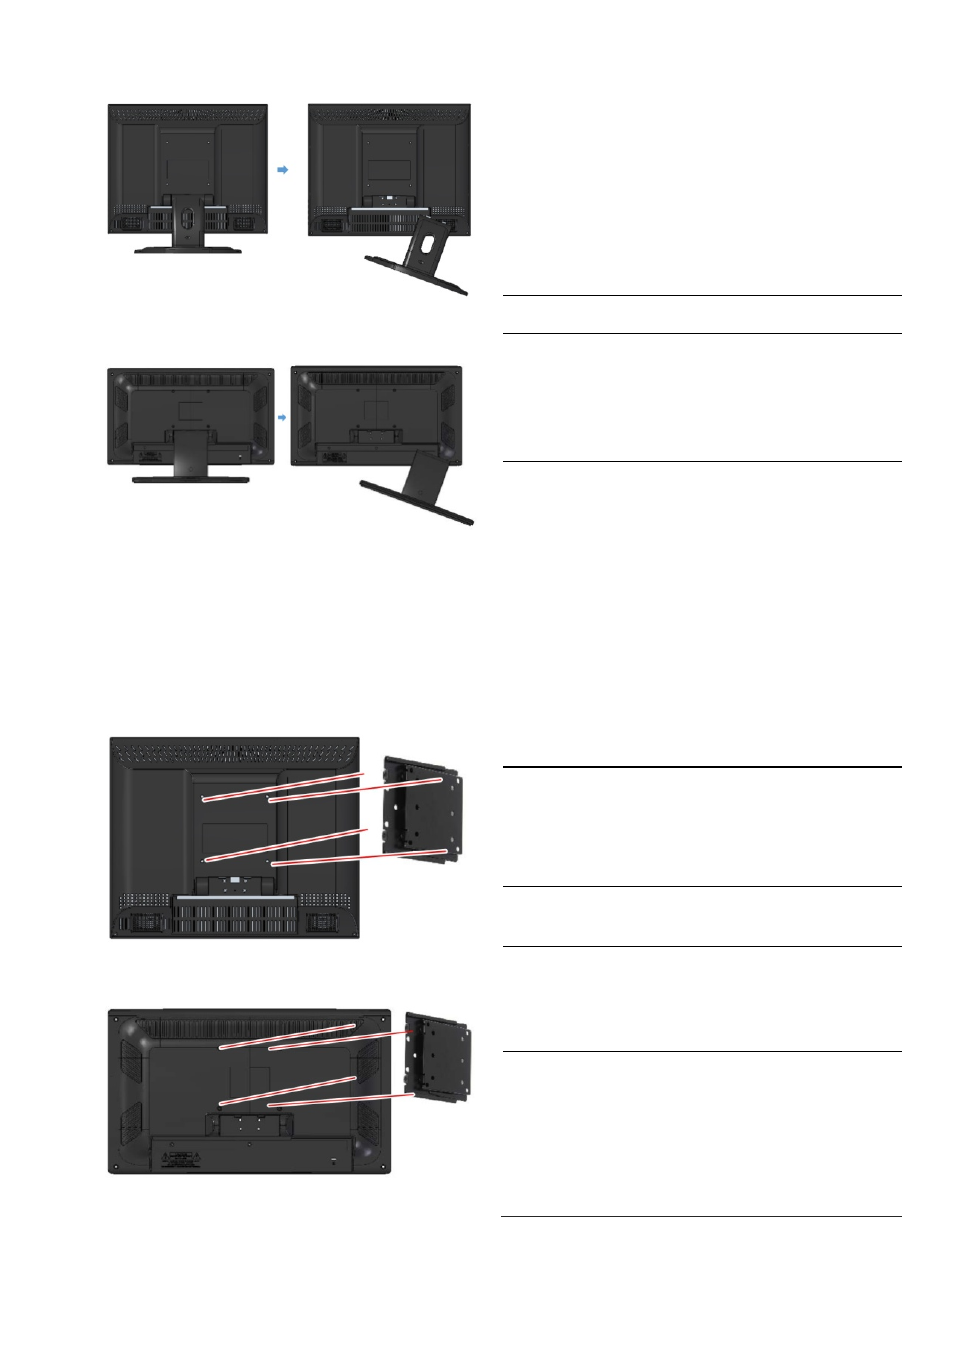
TVM-1701/TVM-1901 models
TVM-1850/TVM-2150 model
Attaching the monitor
stand
Tighten the screws at the locations indicated
by the arrows shown in the figures below.
TVM-1701/TVM-1901 models
TVM-1850/TVM-2150 models
The monitor’s installation surface is
compatible with other types of VESA standard
stands.
Hole spacing: 100 x 100 mm
Screw length: 8 to12 mm
Troubleshooting
Symptom
Check
Picture is jittery
Adjust
Clock
to set the
screen position and adjust
the Clock value carefully
until there is no noise
displayed.
No picture
Check if the power switch
and computer power
switch are in the On
position.
Check if the signal cable is
correctly connected to the
video card.
Check if the pins of D sub-
connector are not bent.
Check if the computer is in
the power- saving mode.
POWER LED is
not lit
Check if the power switch
is in the On position.
Check if the power cord is
correctly connected.
Image is
unstable
Check if the signal cable is
suitable to the video card.
Image is not
centered, too
small, or too
large
Adjust
Clock
or
H&V
Center
to get the proper
image.
Picture bounces
or a wave
pattern is
present in the
picture
Keep the devices that may
cause electrical
interference away from the
monitor.
See the FCC information
at the front cover of the