IC Realtime 3.0 MegaPixel 3.3-12mm VF IR Vandal IP Dome with SD & POE (ICIP3000DVIR) User Manual
Page 22
Step 3
Draw out the cable exit and four screw holes in the installation position according to the device
pedestal. Dig the four plastic expansion bolt holes and cable exit. Insert the four plastic expansion
bolts into the screw holes
Step 4
Adjust the camera pedestal to the proper position and then draw the cable through the cable exit you
just dug in the ceiling (wall). Line up the four screw holes in the device pedestal to the four plastic
expansion bolt holes in the installation position. Put the four self-tapping screws in the device
pedestal and then use the screwdriver to secure the screws in the four plastic expansion bolts firmly.
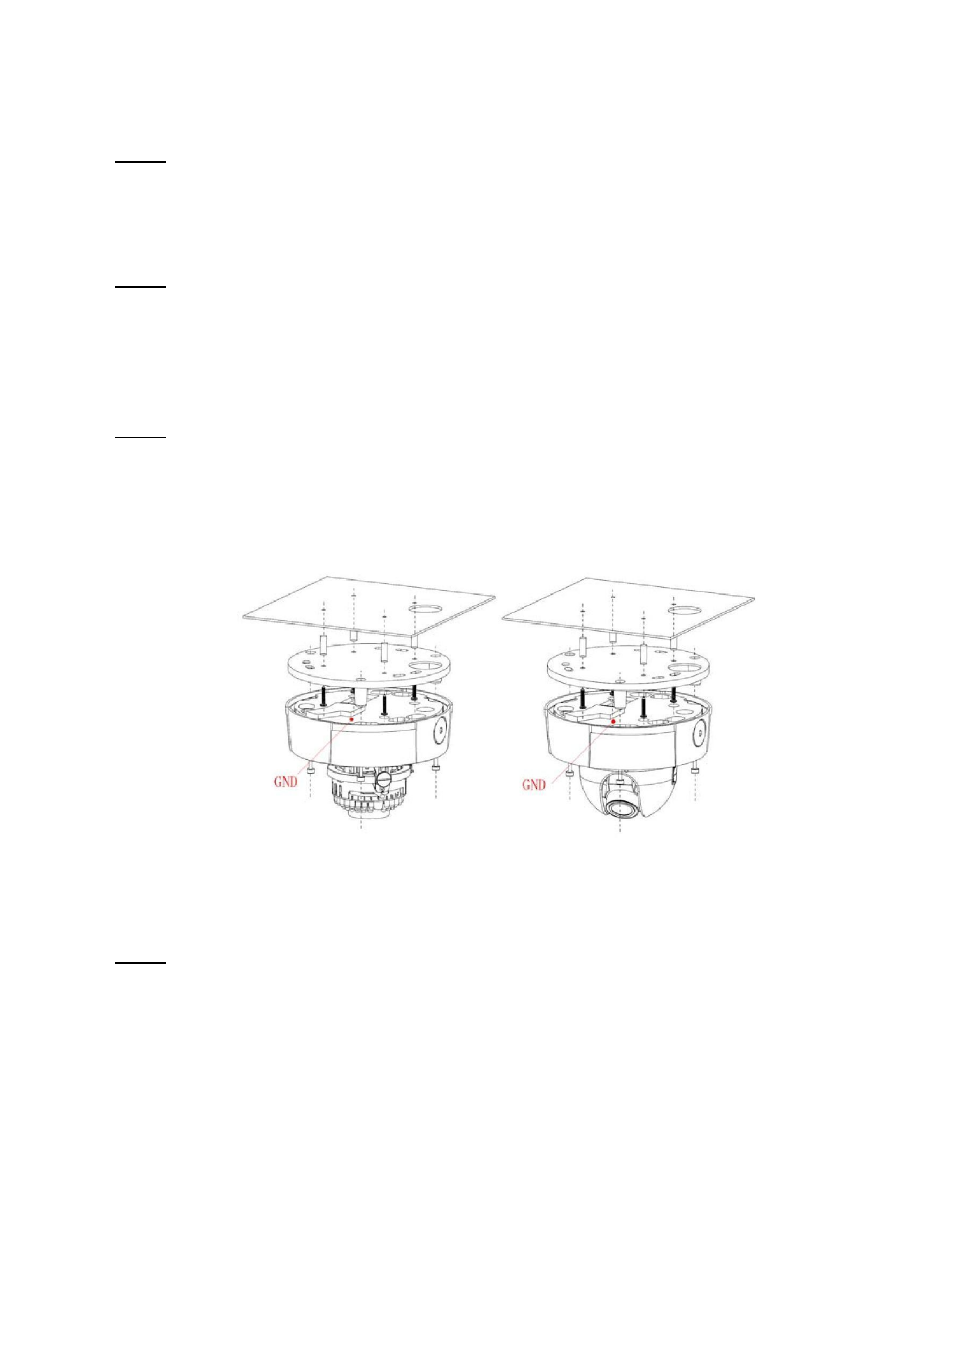
Step 5
Adjust the device position and line up the three inner hexagon screws of the device to the three holes
of the installation position. Put the three inner hexagon screws into the screw holes at the bottom of
the pedestal. Use the inner hexagon screwdriver to fix firmly. Connect the GND to the ground wires to
improve stability. See Figure 3-3 .
With IR light
Without IR light
Figure 3-3
Step 6
Adjust the X-Y-Z axis module to turn the device to the proper monitor angle. Please follow the steps
listed below to adjust. See Figure 3-4.
Please note, for the dome of the IR light, you can skip step a) and step e).
a): Slightly push the two sides to squeeze the plastic hook so that you can take off the
dome enclosure.
b):Slightly loose the screws at the two sides of the X-Y-Z module manually, you can adjust the
module tilt rotation angle (15°~90°).
c):Slightly loose the screw of the pressing slice, you can adjust the video rotation angle of the
module (0°~355°)
d):Adjust the turning ring of the pedestal, you can adjust the module pan rotation angle (
0°~
355°
).
16