Installation, Ir waterproof dome camera, 3 installation – IC Realtime 1.3 Megapixel 720P Weather-proof IR HD-AVS Camera User Manual
Page 11: 1 ir waterproof dome camera
6
3 Installation
Important
Before the installation, please make sure the installation surface can sustain at
least 3X weight of the bracket and the camera.
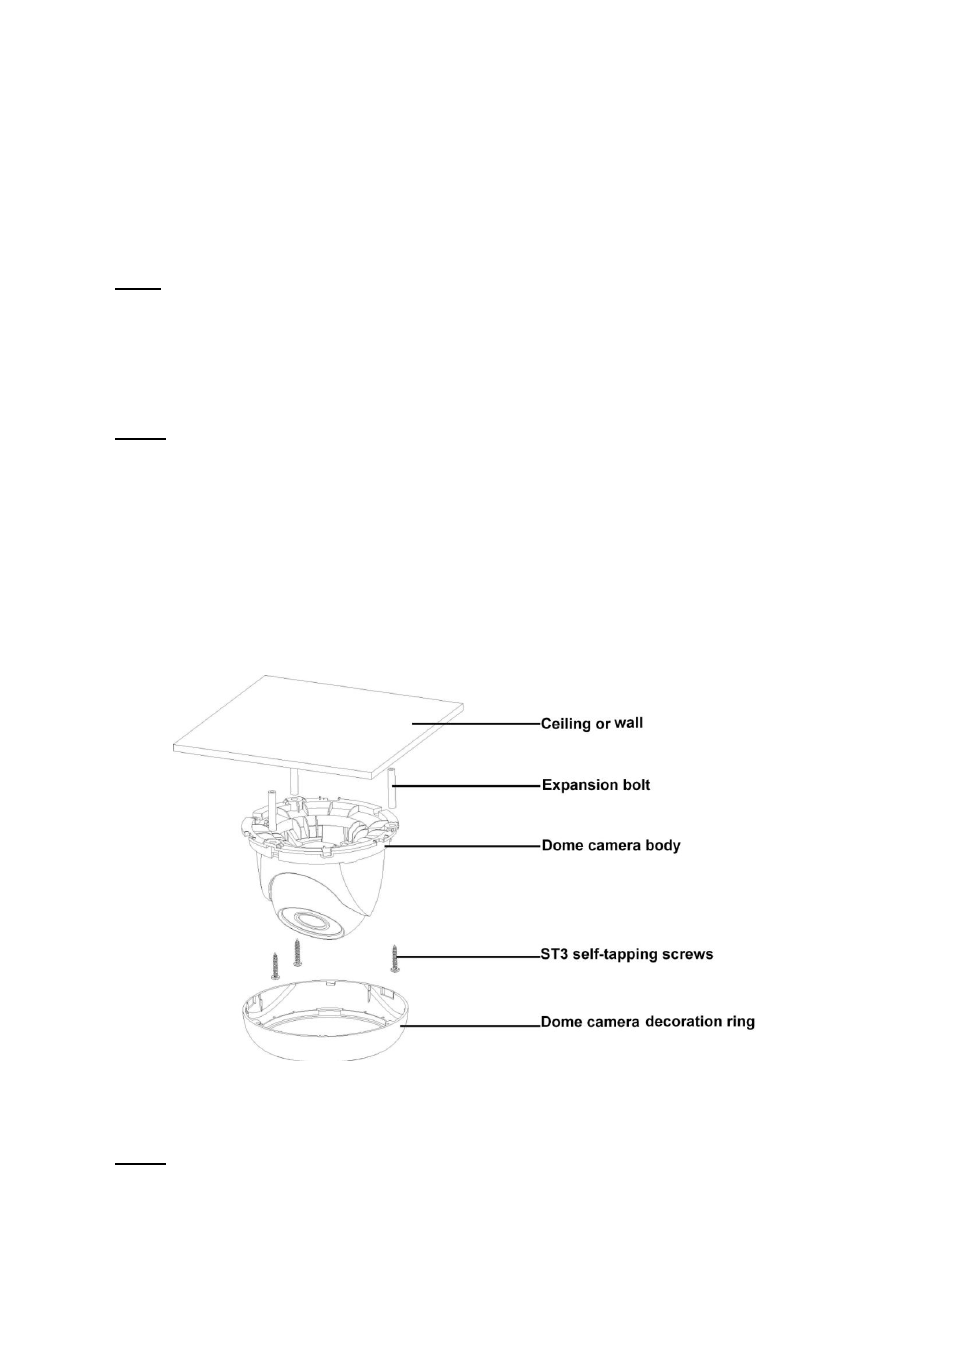
3.1 IR Waterproof Dome Camera
Step1
Please take the installation position map in the accessories bag, and then paste it on the
ceiling or the wall according to your monitor area requirements. Draw and then dig three holes
in the installation surface and then insert three expansion bolts in the holes. Secure these
three bolts firmly.
Step 2
Turn counter clockwise to remove the decoration ring. Please dig a
“cable exit hole” in the
surface according to the installation position map if you want to draw out the cable from the top
of the installation surface. You need to draw out the cable from the cable channel side port of
the pedestal if you want to draw out the cable from the side port of the cable channel. Adjust
the device installation pedestal to the proper position and then draw the cable through the
cable exit. Line up the three screw holes in the device pedestal to the three plastic expansion
bolt holes in the installation position. Put the three self-tapping screws in the three plastic
expansion bolts firmly. Now the dome camera is secure in the installation surface. See Figure
Figure 3-1
Step 3
Adjust the lens to get the clear monitor video. See Figure 3-2. Use crosshead screwdriver to
loosen the screw and the turn the camera body to the proper position manually. Fix the screw
again.