Spedai storage areas – Kenmore 2535567340A User Manual
Page 12
Attention! The text in this document has been recognized automatically. To view the original document, you can use the "Original mode".
■it;
'
O
[Looking Inside
~ Spedai storage Areas
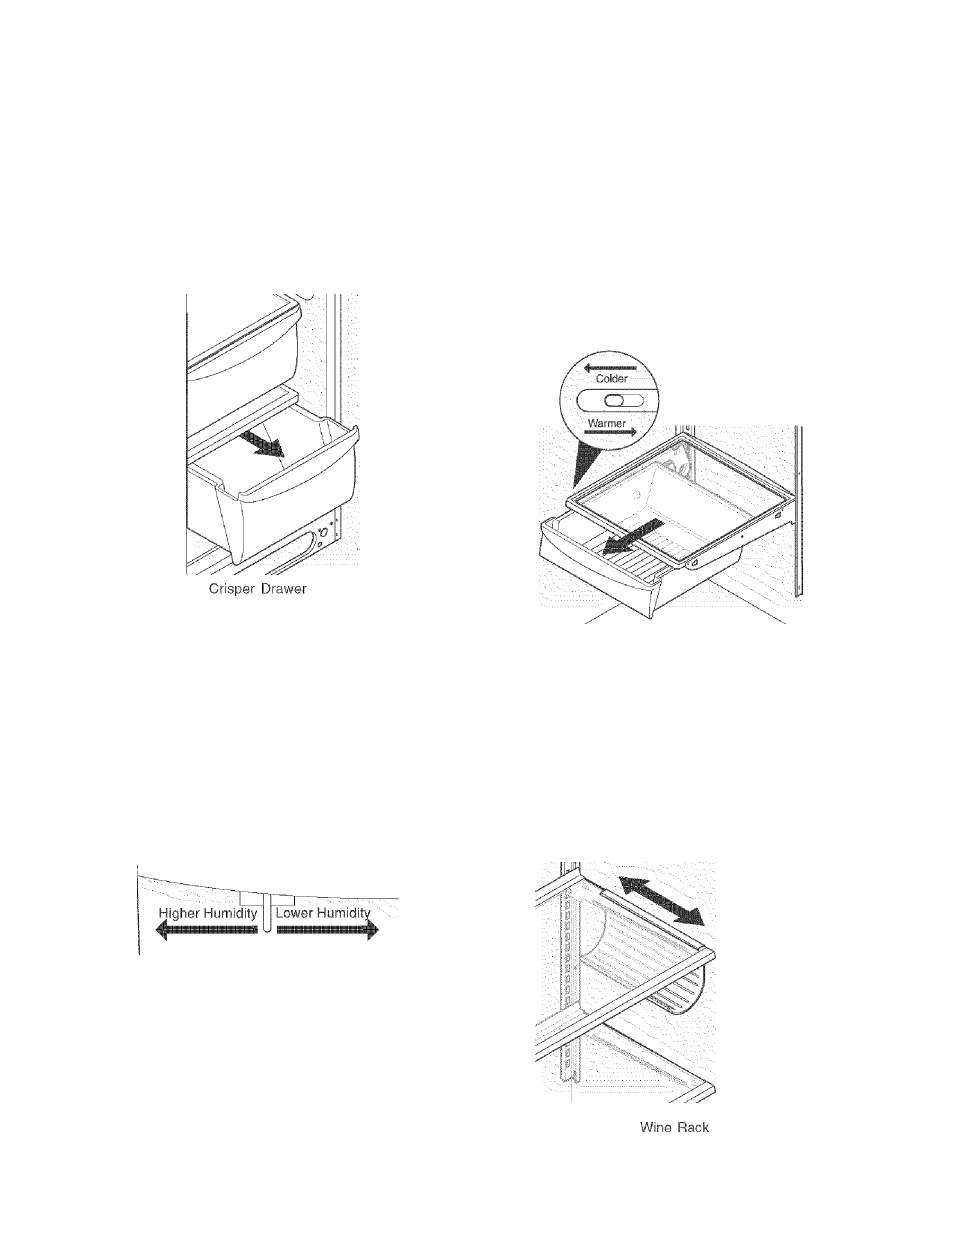
CRISPERS
(SOME MODELS)
The crispers, located under the bottom refrigerator shelf,
are designed for storing fruits, vegetables, and other fresh
produce. Wash items in clear water and remove excess
water before placing them in the crispers. Items with
strong odors or high moisture content should be wrapped
before storing.
HUMIDITY CONTROL
(SOME MODELS)
The Humidity Control, present on some models with
crisper drawers, allows you to adjust the humidity within
the crisper. This can extend the life of fresh vegetables
that keep best in high humidity.
'NOTE: Leafy'vegetables.keep best when stored with the-
Humidity Control set on Higher..Hutnjdity,:orin.a drawer
■without a Humidity .'Control, This keeps incorning air to'a
'.mini.mu.m and maintains maximum moisture content. '■" ■' ■
Crisper Humidity Control
DELI DRAWER
(SOME MODELS)
Some models are equipped with a Deli Drawer for storage
of luncheon meats, spreads, cheeses, and other deli
items.
MEAT KEEPER
(SOME MODELS)
Some models are equipped with a Meat Keeper. Meat
Keeper temperatures can be adjusted by sliding the Meat
Keeper Temperature Control in eitherdirection. Use this
pan for short term storage of bulk meat items. If meats are
to be kept longer than one or two days, they should be
frozen. The Meat Keeper is fixed and cannot be moved up
or down. If fruits or vegetables are to be stored in the Meat
Keeper, set the Meat KeeperTemperature Control to a
warmer setting to prevent freezing.
Meat Keeper with Temperature Control
• NOTE:The Meat Keeper, may.be removed for.cleaning.
■■To. remove, pull the Meat Keeper straight..out while liftio.g
',.up toward the back on the bottorn of the Meat Keeper.)';'
WINE RACK
{SOME MODELS)
The wine rack stores bottles of wine, or single two-liter
plastic bottles of juice or soda pop. To install, slide the
Wine Rack onto the shelf with the curve facing in. To
remove, slide the Wine Rack out. Install on either side of
shelf.
12