Assembly instructions, Connecting to game consoles – BoomChair Etec User Manual
Page 4
4
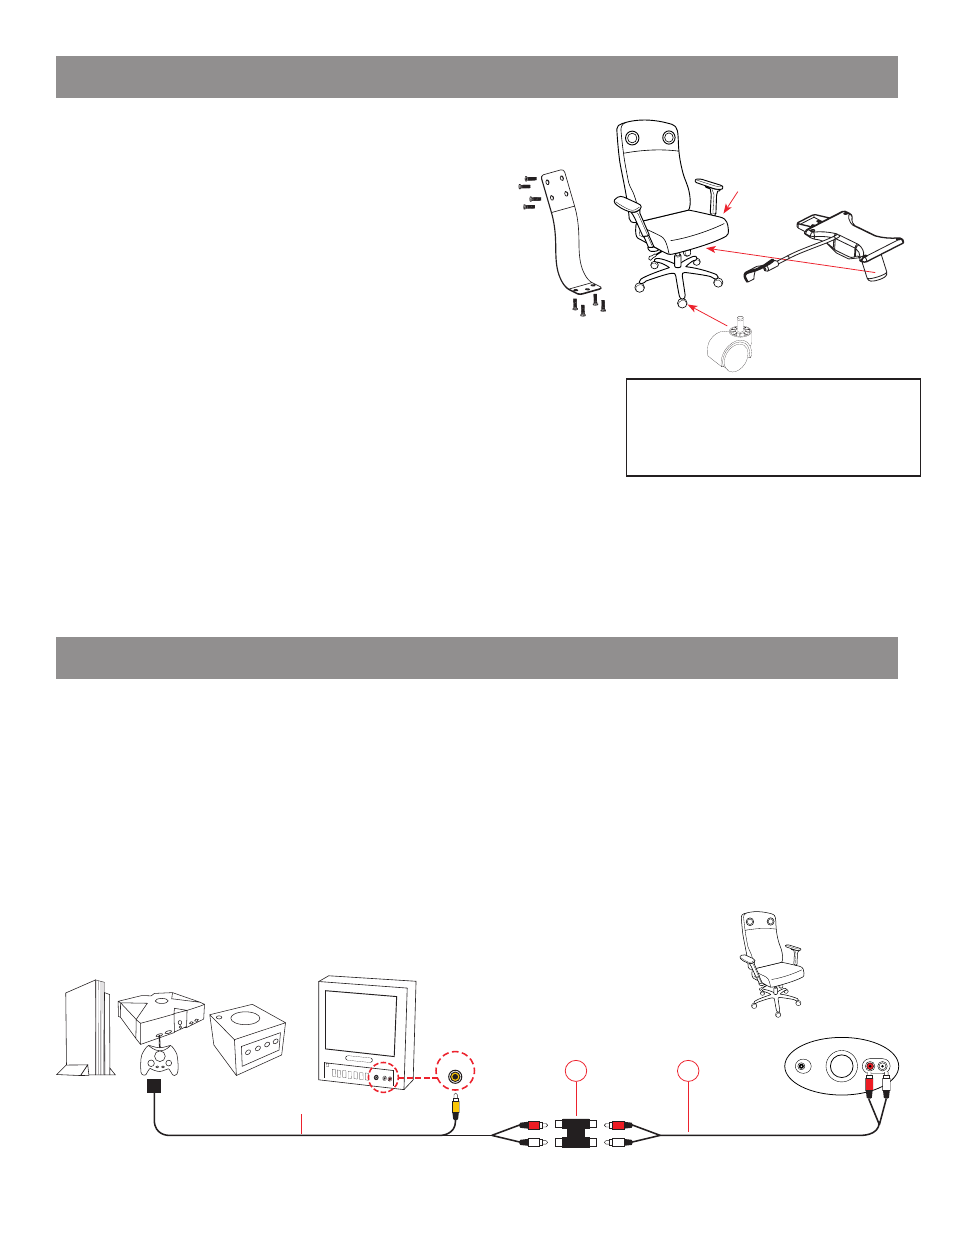
Step 1: Using the console’s custom RCA cord, plug yellow
composite video cable from game console into video input of TV. (Fig. 1)
Step 2: Plug Red/White RCA cord from game console into RCA INPUT of BoomChair™. (Fig. 2)
Step 1: Connect Audio Coupler (3c) to Red/White RCA cord from game console.
Step 2: Connect one end of RCA cord (3b) into other end of Audio Coupler (3c).
Step 3: Connect other end of RCA cord (3b) into RCA INPUT of BoomChair®.
Note: Most game consoles are supplied with a custom connector with yellow video out and RCA red/white audio out.
Note: It may be necessary to extend your BoomChair™ further away from your TV or console. Here’s how. (Fig.3)
IN
3c
3b
GAME CONSOLE
TV
BOOMCHAIR™
Fig. 1
Fig. 2
Cable supplied with game console
Fig. 3
AUDIO COUPLER (3c)
ASSEMBLY INSTRUCTIONS
Step 1: Use 8 hex screws and an allen wrench with the Seat Connec-
tor Bracket to attach the backrest and seat cushions.
Step 2: Attach the armrests using 3 screws each on the bottom of the
seat cushion. Armrests and be adjusted for comfort when chair is in
use.
Step 3: Secure the SWIVEL/TILT KNOB UNIT to the bottom of chair
using 4 longest screws and the provided allen wrench. Make sure
knob is on the front side of the chair as pictured.
Step 4: Apply pressure to lock the 5 caster wheels onto the base.
Step 5: Insert the pole portion into the base and set the chair on top of
the pole so that it locks into the chair opening. You will need to apply
pressure or carefully sit in chair to lock in place.
Step 6: Insert adapter cord (2) into the power jack on the control
panel.
Step 7: Plug adapter (2) into wall outlet.
*
STEP 1
*CAUTION: Use only provided adaptor! Different voltage may cause permanent damage.
CONNECTING TO GAME CONSOLES
STEP 2
Step 1: Unscrew battery compartment on bottom of Boomchair® seat.
Step 2: Insert 4 “AA” batteries (not included).
Step 3: Close battery compartment securely with screws.
Step 4: Turn Boomchair™ on by turning Power knob (A) clockwise.
(OPTIONAL) BATTERY POWER SUPPLY
STEP 3
STEP 4
NOTE: MAKE SURE THAT
THE 4 LONGEST SCREWS
ARE USED IN STEP 3!