Attaching the lens hood – Canon DM-GL1 User Manual
Page 15
15
E
Quic
k Over
vie
w
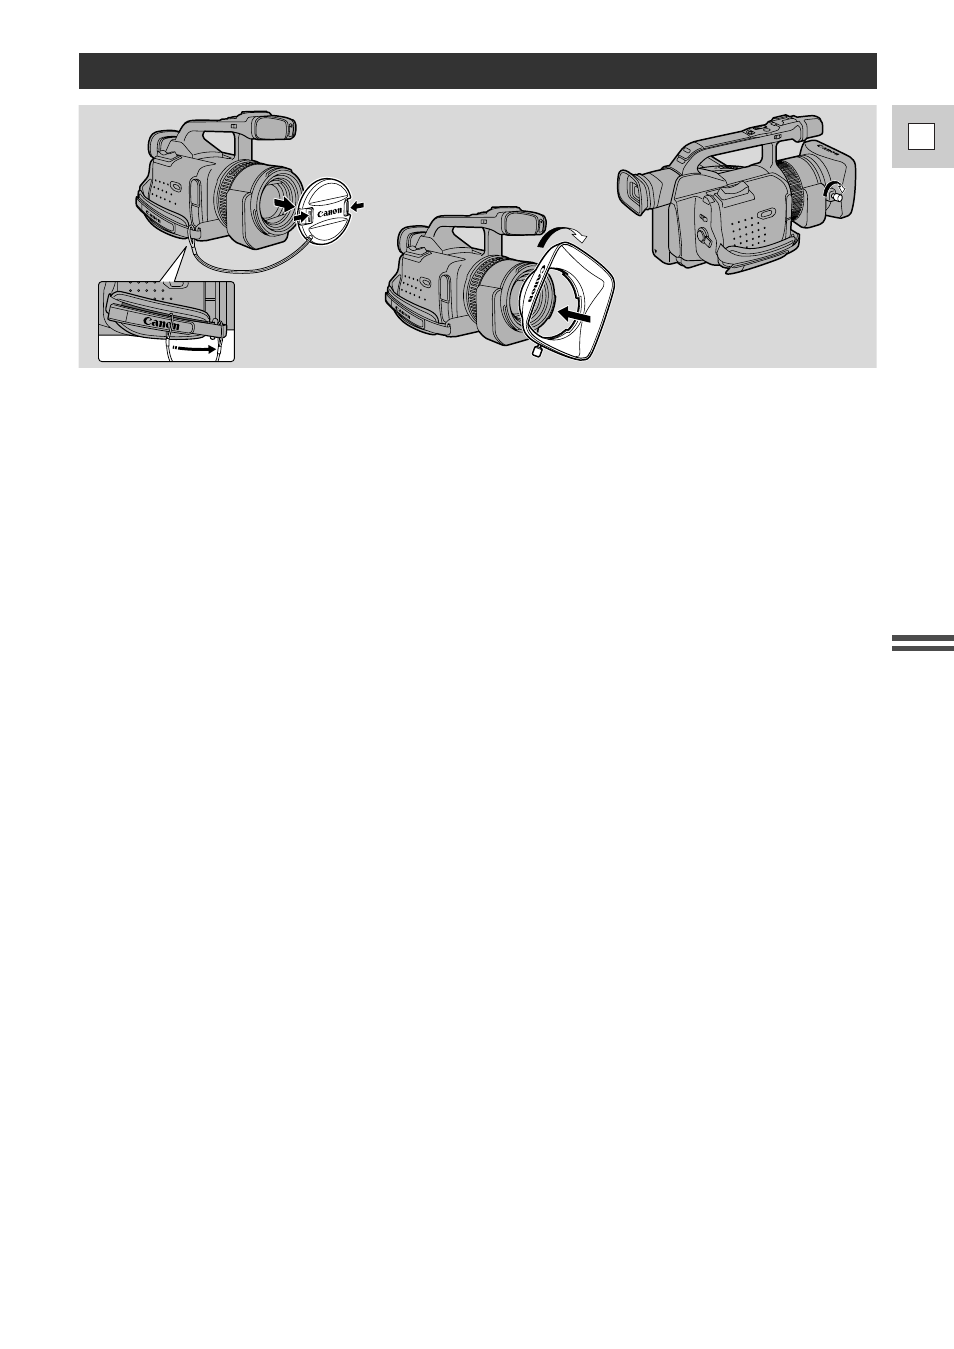
1. Remove the lens cap.
• When you purchase the GL1, the lens cap cord is attached in the middle of the velcro grip belt.
Open the velcro and slide the lens cap cord to the position shown in the illustration.
2. Align the hood to the lens with the Canon logo facing to the left.
3. Twist it into position (clockwise), so that the Canon logo is to the top.
• You do not need to assert any pressure — screw the hood lightly into place.
4. Finally, tighten the locking screw.
• To remove, reverse the above procedure.
Since the lens hood cuts stray light that may cause flare and ghost images and protects the lens, be sure to
attach the hood when you are recording.
Attaching the Lens Hood
See also other documents in the category Canon Camcorders:
- XHA1S (155 pages)
- GL2 (163 pages)
- FS11 (110 pages)
- XH A1 (159 pages)
- V (42 pages)
- EF-M (72 pages)
- AF514XL-S (121 pages)
- 50 (162 pages)
- DC 310 (87 pages)
- 512XL (45 pages)
- E800 (79 pages)
- 2691B001 (19 pages)
- DC 310 (93 pages)
- Digital Video Camcorder FS20 (50 pages)
- QL19 (40 pages)
- AF-7 (9 pages)
- AT 1 (127 pages)
- C30 (18 pages)
- HF M300 (201 pages)
- Elura 10 (152 pages)
- E 600 (96 pages)
- XF100 (2 pages)
- XF100 (2 pages)
- XF100 (2 pages)
- EOS 1D X (19 pages)
- XF100 (2 pages)
- EOS C500 (38 pages)
- XF100 (37 pages)
- EOS C300 (196 pages)
- EOS C300 (44 pages)
- XF100 (2 pages)
- XF100 (2 pages)
- EOS C300 (186 pages)
- XF100 (2 pages)
- EOS C300 (194 pages)
- XF100 (37 pages)
- EOS C300 (186 pages)
- WITE32 (29 pages)
- 5000QD (64 pages)
- Elura 100 (132 pages)
- Elura 100 (12 pages)
- DIGITAL VIDEO CAMCORDER MD160 (94 pages)
- A35 (63 pages)
- T 90 (218 pages)
- Elura 2 MC (147 pages)