Operating guide - wireless option – Petsafe Pawz Away® Extra Outdoor Pet Barrier User Manual
Page 4
4
Customer Care Center 1-800-732-2677
Operating Guide - Wireless Option
Power Up the Barrier Transmitter
Locate the battery door on the bottom of the Barrier Transmitter. Loosen the 4 Phillips
head screws. The screws will stay in the battery lid. Install 4 alkaline D-batteries and
replace the battery door.
Under normal conditions, the batteries will operate the transmitter for up to one year. Test
the system every few months to ensure it is working properly.
Set Up the Barrier Transmitter
Important: Never perform set-up procedures while your pet is wearing the
Receiver Collar.
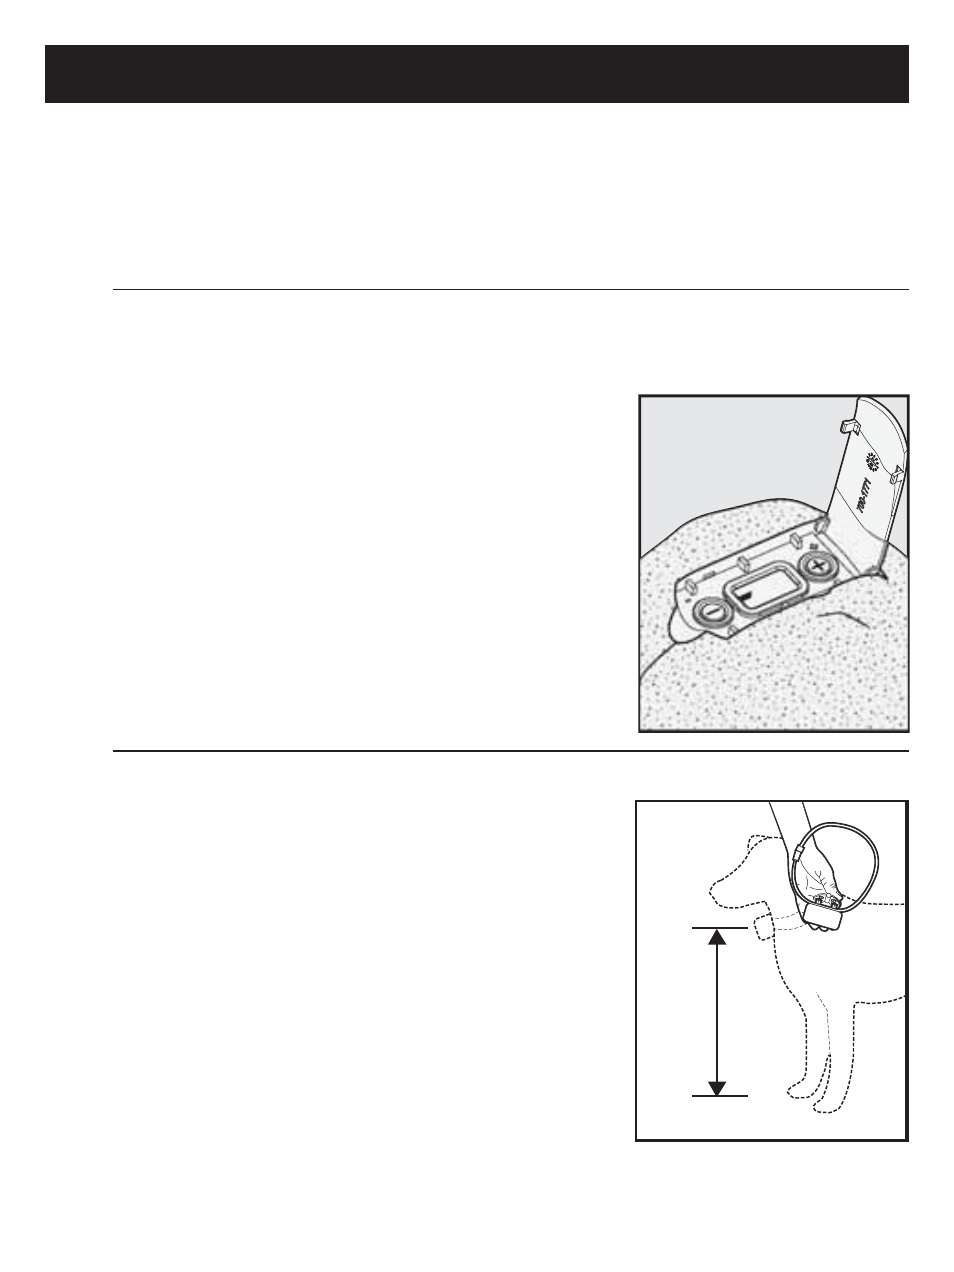
Turn the Barrier Transmitter upright and open the lid
1.
exposing the LCD display and range buttons.
Press the up (+) button once to turn ON the Barrier
2.
Transmitter. A black segment in the bottom of the
LCD display indicates the unit is set to the lowest
range (1A).
Each segment represents approximately two feet of
3.
diameter. You can create a Barrier Area up to 16 feet
in diameter. Using the up (+) and down (-) buttons,
adjust the range to fi t the desired pet Barrier Area.
1A
Test the Barrier Area
Place the Test Light Tool that came with your system on
1.
the Receiver Collar Contact Points. Hold the Receiver
Collar at the approximate height of your dog’s neck and
with the Contact Points facing up (2A). Start outside of
the range and walk slowly toward the Barrier Transmitter.
As you reach the Barrier Area, the Receiver Collar emits a
series of high-pitched tones. For each tone you hear, you
should notice the Test Light fl ashing which indicates that
a progressive Static Correction is being delivered. The
Receiver Collar’s tone is easily heard by dogs but may be
at a volume level diffi cult for some humans to hear.
Check the range of the Barrier Area from multiple angles
2.
to ensure you are getting the desired coverage.
If you place the Barrier Transmitter close to your house,
the signal may transmit through a wall. Be sure to test
the receiver collar inside your home.
2A
Step
1
Step
2
Step
3