Step 5 step 6 step 7 – Losi LOSB0217 Getting Started User Manual
Page 2
Page 2
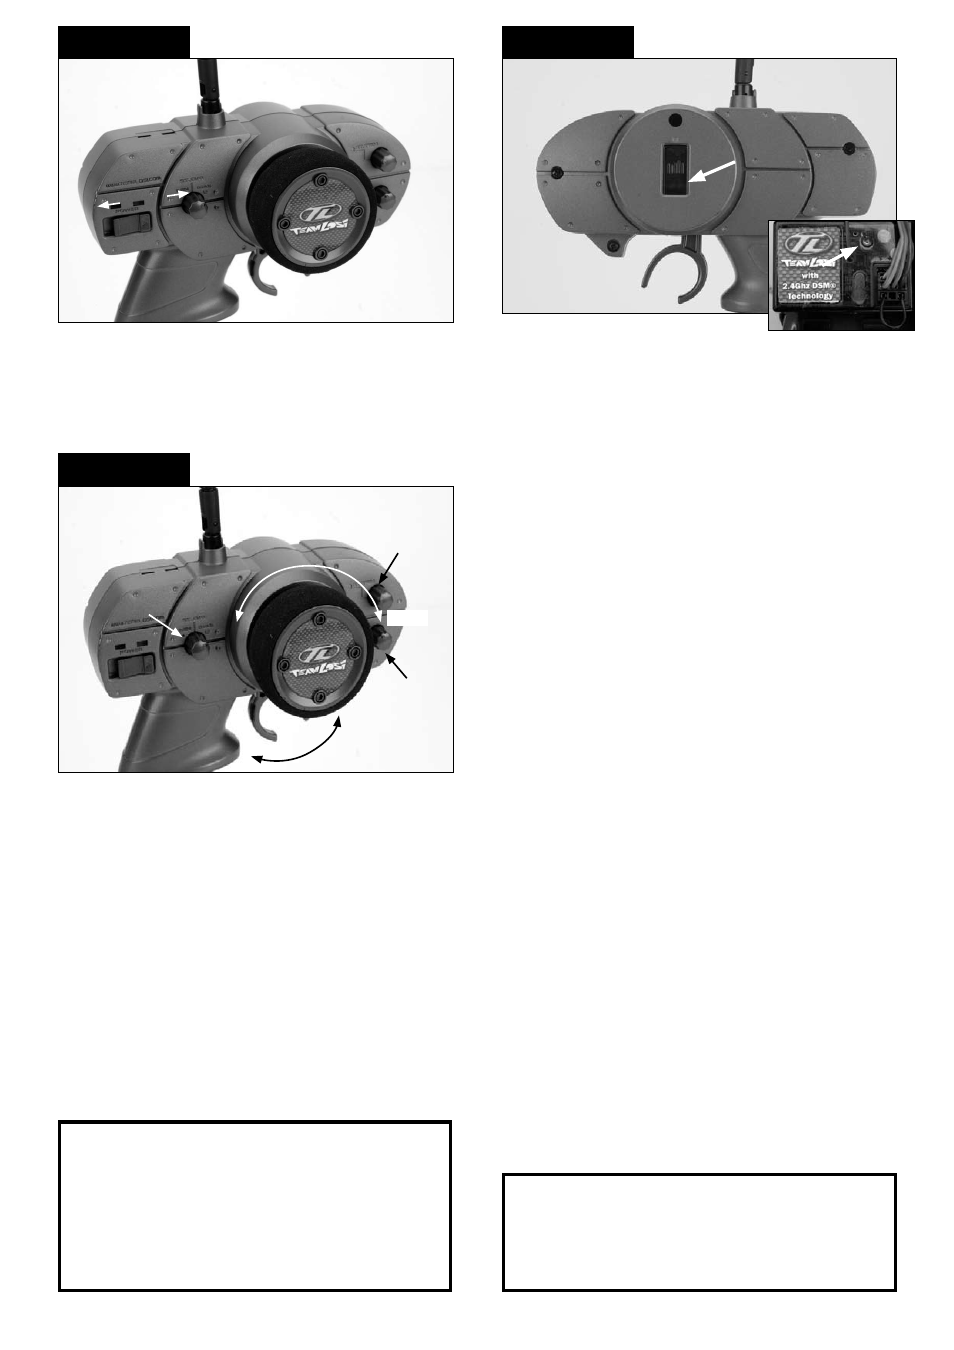
Always turn on the transmitter first by sliding the switch
on the left side of the wheel from left to right. The small
red and green lights above the switch should both light
up. If not, you need to check for low or incorrectly
installed batteries.
Once the transmitter has been turned on, turn on the Mini-
LST2 by sliding the switch on the speed controller to the
“ON” position. If the rear wheels turn, adjust the “TH. Trim”
knob located to the lower right of the steering wheel until
they stop. To go forward, pull the trigger back. If you should
need reverse, wait for the model to stop then push the trigger
forward. When going forward the model should move in a
straight line. If not, adjust the “ST. TRIM” so that it tracks
in a straight line without having to turn the steering wheel.
After you are have finished, turn the Mini-LST2 off
FIRST
by
sliding the switch to the “OFF” position. After the model has
been turned off, turn off the transmitter. If you wish to clean
your Mini-LST2, use compressed air and/or a soft paintbrush
to remove dust and dirt.
NEVER
use chemicals or anything
wet as it can cause damage to both electronics and plastic
parts.
Re-Binding the Transmitter to the Receiver
The Losi
®
DSM
®
radio system included in the Mini-LST2
operates on 2.4 GHz, and provides 79 different channels
which are automatically selected when the transmitter and
vehicle are turned on. The communication between the
transmitter and receiver begins in the few seconds after the
transmitter and vehicle are both turned on. This is called
the “binding process.” The Losi DSM radio system will not
interfere with previous technology radio systems that operate
on 27 MHz or 75 MHz frequencies and you will not receive
any interference from them.
Although set at the factory, below are the steps required
to re-bind your transmitter to the receiver should the need
arise. During the bind process, there is a unique ID from the
transmitter communicated to the receiver to ensure trouble-
free radio operation.
Steps to Re-Bind
. Ensure that the transmitter and vehicle are both
turned off.
2. Using the supplied Bind plug (which looks like a standard
receiver plug with a wire loop installed) insert or plug
into the receiver slot labeled “BIND”. Looking down on
the receiver this slot would be below the LED and is the
furthest from the LED, or nearest to the corner of the
receiver.
Note: You do not need to remove any of the other
plugs to re-bind.
3. With the Bind plug installed, turn on the vehicle. Notice a
blinking Orange LED within the receiver.
4. Now you are ready to turn on the transmitter. You should
notice on the back of the transmitter a similar blinking
Orange LED under the translucent cover.
5. Both the receiver and transmitter blinking Orange LED
will stop blinking and become solid indicating they have
“bound” themselves together.
6. Please turn off both the vehicle and transmitter to remove
the Bind plug from the receiver. Failing to remove the Bind
plug will cause the transmitter to attempt to re-bind every
time you turn on the vehicle and transmitter.
7. Turn on both the vehicle and transmitter to ensure
operation. If the transmitter does not control the vehicle,
please repeat steps –6. Should this not correct the
problem please call Horizon Service/Repair for further
assistance.
8. The Bind process is complete. Your vehicle’s radio system
should be ready for use.
ALWAYS
• Turn on the transmitter before the vehicle
• Use caution when running your vehicle near people
• Turn both the Mini-LST2 and transmitter “off”
when done
• Check the battery condition of the transmitter
before running
NEVER
• Operate the Mini-LST2 with low battery power
• Run the Mini-LST2 through water or wet grass
• Use chemicals to clean the chassis
• Run the Mini-LST2 without a gear cover
Step 5
Step 6
Step 7
Off/On
St.Trim
Th.Trim
Left
Right
Brake/Reverse
Forward
Steering
Rate
Adjustment