Wheatheart Livestock Waterer User Manual
Page 12
3. I
NSTALLATION
W
HEATHEART
- L
IVESTOCK
W
ATERER
M
ODELS
: H50, H50L, EH50, EEFH50, SH50, ESH50, C50, EC50, C100, EC100, C200, EC200
12
IM11 R1
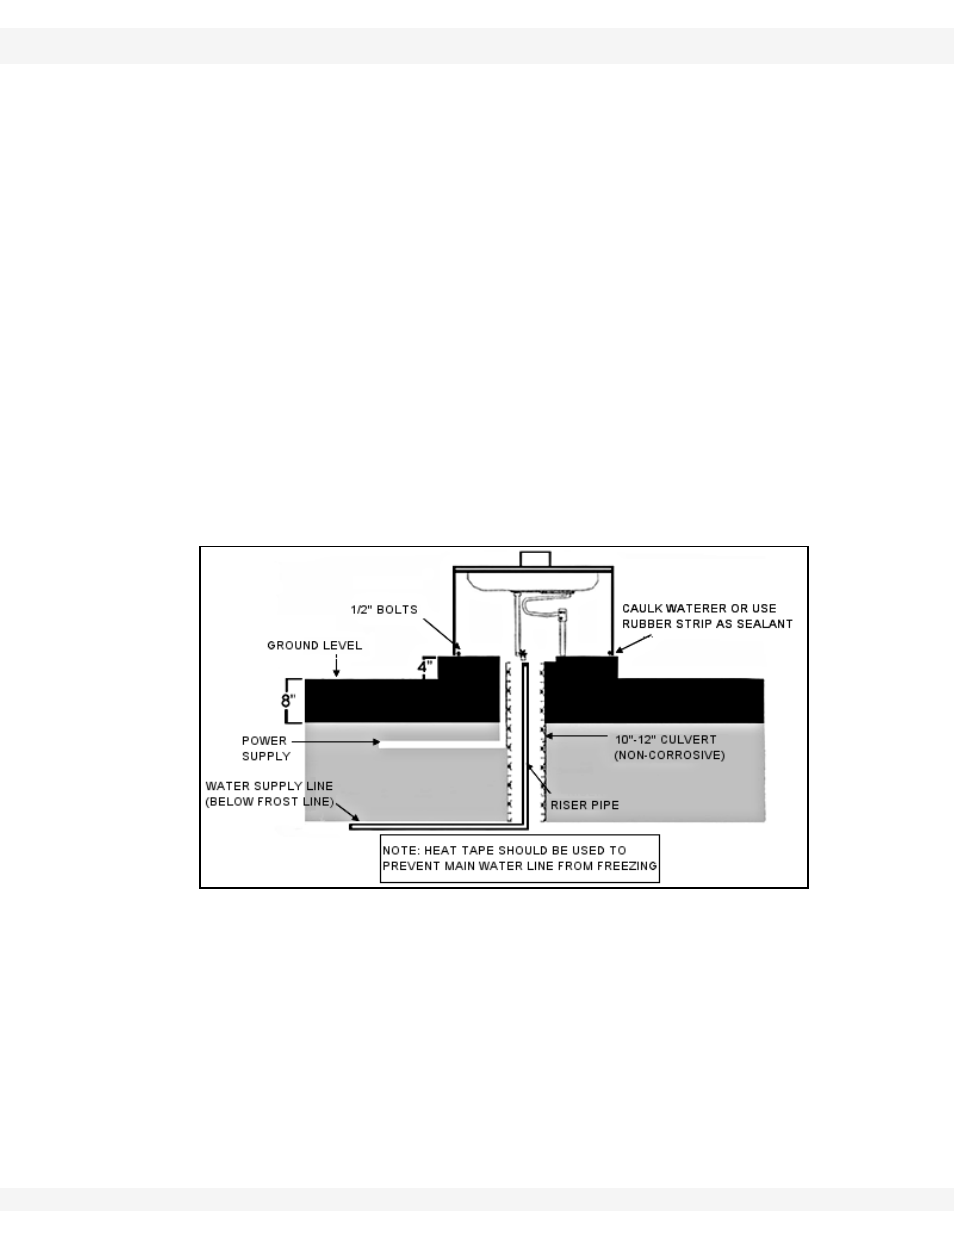
2. To mount the waterer to the concrete pad, secure waterer to the 1/2” bolts
that were set into the concrete.
3. Push down the inner liner of insulation once the floor pieces are in place. The
tighter the insulation is fitted, the more heat will be retained inside the box.
4. Use a rubber strip or other sealant to seal the waterer to the pad. This
minimizes heat loss in cold weather. Do not use insulation between the riser
pipe and the culvert.
5. Energy efficient models only: When the waterer is properly sealed and
securely mounted, fit the extra pieces of insulation on the floor of the waterer,
covering the concrete. The location of the culvert will determine how much
fitting is necessary. As much of the floor as possible should be covered
with insulation. Do not cover the culvert: this allows ground heat to
enter the waterer.
6. Use the flexible water hose (provided) to connect the riser pipe line to the
waterer.
7. A qualified electrician should complete the wiring of the waterer to the
electrical supply line (see Section 3.3. for further details).
Note:
Installing a metal guard (not supplied) around the waterer at the pan level is
recommended. This will help protect the unit from excessive wear from livestock
rubbing against the waterer, thus prolonging its life.
Figure 3.2 Waterer Installation