Chapter 2 – plug&play kit installation – AiM Yamaha R6 User Manual
Page 8
MXL Plug&Play kit for Yamaha R1 2004/2005/2006 – R6 2004/2005/
User manual
Release 1.01
7
www.aim-sportline.com
2
Chapter 2 – Plug&Play kit installation
MXL Plug&Play kit for Yamaha R1/R6
has been expressly designed to guarantee
maximum installation easiness.
Please note: this kit has been expressly tested to guarantee total compatibility with
a stock bike completely corresponding to the one sold by the manufacturer. The
only compatible variation is the original YEK (Yamaha Engineering Corporation) kit.
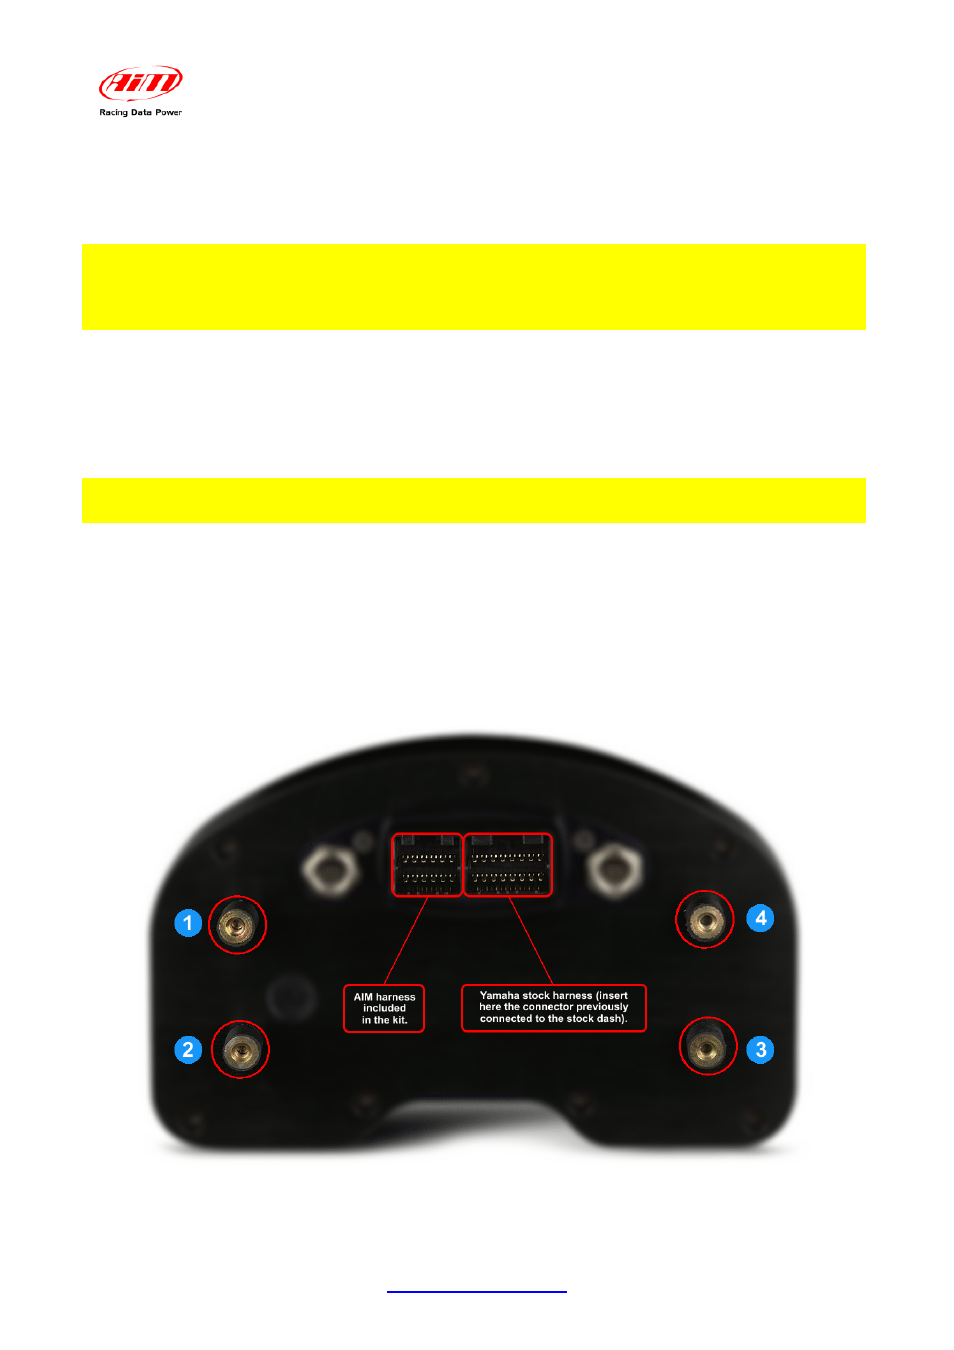
Through the four fixing points on the product rear it is possible to substitute the original
dash in an easy and quick way with no need of bending, cutting or drilling anything: each
component is “Plug&Play”.
The system is to be connected to the high beam chassis using the bracket included in the
kit. This last is in black anodised aluminium, light weight and mechanically resistant.
GENERAL NOTES – Read these notes before installing the kit.
• Do not cut any cable: the wirings included in the kit are Plug&Play;
• be careful not to damage the stock connectors while plugging/unplugging them;
• do not install the system when the engine is hot;
• be careful not to lose screws and washers.
After having removed the stock dash:
• fix MXL to the bracket using the 4 supports highlighted in the below image;
• connect the wiring to the two connectors as explained in the below image.