Fig. 6 – Bell'O PR-25 User Manual
Page 10
10
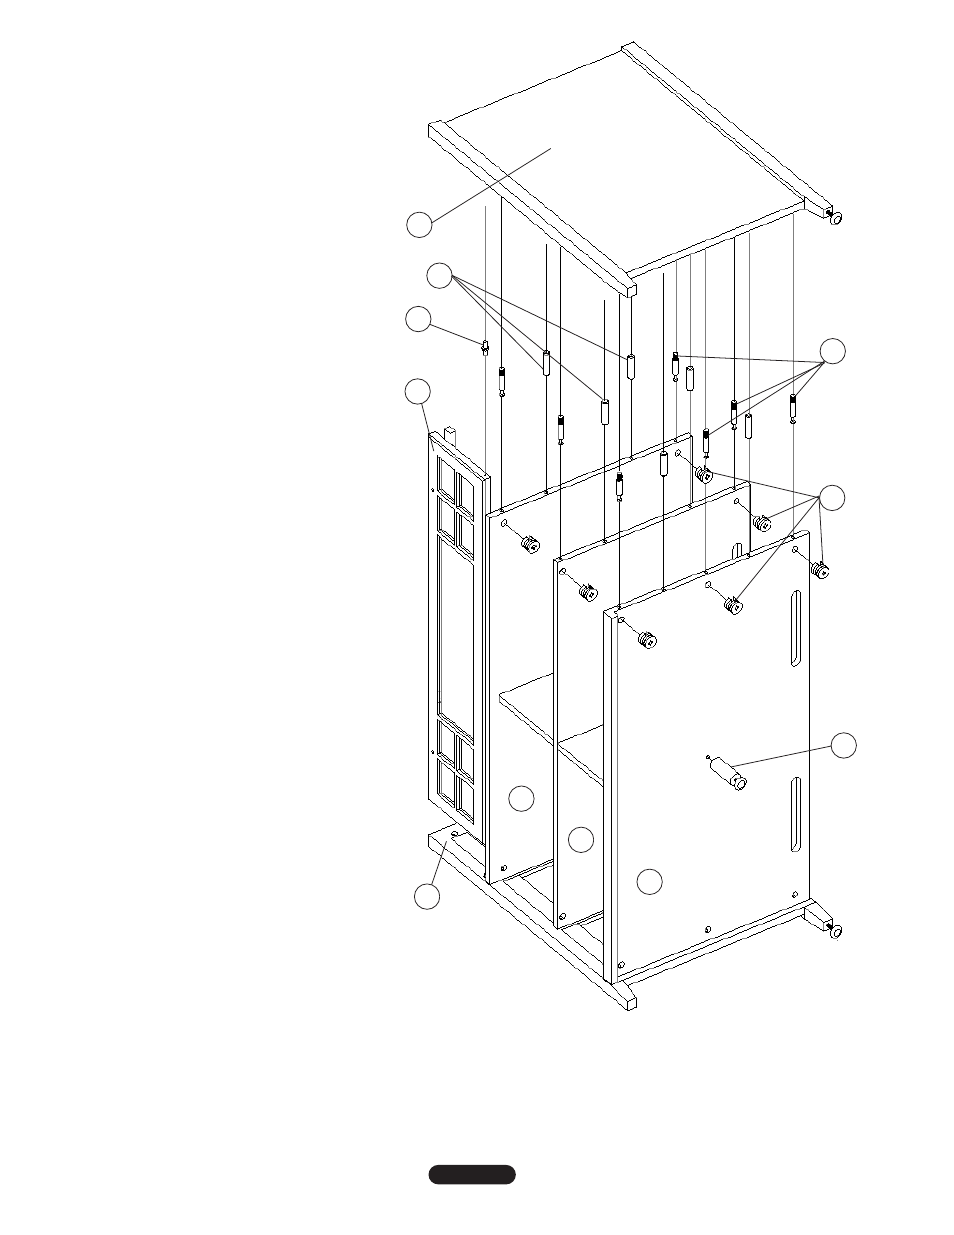
Fig. 6
6. Placement of the right cabinet
side (C):
A.
SCREW two cam lock pins (1)
into the upper and center cross
frame, and three cam lock pins
(1) into the bottom cross frame.
INSERT two smaller dowels (3)
into each of the cross frames.
B.
INSERT two cam locks (2) into
the underside of each shelf
panel (D), (E) and three cam
locks into the underside of the
bottom shelf panel (F) as
shown.
C.
CAREFULLY ALIGN and
PLACE the top door panel (G)
onto the cabinet side (B) so
that it is resting on the hinge
pin (10).
INSERT the remaining
hinge pin (10) into the exposed
end of the top door panel as
shown in Fig. 6.
D. With the adjustable foot on the
cabinet side panel (C) facing
towards the rear,
CAREFULLY
ALIGN the cabinet side panel
with the assembled interior shelves
and dividers and
SECURE them
together by turning the cam locks to
tighten.
DO NOT FORCE the pieces
together. Alignment may require some
slight movement of the parts to get the
proper fit.
E.
SCREW the adjustable center leg (J) into the insert
located in the bottom of the cabinet.
2
G
10
3
D
B
E
F
C
1
J