Identificación de las piezas de la aspiradora, Figura 2. figura 3. figura 4 – Beam Electrolux Alliance Q User Manual
Page 21
21
ENSAMBLAJE E INSTRUCCIONES DEL FUNCIONAMIENTO
DE LA ASPIRADORA
Al usar la aspiradora, se deben seguir siempre las medidas de precaución básicas que
se describen en las “INSTRUCCIONES IMPORTANTES PARA LA SEGURIDAD”.
1. Empuje el tubo hacia su receptáculo en la aspiradora hasta que encaje en su lugar.
El receptáculo para el tubo está diseñado con una parada positiva. Por lo tanto, el
tubo no quedará atascado en dicho receptáculo. Inserte el extremo de la manguera
en el tubo de la aspiradora ya ensamblada hasta que encaje en su lugar. Figura 3.)
2. Asegúrese que el botón del mango de la manguera está en OFF (apagado).
Nota: El mango está en la posición OFF cuando el indicador en el botón ( ) está
en OFF.
3. Inserte la manguera en la válvula de entrada de la pared (placa frontal) y conecte el
cable al tomacorriente. Figura 4.
4. Baje el tubo de la posición vertical.
5. Para activar la aspiración central a ON, presione el botón ( ).
6. Para encender la aspiradora, presione el botón ( ) en la aspiradora.
7. Para apagar la aspiradora, presione el botón ( ) con el símbolo de la
aspiradora. El indicador en el ícono se apagará.
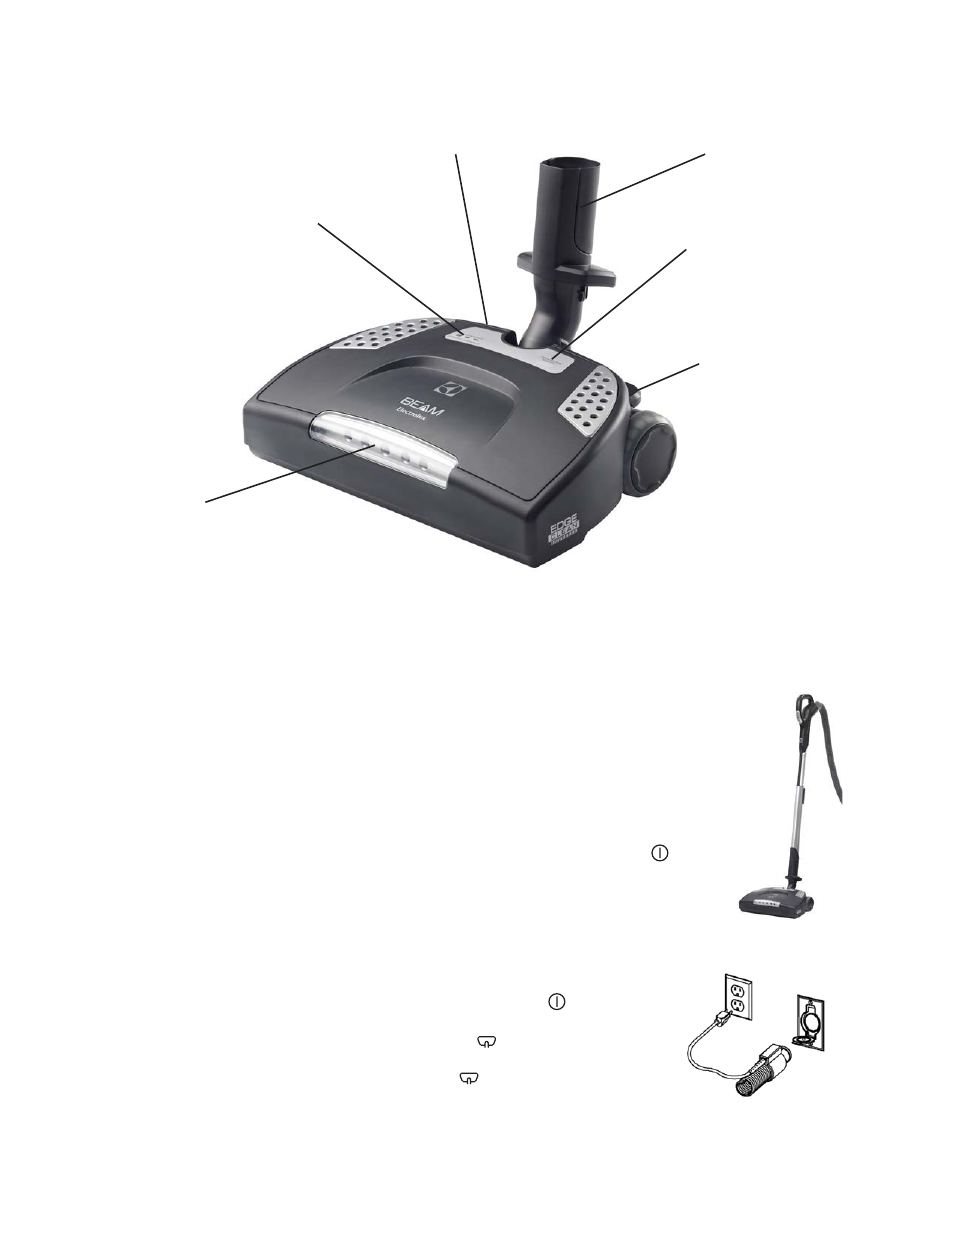
IDENTIFICACIÓN DE LAS PIEZAS DE LA ASPIRADORA
Cuello de liberación rápida
Indicador del disyuntor
(se ilumina de color rojo
si está bloqueado o
atascado)
Pedal de liberación del mango
Pedal de ajuste de la altura
Indicador LED del ajuste de la
altura
Indicadores
LED
Figura 2.
Figura 3.
Figura 4.
Power Button
(Phoenix & 2G)
Phoenix :: CUI1 & 2G
Left Scroll
Right Scroll
Enter
Attention Needed
Status OK
Status OK
Power Level Button
(2G)
2G-to-Unit Connection
Time
Error Code
Power Nozzle Button
(2G)
Power ON/Power Level
(2G)
Performance Level
Bucket Level
Motor Running
Screensaver
Call for Service