InnoMax Softside Fluid User Manual
Page 3
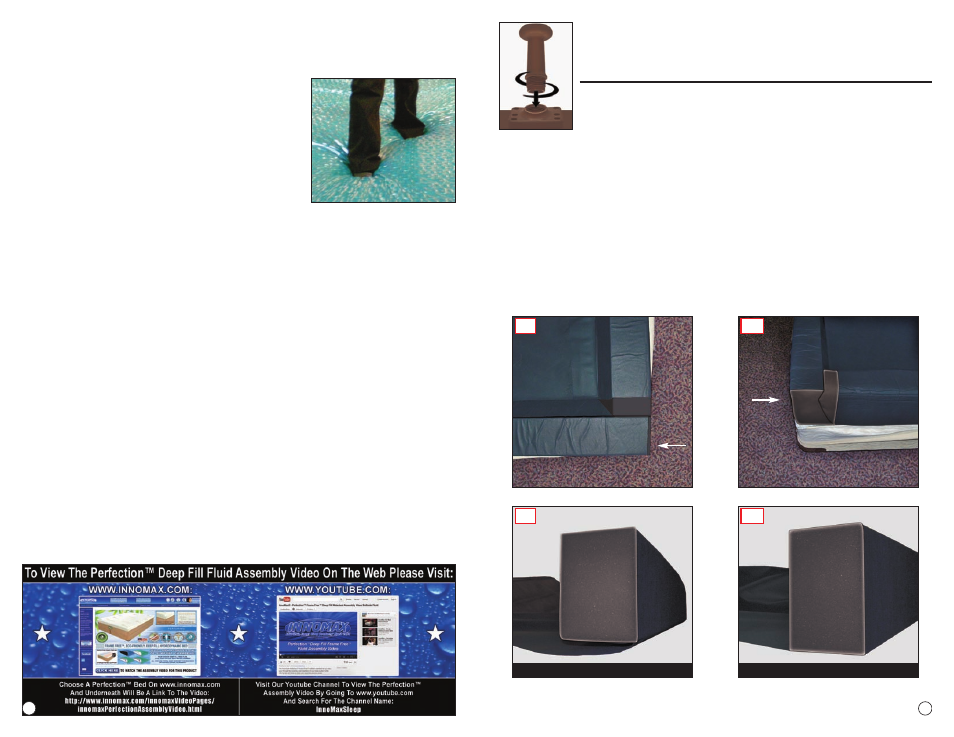
3. Unfold the mattress enclosure and completely unzip the cover.
Insert the
head and foot rail inside the cover. The head of the bed should be stamped and
will have two slits in the black webbing material.This is for the exit of your temperature
control sensor and heater pad power cord. The side rails are inserted in between
the head and foot rails with the webbing as smooth as possible. The rails are
correctly installed when the webbing material is completely unrolled and is at the
bottom of the rail (see DIAGRAM
B2
). The rail should be approximately 6” in
height and 4” in width.
Exception:
The Perfections
®
Sponge Bed
™
is a full depth
flotation style system and is designed with the “M Rail System” which is
approximately 8” in depth and has interlocking slanted rails (see DIAGRAM
A2
).
The black webbing is also to be at the bottom of the rail (see DIAGRAM
B2
).
legs rest upon the ground and you have the firm, flat side of the
foundation is facing up. You are now ready to begin the bed
assembly.
For the assembly video of this product please visit:
www.innomax.com
or
www.youtube.com
under the channel name
InnoMaxSleep
2
5
B1
INCORRECT
Black Webbing Running Under Rails
B2
CORRECT
Black Webbing Running Straight Out
From Rails
A1
Perfection Rails Top View
Foot
Of Bed
A2
Perfection Rails Side View
Foot
Of Bed
4. Install the heater pad(s) directly on the black webbing material in head to
toe position.
Ensure that the entire pad is on a solid (CONTINUED)
all of the trapped air. Use the Air Extractor to remove the excess air.
10. Several of InnoMax’s
®
firmer water chambers feature a high level of fiber,
closed cell and/or sponge support sheets.
These layers need to become fully
saturated with water to provide the desired comfort
levels. This process may take several days and may
require you to walk or roll on the mattress many times
during this period to extract as much air as possible.
While this early portion of the mattresses life may be
somewhat inconvenient, you will off set the extra
effort with the enhanced comfort you will enjoy for
years to come. The mattress may not feel as it did in
the showroom until you have finished this process. It
is recommended that you do not adjust fill levels to change firmness levels during
this process. Most sleepers find that following the “break end” period, the initial fill
level is the preferred setting.
11. Plug the heater pad into the heater control.
Plug the control into a 110 volt
wall outlet and then set the temperature to the desired level. It is recommended to
be set between 80-87 degrees Fahrenheit depending upon your personal comfort
level. If you have a dual heating system, repeat this step for the other side of the
mattress.
12. Zip up the cover/pillow top.
Install the new mattress pad and sheets. Enjoy
a great night’s sleep on your new fluid support system!
13. Maintenance of your fluid support sleep system.
To receive the maximum
comfort, enjoyment and longevity from your new fluid system, it is important to
perform periodic maintenance. In addition to the use of quality waterbed conditioner
on an annual basis, it is recommended to use Blue Magic
®
Vinyl Cleaner on the outside
of your water chamber(s) and vinyl safety liner at least 2-3 times per year to
prevent plasticizer migration which dries vinyl and can cause brittleness, and in
some cases, cracking of the surface. Also, vinyl is a porous surface and over time,
air molecules can pass through into the chamber requiring the use of the Air
Extractor to remove the trapped air bubbles. This small amount of maintenance
will allow you to benefit from the amazing comfort and support of your fluid
system for many years to come.