Disassembly & reassembly, Required tools, Preparation for disassembly p – Goulds Pumps 3501 Mixer - IOM User Manual
Page 35
DISASSEMBLY & REASSEMBLY
REQUIRED TOOLS . . . . . . . . . . . . . . . . . . . . . . . . . . . . 31
PREPARATION FOR DISASSEMBLY . . . . . . . . . . . . . . . . . 31
DISASSEMBLY. . . . . . . . . . . . . . . . . . . . . . . . . . . . . . . 32
INSPECTIONS . . . . . . . . . . . . . . . . . . . . . . . . . . . . . . . 34
REASSEMBLY . . . . . . . . . . . . . . . . . . . . . . . . . . . . . . . 35
REQUIRED TOOLS
·
Hoist and Strap
·
Socket Sizes (mm): 12, 14, 16, 19, 20
·
Torque Wrench for reassembly
·
Wrench Sizes (mm): 12, 16, 20
·
Allen Wrenches (mm): 12, 14, 16, 19, 22
·
Pry Bars
·
Induction Bearing Heater
·
Feeler Gauges
·
Dial Indicator
·
Cleaning Agents
PREPARATION FOR DISASSEMBLY
p
!
WARNING
Mixers may handle hazardous and/or toxic fluids.
Skin and eye protection are required. Precautions
must be taken to prevent injury or environmental
contamination.
NOTE: Before disassembling the mixer for overhaul,
ensure all replacement parts are available.
1.
Lock out power supply to driver.
2.
Shut off all valves controlling flow to and from
mixer.
3.
Drain liquid from piping, flush mixer if necessary.
4.
Disconnect all auxiliary tubing and piping.
5.
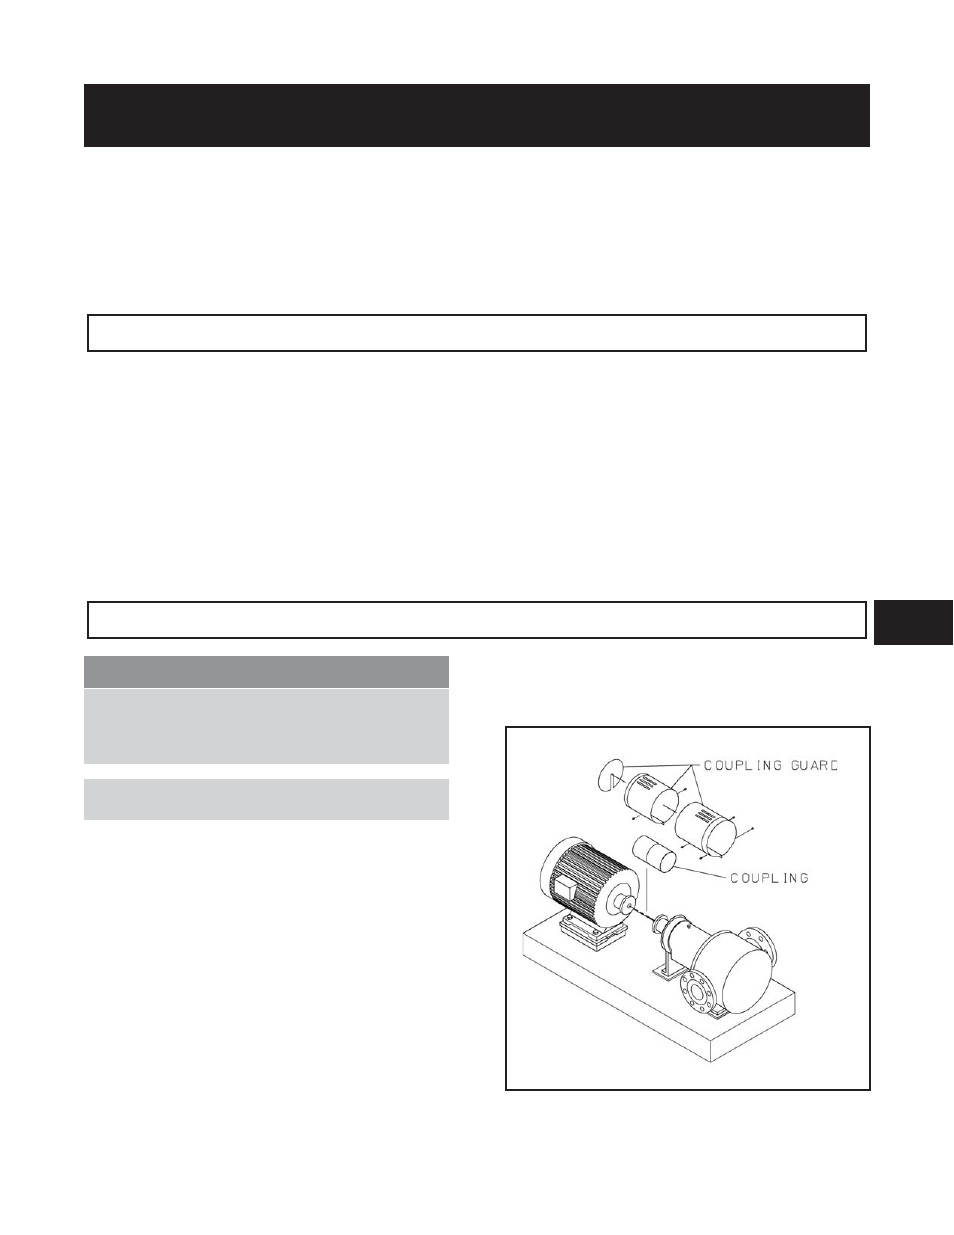
Remove coupling guard (Fig. 25).
6.
Disconnect coupling (Fig. 25).
7.
Either remove mixer coupling hub or move hub
down shaft to bearing frame.
8.
If unit is oil lubricated, drain oil from bearing
frame by removing bearing frame drain plug (408B).
Replace plug after oil is drained.
3501 IOM 11/10
31
6
Fig. 25