American Standard 1340.825 User Manual
Page 3
M968492
#
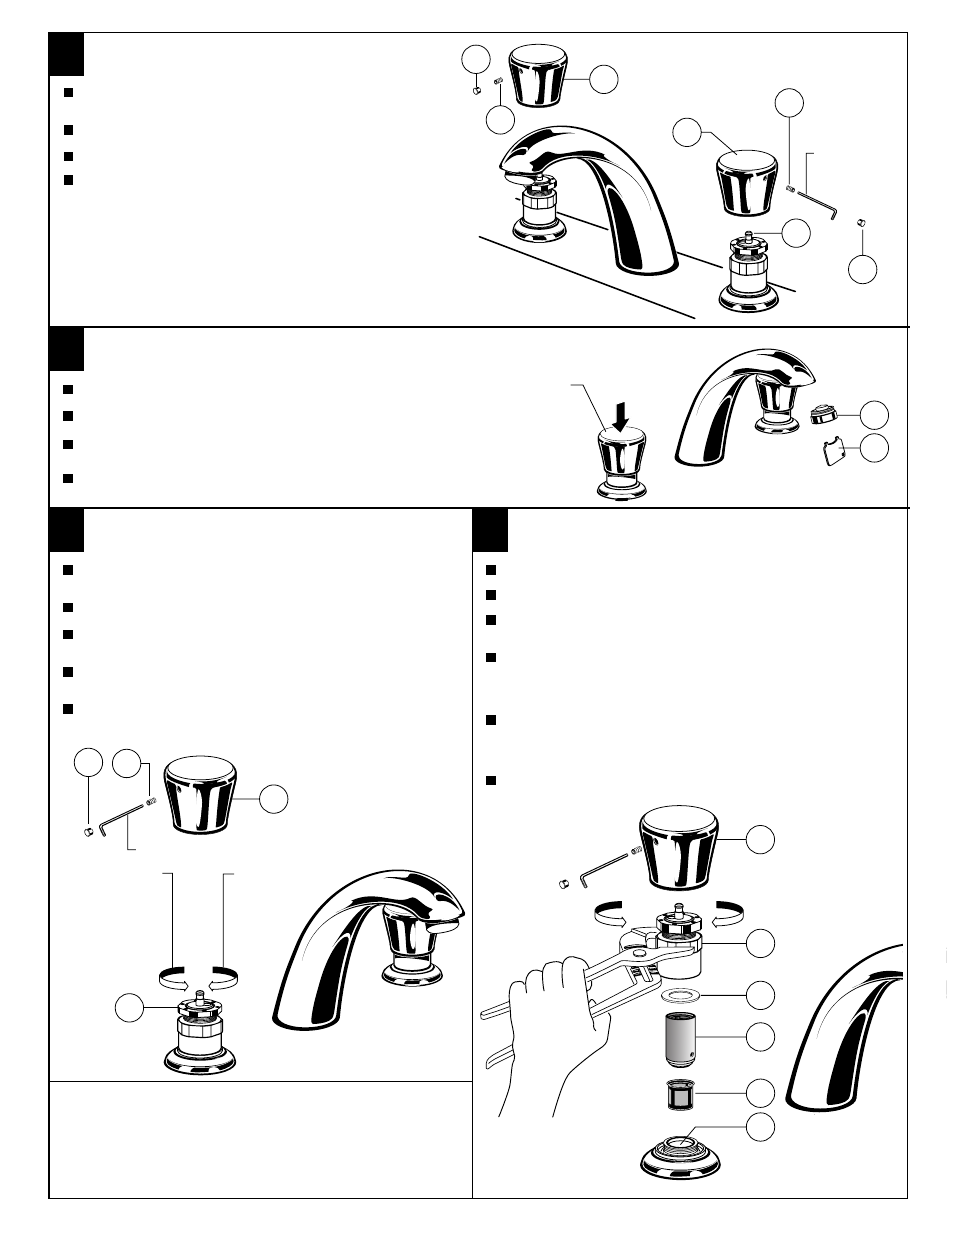
INSTALL HANDLES
Remove INDEX BUTTON (1; 2) and loosen SET
SCREW (3) with a 2.5mm hex wrench.
Install HANDLES (4) onto VALVE STEM (5).
Tighten SET SCREWS (3) with 2.5mm Hex Wrench.
Replace INDEX BUTTONS. Red (1) in Left HANDLE (4)
Blue (2) in Right HANDLE (4).
1
1
4
3
2.5mm
HEX WRENCH
3
5
4
2
2
Remove HANDLE (1) by removing INDEX BUTTON (2)
and SET SCREW (3) with a 2.5mm hex wrench.
Pull off HANDLE (1).
To increase cycle time, turn the gray PLASTIC ADJUSTING
KNOB (4) clockwise.
To decrease cycle time, turn the gray PLASTIC
ADJUSTING KNOB (4) counter-clockwise.
Replace SET SCREW (3), INDEX BUTTON (2) and
HANDLE (1). Test faucet for proper operation and
cycle time.
TO ADJUST CYCLE TIME
%
SERVICE
&
1
2
3
4
TO INCREASE
CYCLE TIME
ROTATE
CLOCKWISE
TO DECREASE
CYCLE TIME
ROTATE
COUNTER-
CLOCKWISE
2.5mm HEX WRENCH
Turn on water supplies and check connections for leaks.
Remove AERATOR (1) with KEY (2) supplied.
Operate HOT and COLD HANDLES by pressing down on HANDLES.
Both Hot and Cold handles are set for approximately 8 second operating cycles.
Replace AERATOR (1).
TEST INSTALLED FITTING
$
PRESS HANDLE
DOWN TO OPERATE
CARE INSTRUCTIONS:
DO: SIMPLY RINSE THE PRODUCT CLEAN WITH CLEAR
WATER. DRY WITH A SOFT COTTON FLANNEL CLOTH.
DO NOT: CLEAN THE PRODUCT WITH SOAPS, ACID, POLISH,
ABRASIVES, HARSH CLEANERS, OR A CLOTH WITH A
COARSE SURFACE.
Remove HANDLE (1). Refer to Step 4 for handle removal.
Remove ACTUATOR ASSEMBLY (2).
Remove WASHER (3). Pull out VALVE ASSEMBLY (4) and
FILTER SCREEN (5).
Inspect that VALVE ASSEMBLY (4), FILTER SCREEN (5) and
VALVE SEAT (6) are clean and free from debris. VALVE
ASSEMBLY (3) and FILTER SCREEN (5) can be cleaned with
soap and water.
Replace FILTER SCREEN (5) and VALVE ASSEMBLY (4). Place
WASHER (3) on top of VALVE ASSEMBLY (4). Thread VALVE
ACTUATOR (2) onto faucet. Torque VALVE ACTUATOR (2)
to 12-15 ft. lbs (15-20 Nm).
Replace HANDLE (1).
1
4
3
5
2
REMOVE REPLACE
6