Rebel9 pro – SHARKOON Rebel9 Pro Economy User Manual
Page 7
REBEL9 PRO
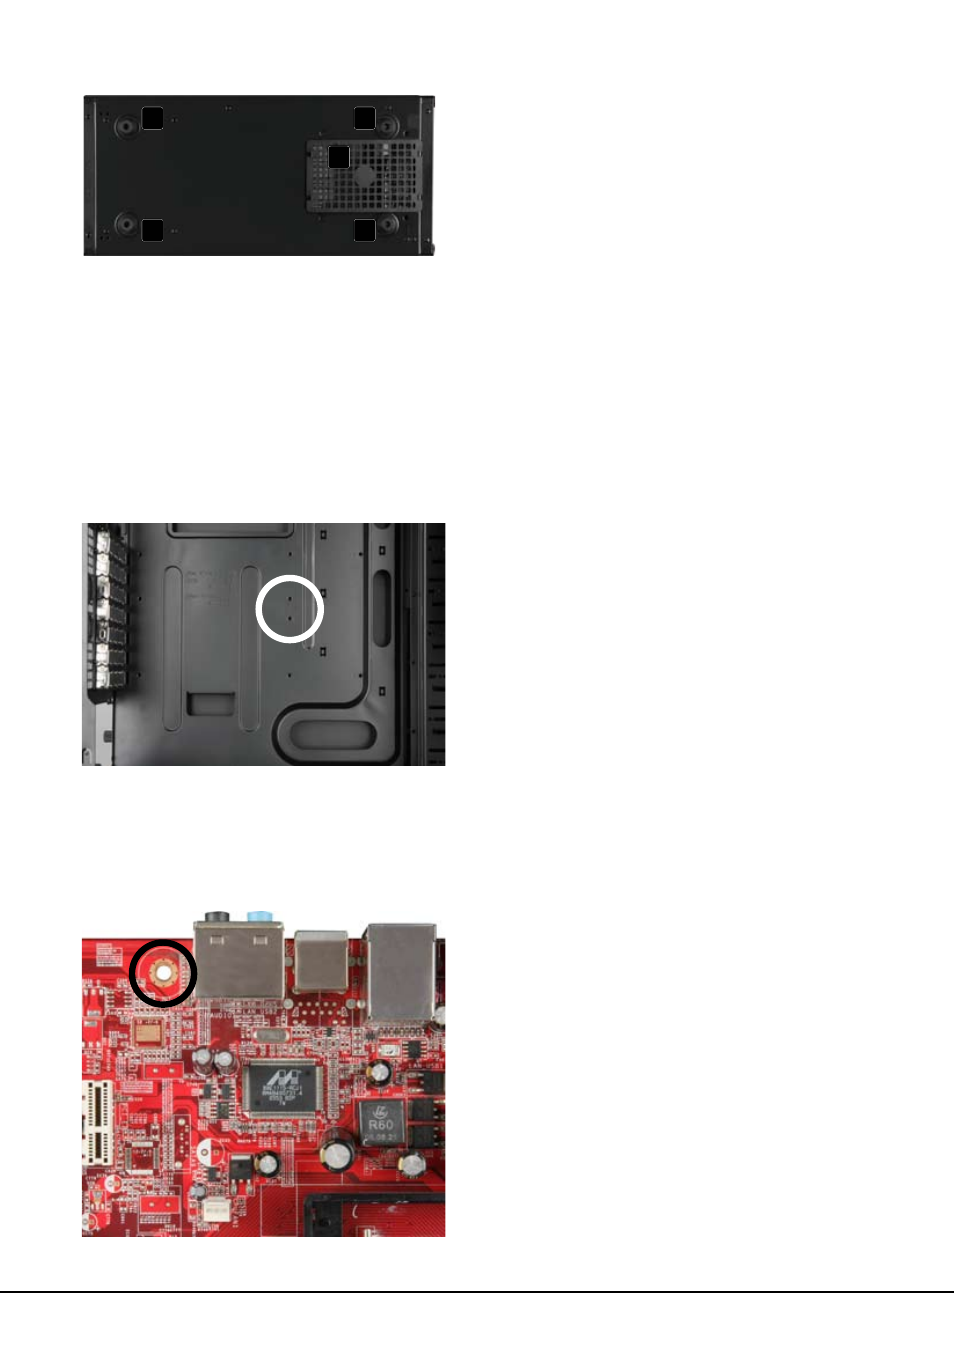
Bottom view
A – Case feet
B – Air intake for PSU
Note:
For more information on how to install the intended devices, refer to their respective
documents.
4. Installation of a mainboard
1. Open the case by loosening the thumb screws on the case’s back side and removing the left
side panel. Lay down the case sidewise on an even surface.
2. The mainboard’s mounting panel inside the case provides various drillings to fix the
stand-offs (fig. 1).
fig. 1
The mainboard contains special screw openings (fig. 2).
fig. 2
A
A
A
A
B
This manual is related to the following products:
See also other documents in the category SHARKOON Computer Accessories:
- HDD VIBE FIXER (1 page)
- T9 Value (15 pages)
- T5 Value (17 pages)
- Vaya (15 pages)
- Tauron (23 pages)
- T28 (18 pages)
- Nightfall U3 (17 pages)
- 5.25 BayExtension (1 page)
- DriveLink USB2.0 (8 pages)
- SATA QuickPort XT USB3.0 (5 pages)
- SATA QP Pro LAN (Giga) (22 pages)
- SATA QP Intern Multi (1 page)
- DriveLink Combo USB3.0 (5 pages)
- FireGlider Black (30 pages)
- Tactix (12 pages)
- DarkGlider (15 pages)
- Drakonia (11 pages)
- Drakonia Black (11 pages)
- FireGlider Optical (20 pages)
- QuickStore Portable (18 pages)
- QuickStore Portable USB3.0 (18 pages)
- QuickStore Portable Pro (6 pages)
- QuickStore Portable Pro USB3.0 (5 pages)
- 4-Port USB-Hub (1 page)
- MS120 (19 pages)
- MS140 (19 pages)
- WPM V2 (13 pages)
- WPM Bronze (13 pages)
- Rush Power M (14 pages)
- X-Tatic Analog (10 pages)
- X-Tatic Digital (15 pages)
- X-Tatic Sound Control Unit (13 pages)
- Unatic (18 pages)
- Unatic (28 pages)
- SHA550-12A (1 page)
- Furious (15 pages)
- Nightfall (17 pages)
- Rebel12 Value (11 pages)
- Flexi-Drive S2S (7 pages)
- USB LANPort 100 (27 pages)
- SATA QuickPort Pro LAN (27 pages)
- Bandit (12 pages)
- X-Tatic SP (2 pages)
- DriveLink USB3.0 (8 pages)