Installing the ps-b – Proface APL3000B - Node Box PC User Manual
Page 60
Chapter 3 Installation and Wiring
3-5
Installing the PS-B
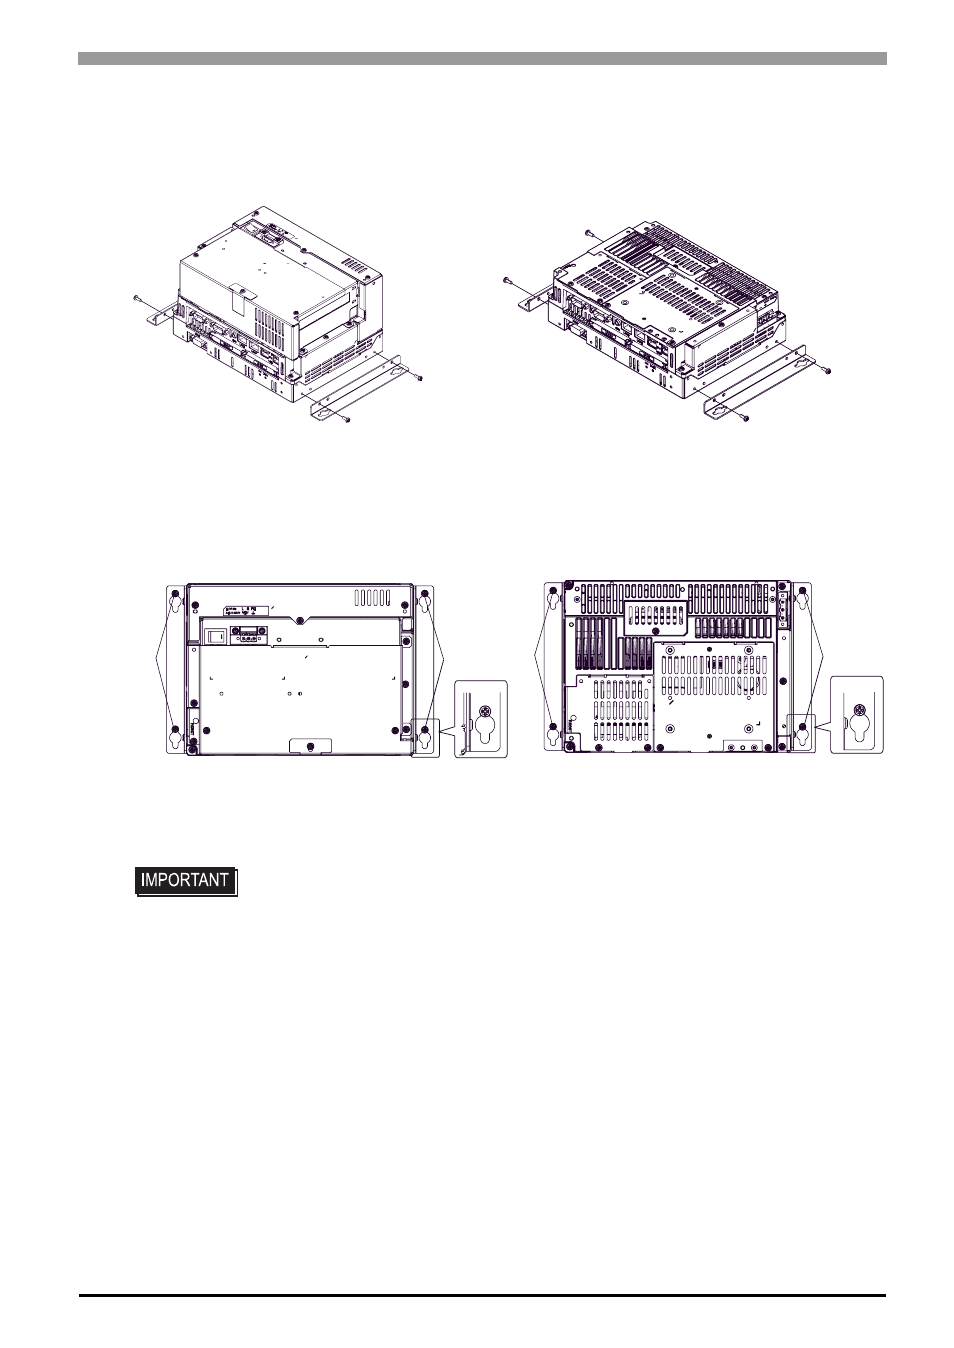
(1)
Attach installation fasteners with the accompanying four M3 screws to the PS-B unit.
The torque should be 0.5 to 0.6 N•m.
(2)
Attach the PS-B unit to the board with M4 screws (not supplied): First, tighten the screws temporarily on
the board; mount installation fasteners temporarily onto the screws; and then tighten the screws until the
PS-B unit is securely fixed. The torque should be 1.0 to 1.2 N•m.
• Depending on the panel’s material and design, the installation surface may need
to be strengthened. If high levels of vibration are expected and the
PS-B unit’s installation surface (i.e. an operation panel’s door, etc.) can move (i.e.
open or close) due consideration should be given to the PS-B unit’s weight.
• Determine the thickness of the panel in consideration of its material and strength
as well as the environment in which the PS-B unit is used. The thickness must be
1.6mm [0.06in.] or more, considering the length of M4 screws.
• M4 screws are not included with the PS-B unit. Please provide them yourself.
• Tightening the screws with too much force can damage the PS-B unit.
• Be sure to insert installation fasteners in the recessed portion of an installation
fasteners hole. If the fasteners are not correctly attached, the PS-B unit may shift
or fall out of the panel.
(This figure is PS3000-BA.)
(This figure is PS3001-BD.)
Horizontal mounting / Wall mounting 1
(PS3000-BA Top)
Screws
Screws
Screws
Screws
Horizontal mounting / Wall mounting 1
(PS3001-BD Top)