Smartlinc icons, Set time, day and house name and location, Set up room with a device/scene and timer – INSTEON SmartLinc (2412N) Quick Start User Manual
Page 2
2412N Rev. 9/5/2012 4:00 PM / See Owner’s Manual for Warranty Information.
Protected under U.S. and foreign patents (s
© Copyright 2012 INSTEON, 16542 Millikan Ave., Irvine, CA 92606, 800-762-7845
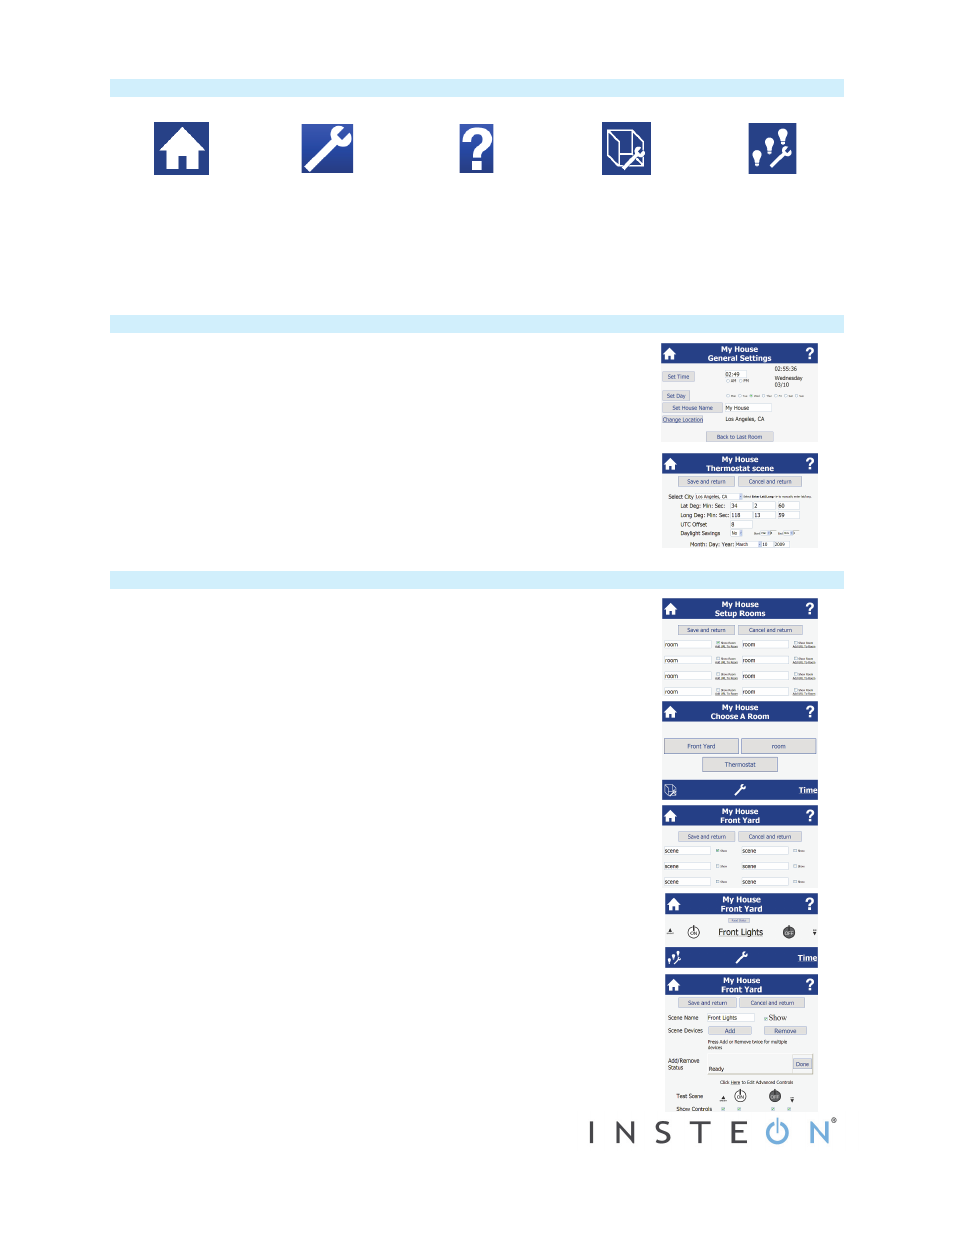
SmartLinc Icons
Homepage
Settings
Help
Room Settings
Scene Settings
Returns you to the
SmartLinc homepage
Takes you to
SmartLinc general
settings
Takes you to the
SmartLinc Help page on
the Smarthome Wiki
Takes you to the Room
Settings page to add,
remove and rename
your rooms and add
URLs (cameras)
Takes you to the
Scene Settings page
to add, remove and
rename your scenes
Set Time, Day and House Name and Location
1) From SmartLinc homepage, click Settings icon
2) Type in current time, click AM or PM and click Set Time
3) Click current day and click Set Day
4) Type in desired house name (default is “My House”) and click Set House Name
5) If you want to use sunrise/sunset timers, click Change Location
6) Select your location (or nearest city) from drop-down list or enter geographical
latitude and longitude
7) Select appropriate Daylight Savings Time setting
8) Confirm current date (month, day and year) is correct
9) Click Save and return
Set Up Room with a Device/Scene and Timer
Follow these instructions to set up a room, add a device/scene to it, then put that
device/scene on a timer.
1) From SmartLinc homepage, click Room Settings icon
2) Type desired room name (such as “Living Room” or “Bedroom”) over a room
label
3) Ensure Show Room checkbox next to room name is checked
4) Click Save and return
5) A new button labeled with your room name will appear on the Choose a Room
menu. Click it.
6) Click Scene Settings icon
7) Type desired scene name over a scene label
8) Click Show checkbox next to scene name
9) Click Save and return
10) A new link with your scene name will appear in your room menu. Click it.
11) Click Add
The Add/Remove Status will change to “waiting . . .”
12) Activate linking mode on the INSTEON device you want to add to the room. (For
most INSTEON devices, press and hold the Set button until it beeps and/or its
LED begins blinking; consult device’s Quick Start Guide or Owner’s Manual for
specific instructions.)
The Add/Remove Status will change to “Done” and display INSTEON I.D. of
device you just linked (e.g., 0D425B)
13) Click ON and OFF icons
Device will respond appropriately
SmartLinc will now monitor and display the status of the linked device. To
change this, scroll down and enter a new INSTEON I.D. in Status Device ID
field or uncheck Report Status box to disable status reporting for that device.
14) To set a timer, type desired on time (such as 07:00) into On Time box and click
AM or PM