Interior lighting electronic control panel, Ada series, Interior lighting – U-Line ADA24R User Manual
Page 6: Electronic control panel
4
ADA24
ADA SERIES
Interior Lighting
The interior of the cabinet can be illuminated whenever
the door is opened or remained darkened for a 36-hour
period (blackout/Sabbath mode [not Star K certified]).
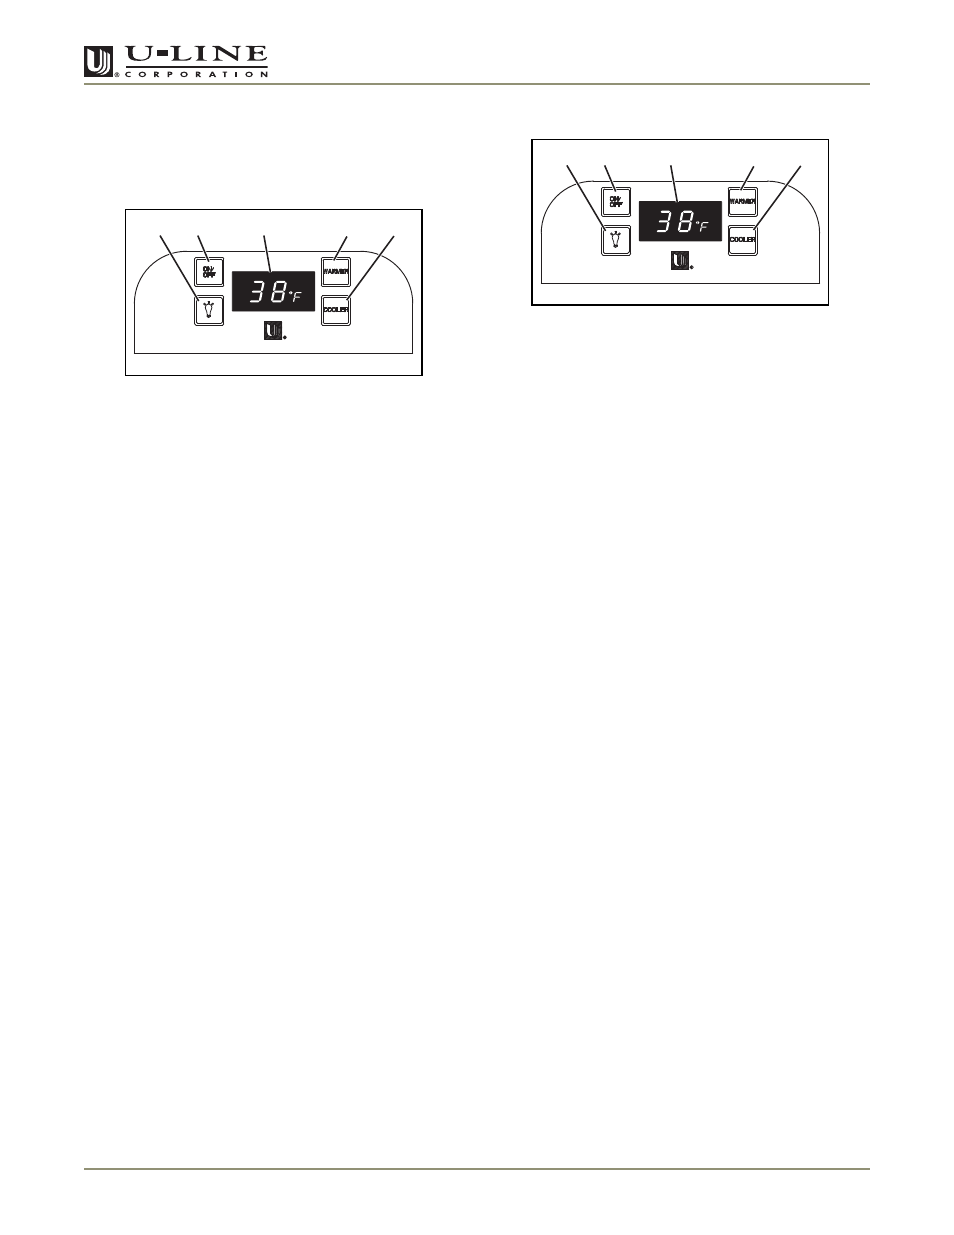
Figure 3
The LIGHT button (Figure 3, 1) on the control panel is
used to change the lighting functions.
To turn the lights and display OFF for a preset 36-hour
interval (blackout/Sabbath mode [not Star K certified]):
1. Press and hold the LIGHT button (Figure 3, 1) for ten
seconds and release (the °F symbol will flash briefly at
the end of the ten second period).
2. The interior light and control display (Figure 3, 3) will
go dark for the next 36 hours.
NOTE: Although the display will not be visible, the
temperature controls in the unit remain active, and the
interior temperature will be maintained.
3. To exit the blackout/Sabbath mode (not Star K certified)
before the 36-hour period, repeat Step 1.
Electronic Control Panel
Figure 4
The electronic control with digital display (Figure 4) is
configured to show a single temperature continuously.
This set-point temperature is a base number used by the
controller to maintain the temperature zone in your unit.
The factory default set-point is 38°F. This set-point
temperature is used as a gauge if further temperature
adjustments are required.
Temperature Display Selection
U-Line products supplied for 110 VAC operation have
temperatures displayed in a default Fahrenheit (°F)
configuration (Figure 4, 3). Models supplied for 220 VAC
operation have temperatures displayed in a default
Celsius (°C) configuration.
The display can easily be adjusted for either type of
temperature display. Press and hold the LIGHT button
(Figure 4, 1) and simultaneously within five seconds
press the COOLER button (Figure 4, 5) three times to
change the display as desired.
Temperature Display
To display actual temperature:
1. Press the WARMER button (Figure 4, 4) for five
seconds. The display (Figure 4, 3) will indicate the
actual temperature.
2. After approximately 10 seconds, the set point
temperature will return to the display.
5
4
3
2
1
ULIN_0074_A
5
4
3
2
1
ULIN_0074_A