Copper water supply connection, U-line water hookup kit connection, 11 prepare plumbing – U-Line CO1175 User Manual
Page 17
U-Line Plumbing Specfications
15
WARNING
Prior to attempting installation, determine if this
product contains a gravity style drain or factory
installed drain pump. Products without a drain pump
may only use a gravity style drain. Failure to connect
water supply or drain line connections properly may
result in water leakage, personal injury, and/or property
damage. Disconnect power and turn off water to the
unit before attempting to alter these connections.
Please consult U-Line or your installation instructions
for further details. These connections are the
responsibility of the owner and must be connected per
local plumbing code. If you are uncertain of how to
safely and properly install this product, contact a
licensed plumber.
Water Connections:
CAUTION
Review, obey, and understand the local plumbing codes
before you install your unit. Connect to the cold water
supply. The water pressure should be between 20 and 120
psi. The water line MUST have a shut-off valve on the 1/4”
supply line.
IMPORTANT
IMPORTANT
• U-Line requires the use of copper tubing for
installation or the U-Line water hookup kit available at
www.u-line.com. This kit includes a flexible water
supply connecting hose and brass fitting.
• Do not use any plastic water supply line. The line is
under pressure at all times. Plastic may crack or
rupture with age and cause damage to your home.
• Do not use Teflon tape or joint compound on the water
fitting. The rubber washer provides an adequate seal.
Other materials could cause blockage of the valve.
Copper Water Supply Connection:
CAUTION
Turn off water supply and disconnect electrical supply to
unit prior to attempting installation
1. Turn off water supply and disconnect electrical supply to
product prior to attempting installation.
2. Locate the desired cold water
supply location.
3. Attach a 1/4” copper line to this
location and route the tubing to
the appliance. Leave
approximately 8’ of water line to
be coiled behind the appliance.
The water line should be looped
into 2 coils. This will allow the line
to flex when removing the unit for cleaning and service. Do not
kink or pinch the coiled line.
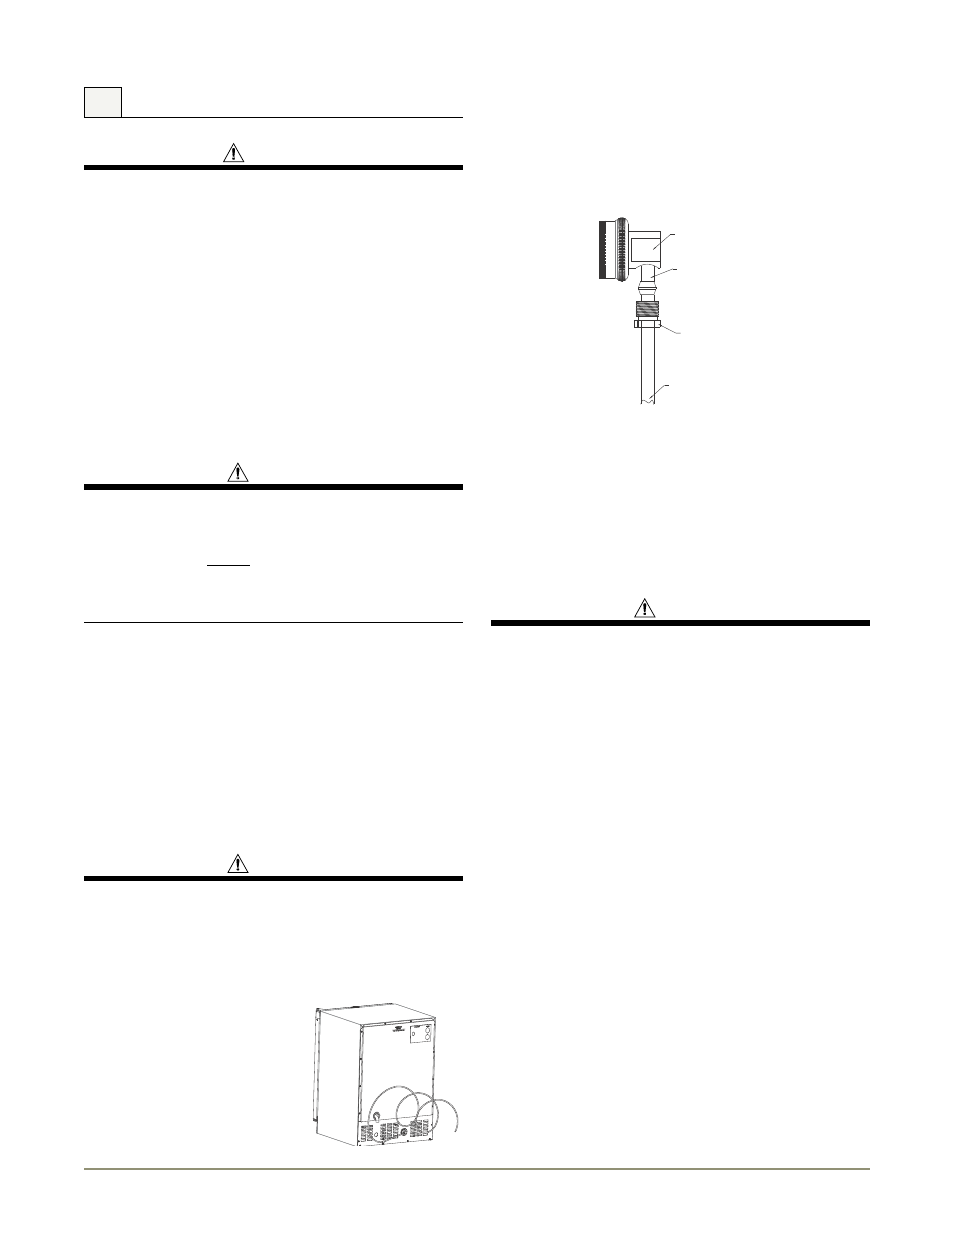
4. Locate the U-Line supplied hose fitting. Ensure the end on the
copper tubing has been cut straight and is free of burrs. Slide the
compression nut and ferrule onto the copper tubing as shown
below.
5. Push the assembly completely into the garden hose fitting and
tighten.
6. Attach the copper water line to the back of the unit using the
supplied clamp and the back panel screw. This will prevent
rotation of the line when moving the unit.
7. Turn on water and check for leaks.
U-Line Water Hookup Kit Connection:
CAUTION
Turn off water supply and disconnect electrical supply to
unit prior to attempting installation
1. Locate the desired cold water supply location.
2. Attach the garden hose connection from the kit to the rear of
the unit using 2 pliers.
3. Attach the braided line to this location and route the tubing to
the appliance. Leave approximately 4’ of water line to be coiled
behind the appliance. The water line should be looped into 2
coils. This will allow the line to flex when removing the unit for
cleaning and servicing. Do not kink or pinch the coiled line.
4. Turn on water supply and check for leaks.
11 Prepare Plumbing
9/16" Wrench
1/4" Copper Water
Supply Line
7/16" Wrench
From Water Supply
to Ice Maker