Radio Shack 12-259 User Manual
Hazard alert radio, Handheld, What’s included
©2007. RadioShack Corporation. All rights reserved. RadioShack and RadioShack.com are trademarks used by RadioShack Corporation.
12A07
12-259
P/N: AO0158ADA1
Printed in China
12-259
Handheld
Hazard Alert Radio
Thank you for purchasing your Hazard Alert Radio
from RadioShack. Please read this user’s guide before
installing, setting up and using your new radio.
What’s Included
Radio
Belt Clip
User’s Guide
Specifications
Power supply ...................... 6V DC 300 mA AC adapter (not supplied)
......................................................................3 AA battery (not supplied)
Thermometer operating range ...................................... -4 °F to 122 °F
Dimensions (HWD) .............................................6
9
/
16
x 2
13
/
16
x 1
7
/
16
in.
Weight ............................................................................................ 5.6 oz
Channel 1 ........................................................................... 162.400 MHZ
Channel 2 ........................................................................... 162.425 MHZ
Channel 3 ........................................................................... 162.450 MHZ
Channel 4 ........................................................................... 162.475 MHZ
Channel 5 ........................................................................... 162.500 MHZ
Channel 6 ........................................................................... 162.525 MHZ
Channel 7 ........................................................................... 162.550 MHZ
Specifications are subject to change and improvement without notice. Actual
product may vary from the images found in this document.
RF Emissions Information
This equipment has been tested and found to comply with the limits for a
Class B digital device, pursuant to Part 15 of the FCC Rules. These limits are
designed to provide reasonable protection against harmful interference in
a residential installation. This equipment generates, uses, and can radiate
radio frequency energy and, if not installed and used in accordance with
the instructions, may cause harmful interference to radio communications.
However, there is no guarantee that interference will not occur in a particular
installation. If this equipment does cause harmful interference to radio or
television reception, which can be determined by turning the equipment off
and on, the user is encouraged to try to correct the interference by one or
more of the following measures:
• Reorient or relocate the receiving antenna.
• Increase the separation between the equipment and receiver.
• Connect the equipment into an outlet on a circuit different from that to
which the receiver is connected.
• Consult your local RadioShack store or an experienced radio/TV technician
for help.
If you cannot eliminate the interference, the FCC requires that you stop
using your radio. Changes or modifications not expressly approved by
RadioShack may cause interference and void the user’s authority to operate
the equipment.
This device complies with Part 15 of the FCC Rules. Operation is subject
to the following two conditions: (1) This device may not cause harmful
interference, and (2) This device must accept any interference received,
including interference that may cause undesired operation.
Limited 90-Day Warranty
This product is warranted by RadioShack against manufacturing defects in
material and workmanship under normal use for ninety (90) days from the
date of purchase from RadioShack company-owned stores and authorized
RadioShack franchisees and dealers. For complete warranty details and
exclusions, check with your local RadioShack store.
RadioShack Customer Relations
300 RadioShack Circle, Fort Worth, TX 76102
04/04
Protect the environment by recycling used electronics. Go to
www.ecyclingcentral.com to find a recycle location near you.
Product:
Hazard Alert Radio
Model:
12-259
Responsible
Party:
RadioShack Corporation
300 RadioShack Circle
Fort Worth, TX 76102
Phone:
817-415-3200
Traditional weather radios simply receive the National
Oceanic and Atmospheric Administration (NOAA) weather
broadcast (usually within a 50-mile radius), then sound
an alarm if any emergency code was transmitted along
with the broadcast. This means that people outside an
affected area are often alerted even though their area is
not affected, leading some to ignore weather warnings that
apply to their own area.
In 1994, NOAA began broadcasting signals called FIPS
(Federal Information Processing System) codes along with
their standard weather broadcasts. These codes identify
the type of emergency and the specific geographic
(such as a country) information about the codes, so you
can determine if the emergency might affect your area.
Only SAME-compatible weather radios are able to take
advantage of this technology.
Each FIPS code identifies a specific geographic area
defined by the National Weather Service (NWS), so your
alert radio, sounds an alert only when a weather emergency
is declared in that area. This helps you more efficiently
track the weather conditions in and around your area.
How Your Alert Radio Works
Using AC Power
Your alert radio can also use one 6V, 300mA AC/DC adapter
with plug size H (not supplied) for power.
1. Open the rubber DC 6V jack cover.
2. Insert the AC/DC adapter’s barrel plug into DC 6V jack.
Then plug the adapter into a standard AC outlet.
Power Up Reset
When powered on for the first time after installing batteries,
all LCD segments turn on for one second. The device starts
to search for the best weather channel. To reset the alert
radio to default settings:
1. Remove the batteries and disconnect AC power.
2. Hold down WX and install batteries or connect to AC
power. Hold down WX until USER SETUP appears and a
short beep sounds.
3. Release WX and press MENU. DEFAULT ON appears
briefly, and then USER SETUP appears.
4. Remove batteries and/or disconnect AC power. Reinsert
to begin use.
Note: The backlight is on when receiving an alert message, or for
any key operation.
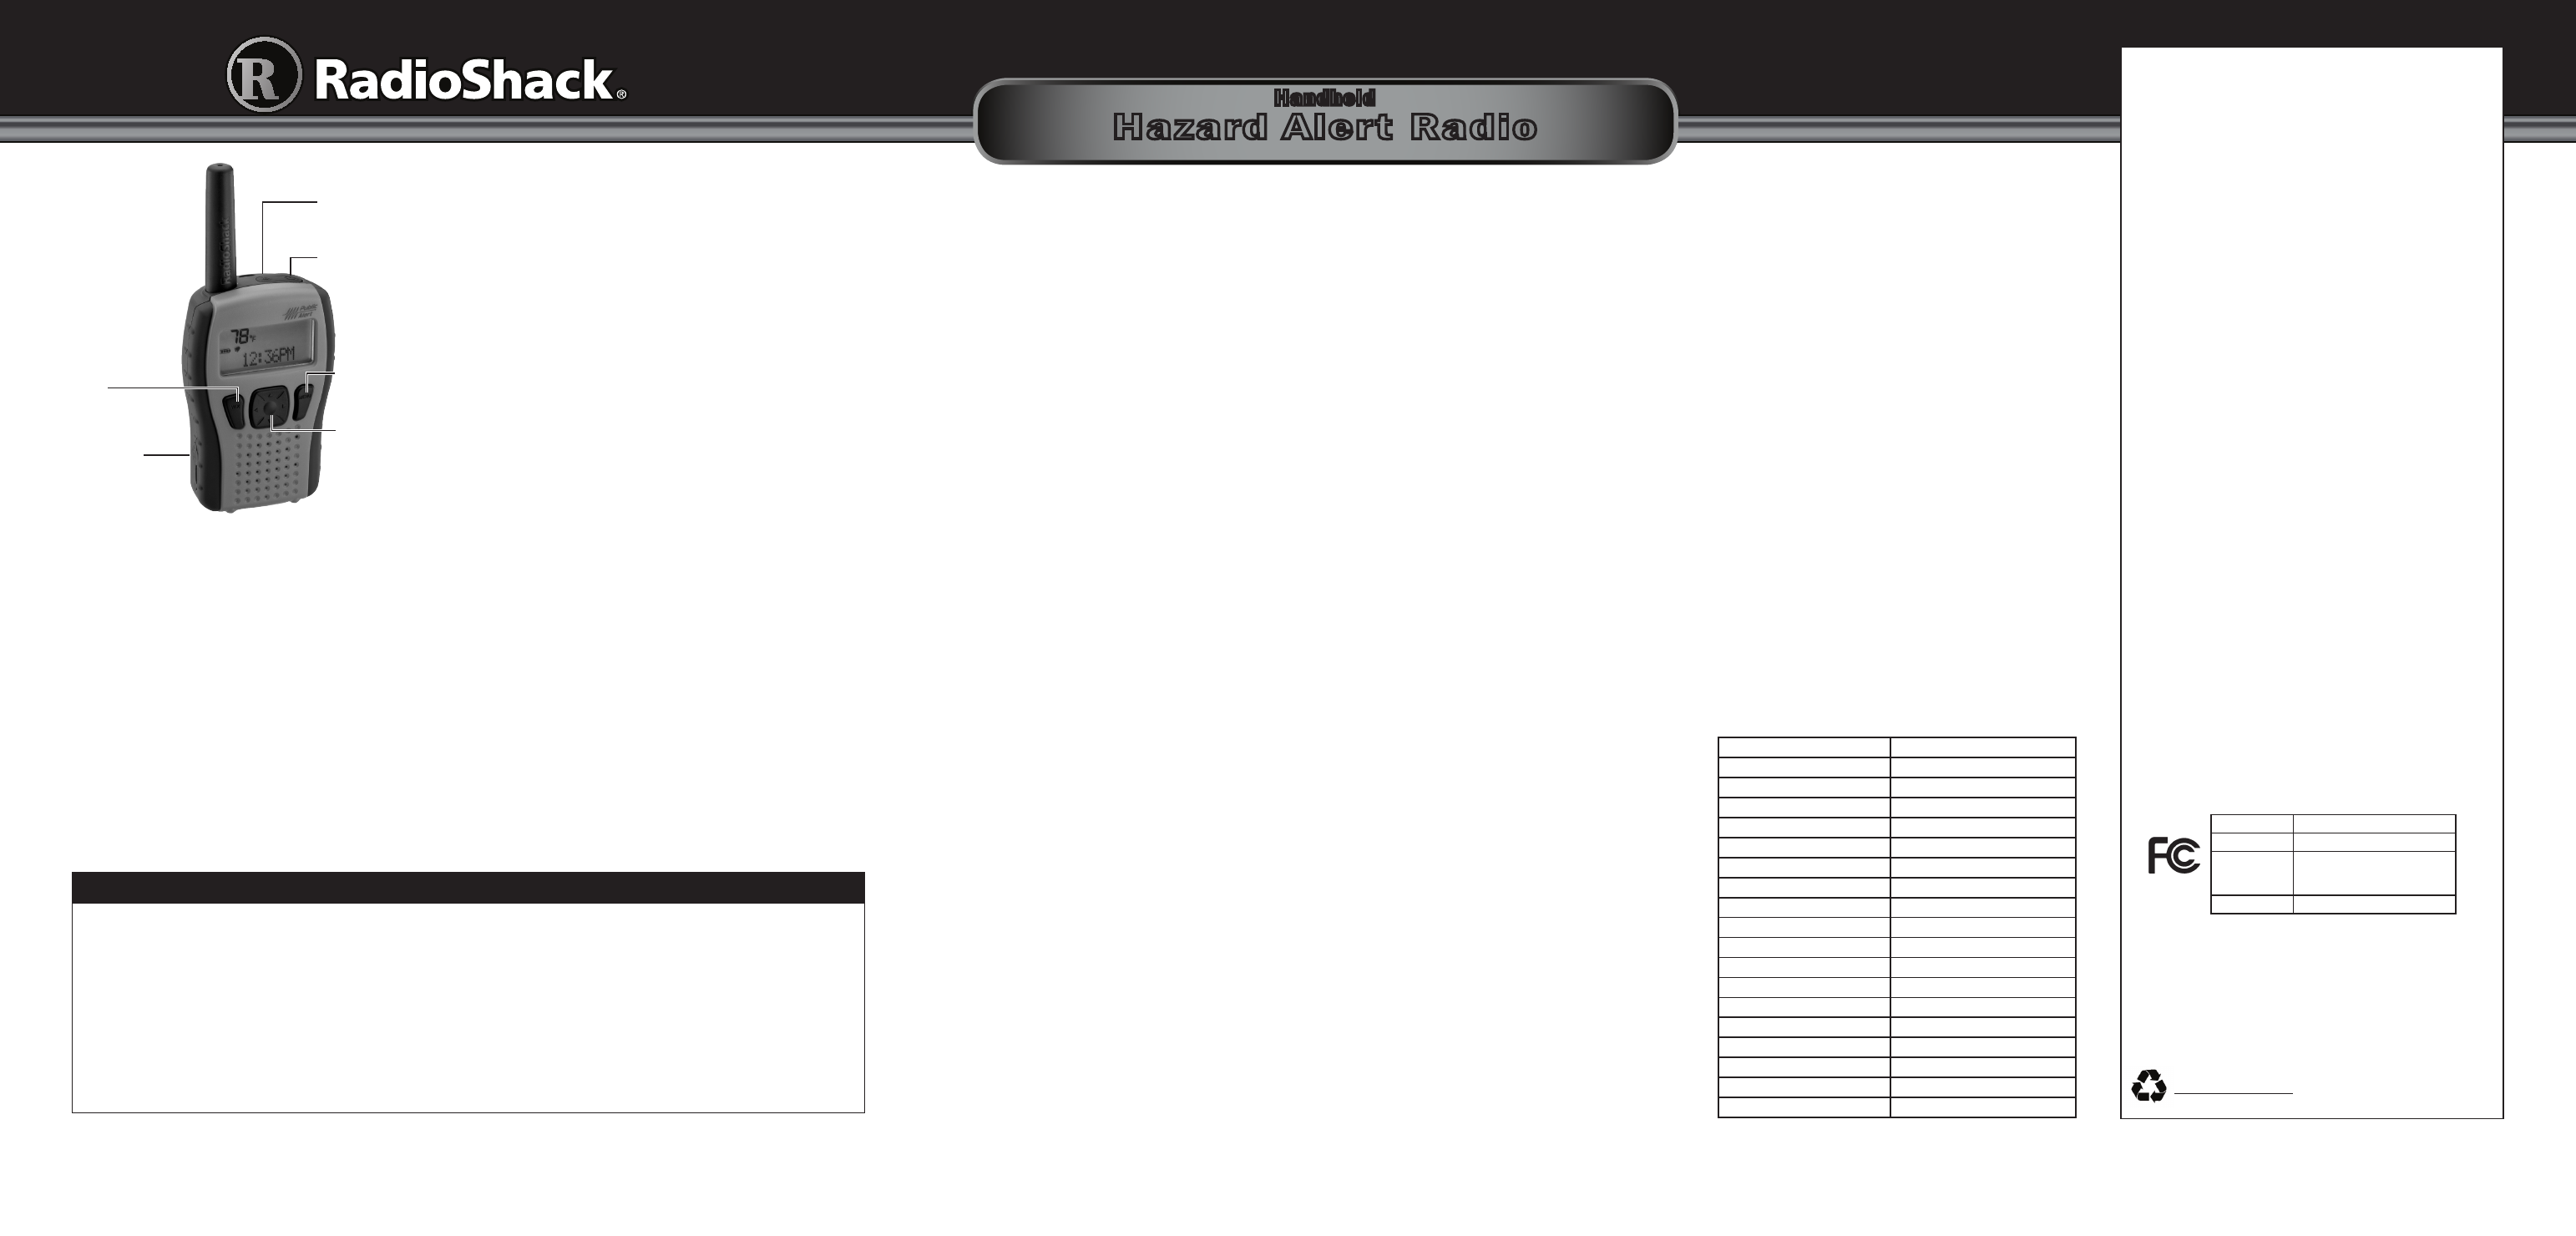
Hold down G for two
seconds to turn on or off
TR/HM
Select Travel mode or
Home mode.
DC 6V jack
Selecting Temperature Display Mode
1. Press MENU. Then repeatedly press or until
TEMPERATURE appears.
2. Press . The current temperature reading flashes.
3. Press or to select temperature display mode (ºF or
ºC). The temperature is updated every 30 seconds.
4. Press to confirm. Press MENU to exit.
Selecting a Channel
1. Press MENU. Then repeatedly press or until
SELECT CH appears.
2. Press .
To automatically search for channels, press when
AUTO appears. CHANNEL and SEARCHING …
appear. If there is an available channel, CHANNEL,
and the number of the currently selected channels, and
AVAILABLE appear. If there is no available channel, NO
CHANNEL, AVAILABLE, BACK TO CHANNEL, and
the number of the last selected channel appear. AUTO
appears and the alert radio beeps.
To manually search for channels, press when
MANUAL appears. CHANNEL and the number of the
currently selected channels appear. The alert radio
tunes to a channel and turns on the broadcast. To select
another channel, repeatedly press or until the
desired channel number appears.
Press to confirm the selection. A beep sounds and
CH, the number of the currently selected channels, and
SELECT appear. Then SELECT CH appears. Press MENU
to exit.
Notes:
• If Auto mode was selected previously, AUTO appears. If
Manual mode was selected previously, MANUAL appears.
• During manual channel selection, the weather broadcast
turns on so that you can verify a station exists on the selected
channel.
• The alert radio automatically searches for and tunes to the
strongest weather broadcast channel in your area if you
select AUTO.
Selecting Alert Mode
You can set the alert radio to respond to an NWS alert
broadcast in one of two ways:
TONE – The alert radio sounds an alert for five minutes or
until End of Message is received and an alert description
appears until the alert’s effective time expires. To turn off
the alert sooner, press WX.
Note: The alert radio automatically selects TONE for the first
time you turn it on.
VOICE – The alert radio sounds an alert for about eight
seconds, and then automatically turns on the weather
(voice) broadcast for five minutes. It also displays the alert
description (such as TORNADO WARNING) until the alert’s
effective time, received as part of the NWS broadcast code,
expires.
1. Press MENU. Then repeatedly press or until ALERT
MODE appears.
2. Press .
3. Press or to select TONE or VOICE.
4. Press to confirm, or press to return without
changes.
5. Press MENU to exit.
Missed Alert Reminder
The alert radio beeps about every 10 seconds after a
specific weather alert broadcast ends and until the weather
alert expires. This is called a missed alert reminder.
1. Press MENU. Then repeatedly press or until ALT
REMINDER appears.
2. Press . Í (off) or % (on) appears.
3. Repeatedly press or to select Í or %. When the
desired mode appears, press to select. Press to
return without changes.
4. Press MENU to exit.
The following weather alert messages will generate a
missed alert reminder
avalanche warning
hurricane warning
blizzard warning
immediate evacuation
biological hazard warning
boil water warning
chemical hazard warnning
law enforcement warning
civil danger warning
dam break warning
coastal flood warning
contagious disease warning
dust storm warning
nuclear power plant warning
emergency action notification
radiological hazard warning
food contamination warning
flash freeze warning
earthquake warning
severe thunderstorm warning
freeze warning
shelter in-place warning
fire warning
special marine warning
flash flood warning
wild fire warning
flood warning
tornado warning
hazardous material warning
iceberg warning
high wind warning
industrial fire warning
civil emergency message
land slide warning
tropical storm warning
volcano warning
tsunami warning
winter storm warning
Adjusting Voice and Tone Volume
1. Press WX to turn on the broadcast.
2. Repeatedly press or to adjust the volume to the
desired listening level. VOLUME: and the volume level
appear.
3. Press WX to turn off the weather broadcast.
4. Repeatedly press or to adjust the alert tone volume
to the desired listening level. TONE VOL: and the alert
tone level appear.
Setting the Alarm
1. Press MENU. Then repeatedly press or until SET
ALARM appears.
2. Press . É and the alarm time appear. The first time you
activate the alarm, the alarm time shows 12:00 AM.
Note: Repeatedly press or to enable or disable the alarm.
The alarm is enabled with É on and disabled with É flashing.
3. Press . The hour digits flash. Then press or to set
the desired hour.
4. Press . The minute digits flash. Repeatedly press or
to set the desired minutes.
5. Press . AM or PM flashes. Repeatedly press or to
make your selection.
6. Press to confirm. A long beep sounds. Press MENU to
exit.
At the set alarm time, the alert radio generates an alarm.
Press any button to stop the alarm.
Note: The alarm duration is one hour under standby mode and
five seconds only during an NWS alert broadcast.
Setting the Clock
1. Press
Press MENU. Then repeatedly press
epeatedly press
press or until SET
CLOCK and Ì appear.
2. Press . The hour digits flash. Press or to set the
hour.
3. Press . The minute digits flash. Repeatedly press or
to set the minutes.
4. Press . AM or PM flashes. Repeatedly press or to
choose the desired format.
5. Press again to store the time. A long beep sounds to
confirm the entry.
6. Press MENU to exit.
Note: Hold down MENU to view the clock time during NWS alert
broadcast.
Battery Notes
• Dispose of old batteries promptly and properly. Do not
burn or bury batteries.
• Use only fresh batteries of the required size and
recommended type.
• Do not mix old and new batteries, different types
of batteries (standard, alkaline, or rechargeable), or
rechargeable batteries of different capacities.
• If you do not plan to use the alert radio for a month or
more, remove the batteries. Batteries can leak chemicals
that can damage electronic parts.
Installing Batteries
1. Slide down the latch on the battery compartment cover
and remove the cover.
2. Install 3 AA batteries (not supplied) as indicated by the
polarity symbols (+ and –) marked inside.
3. Replace and secure the cover.
Full battery power is indicated on the display as j. When
battery power is weak,
;
appears. Further operations are
not allowed until you replace the batteries.
Note: Be sure to turn off the power and replace new batteries
within 1 minute as to keep the set clock time. If it takes more
than 1 minute to replace the batteries, you may be need to reset
the clock time.
U.S. Pat. Nos. 7,130,600 and 7,050,784
WX
Press to listen to a
broadcast.
MENU
Press to select menu
items.
Press to navigate the
programming menu
and adust the volume.