Assembling the cutting center, Cutting hard foods – Presto LeverEdge Knife User Manual
Page 2
See Professional Cutting
Tips DVD,
Chapter
1
See Professional Cutting
Tips DVD,
Chapter
2
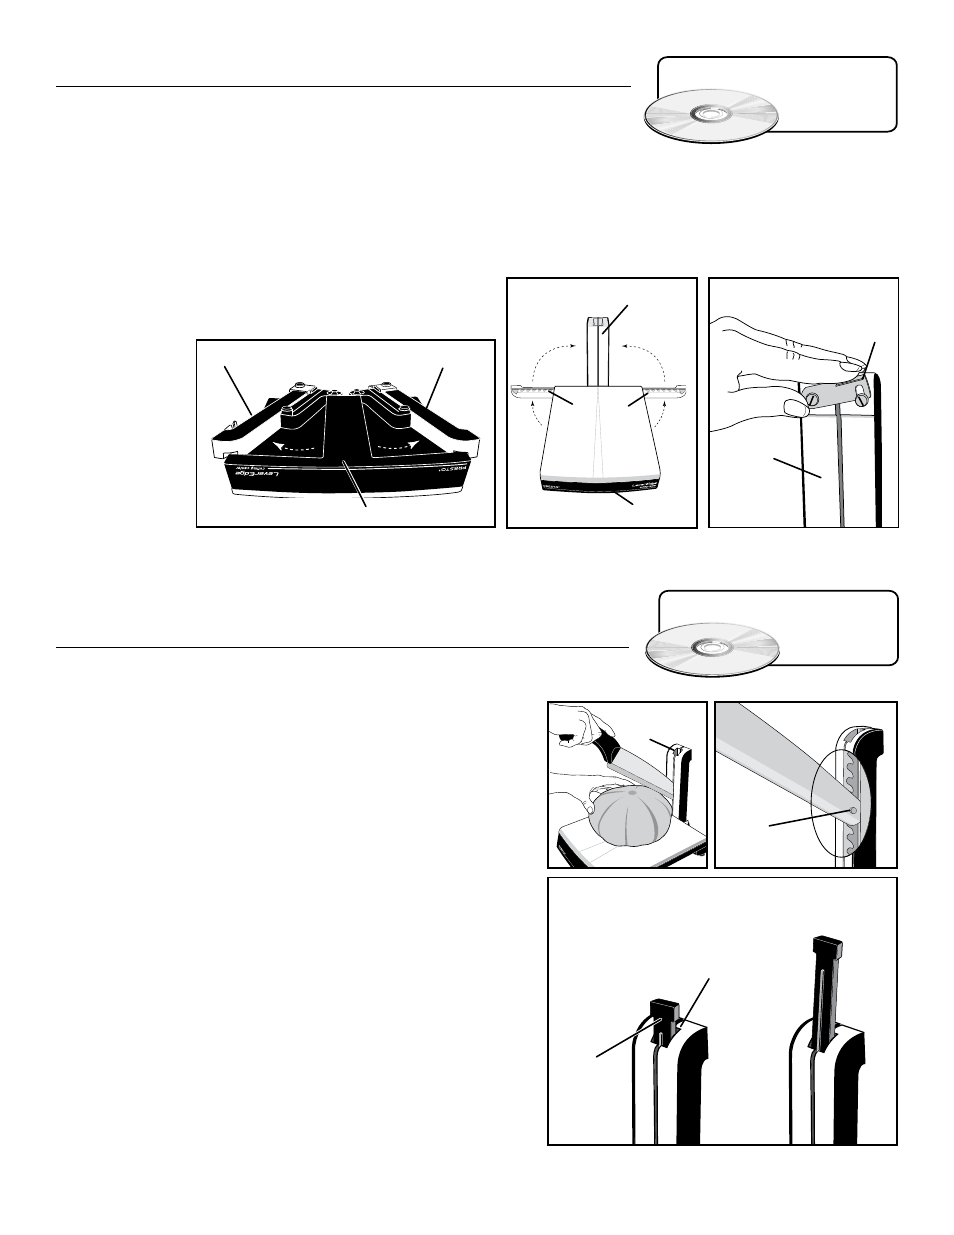
Assembling the Cutting Center
The cutting center will be in the storage position when you take it out of the
box. In order to use the unit, you will need to unfold the pivot post to its cutting
position. Follow these easy steps:
1. Begin with the cutting board base turned upside down on the counter. Note the location of the two sections of the
pivot post. Swivel the two sections of the pivot post outward as shown in Fig. B.
2. Turn the cutting board base over and continue to move the posts until they completely clear the base. Then rotate
them upward until they come together in a vertical
position (Fig. C).
3. Lock the two sections together with the latch on the
back of the
post (Fig. D).
Rotate the
latch until
the notch fits
securely over
the screw. You
are now ready
to begin using
the cutting
center.
Cutting Hard Foods
with the LeverEdge
cutting center
Remember to always use the white cutting board when cutting
with the LeverEdge
knife.
1. Place the food to be cut on the cutting center approximately
one inch from the pivot post.
2. Put the tip of the LeverEdge
knife into the slot at the top of
the pivot post. Slide the knife down until the tip of the knife is
lower than the top of the food, a portion of the blade rests on
the top of the food, and the knife handle is in a comfortable
position (Fig. E).
3. Pull the knife toward you slightly until the pivot pin on the end
of the blade engages in one of the pivot points in the pivot post
(Fig. F). Engaging the pin in the pivot point is what gives you
the extra leverage you need to cut hard foods.
4. Slide the blade lock down into the slot
in the pivot post (Fig. G). This will lock the knife in position,
so it stays in place while you make your cut. You will know the
blade is engaged when only the top of the lock is visible.
5. Once the knife is locked in position, push down on the knife
handle to make the first cut. Extra pressure may be needed for
especially hard foods.
Fig. B
Cutting board base
Pivot post
Pivot post
Fig. D
Pivot post
Latch
Fig. C
Pivot post
vertical
position
Cutting board base
Pivot posts
clear of
base
Fig. G
Blade
lock
Slot
WRONG
RIGHT
Slot
Pin in pivot
point
Fig. F
Fig. E
2