Assembly – Kawasaki NINJA 74110 User Manual
Page 14
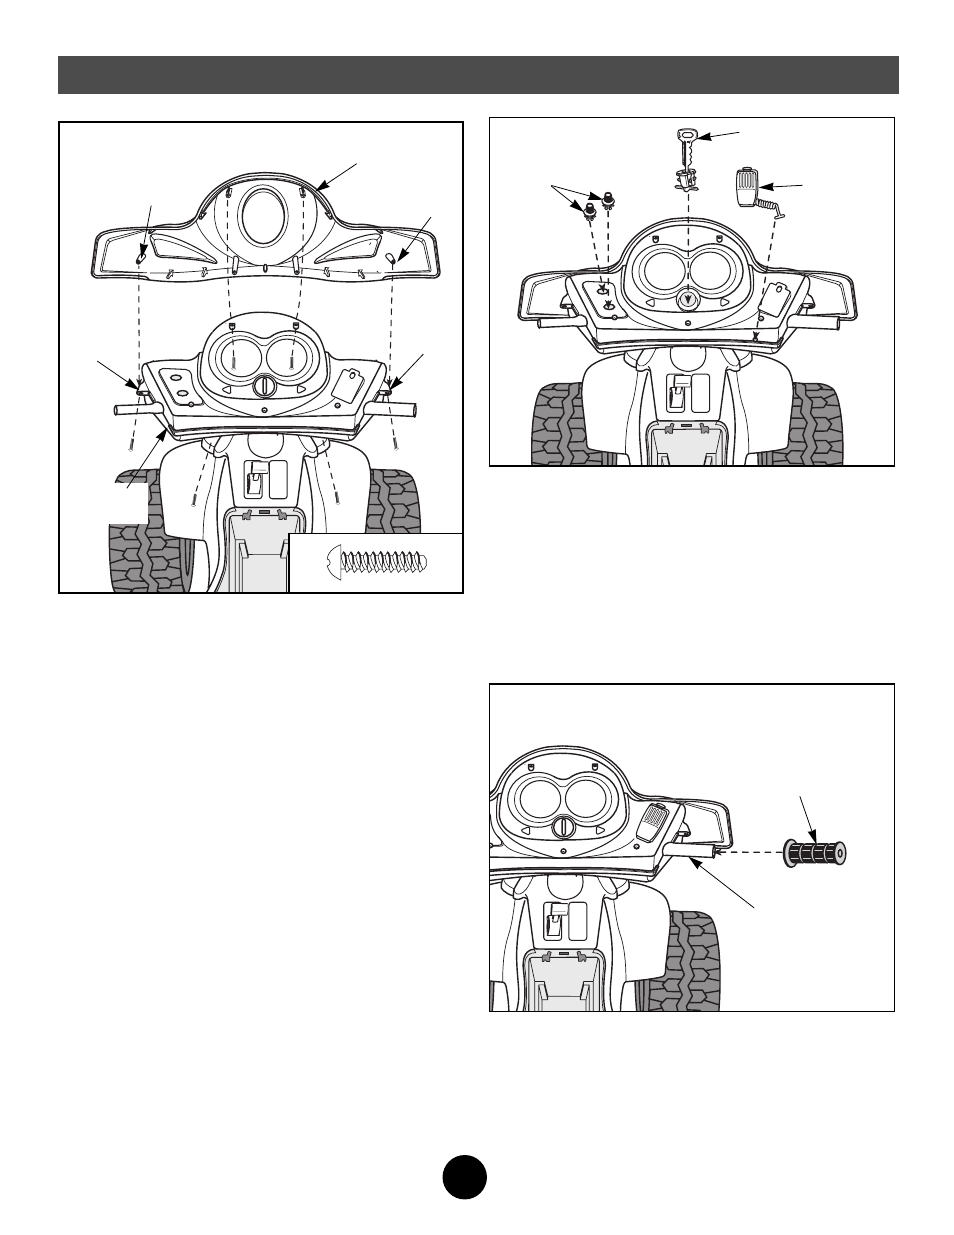
Assembly
• Fit the front fairing onto the handlebar assembly. Make
sure that the screw tabs on the handlebar assembly are
aligned with the screw pegs on the front fairing.
• Insert four #8 x
3
/
4
" screws through the top half
of the handlebar housing and into the front fairing and
tighten the screws with a Phillips screwdriver. Do not
over-tighten.
• Insert two #8 x
3
/
4
" screws up through the bottom half of
the handlebar housing and into the front fairing and
tighten the screws with a Phillips screwdriver.
Do not over-tighten.
Helpful Hint: You may want to use a long screwdriver to
tighten the screws going into the bottom half of the
handlebar housing.
19
Handlebar
Assembly
Screw
Tab
Screw
Peg
Front Fairing
Screw
Tab
Screw
Peg
20
• Bend the plastic tip at the end of the microphone cord so
that it forms a "T".
• Insert the plastic tip through the hole in the handlebar
housing.
• Pull lightly on the microphone cord to make sure it is
secure in the dash.
• Fit the tab on the back of the microphone into the hole in
the center of the dash to hook it to the dash.
• Snap the key assembly into the large hole in the dash.
• Snap the radio knobs into the holes in the dash.
Microphone
Key Assembly
Knobs
Note: The left and right handgrips are not
interchangeable! The hole in the left handgrip is smaller
than the hole in the right handgrip.
• Fit the right hand grip onto the soundbox stem on the
right side of the handlebar. If it is difficult to slide the
hand grip onto the soundbox stem, moisten the hand
grip.
• Repeat this procedure to fit the left handgrip onto the
left side of the handlebar.
Soundbox Stem
Right Hand Grip
21
14