Mounting the battery charger, Figure 2.7 – Invacare 1900 User Manual
Page 13
SECTION 2—OPERATING THE BATH LIFT
13
6. After ten minutes, rinse the seat surface, safety strap, shoulder strap, arm rests, and
any other non‐electronic surface with the shower wand of the bath. Refer to the
individual bathing unit’s owner’s manual for using the shower wand.
CAUTION
DO NOT spray the push handles, scale, or hand pendant with water. Sprayed water
may damage the electronic components of the lift.
7. Lightly wipe the push handles, scale, and hand pendant with a damp cloth.
8. Dry all surfaces with a clean towel.
9. Remove the bath lift from the tub. Reverse STEPS 13 to 16 in Transferring into/out of
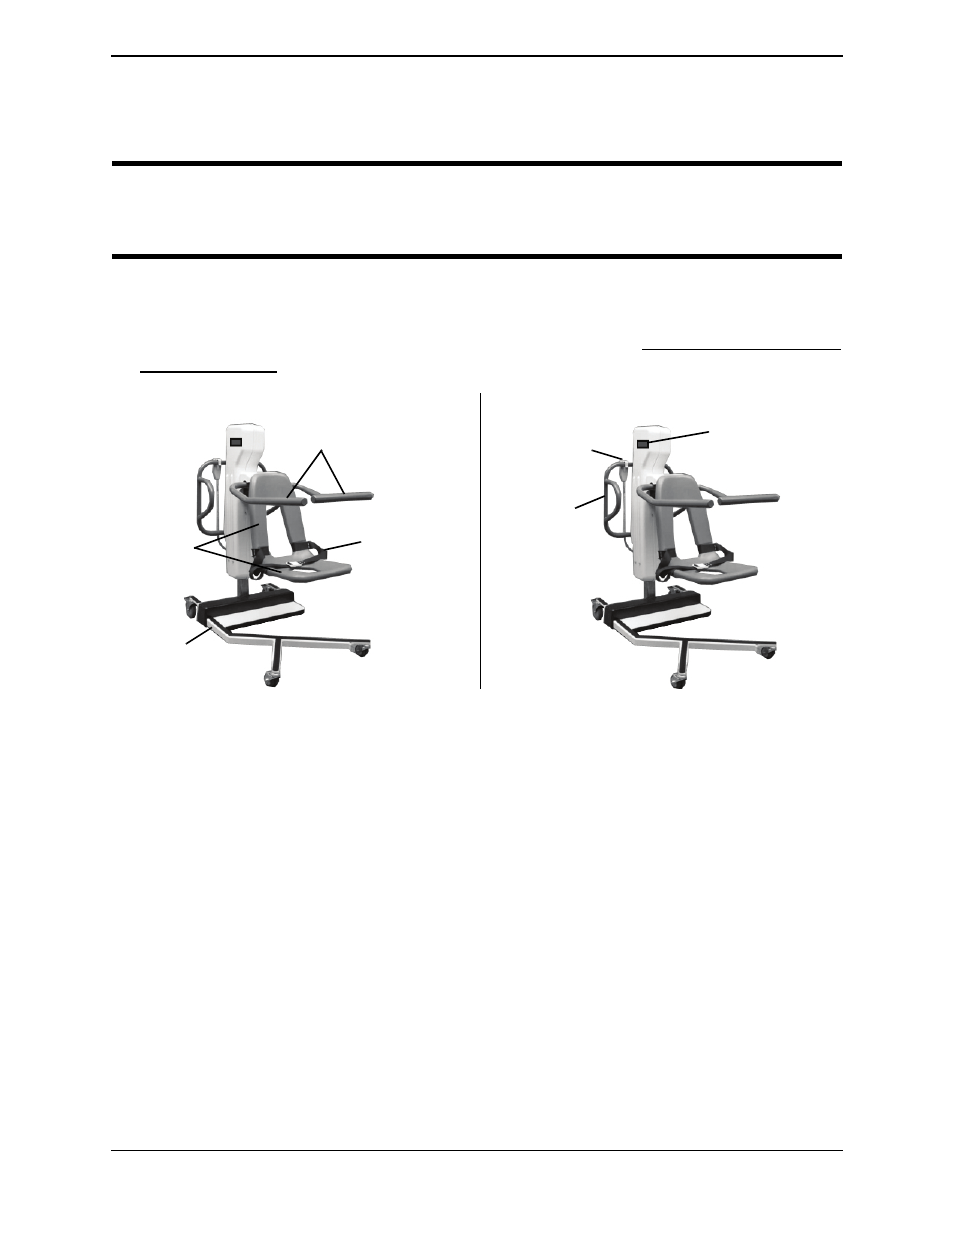
FIGURE 2.7 Disinfecting the Lift
Mounting the Battery Charger
NOTE: For this procedure, refer to FIGURE 2.8.
NOTE: Refer to your local regulations concerning proper mounting procedures.
1. Place the battery charger with mounting bracket on the wall at the desired position.
2. With a pencil, mark the middle hole position.
3. Measure down 6½ inches from the pencil mark and drill one mounting hole.
4. Install the bottom mounting screw until there is an approximate 1/8‐inch gap between
the screw head and the wall.
5. Install the battery charger with mounting bracket onto the bottom mounting screw.
6. Drill the remaining two mounting holes.
7. Install the two remaining mounting screws through the mounting bracket and into the
wall. Tighten securely.
8. Plug the battery charger into the wall electrical outlet.
NOTE: The On LED should illuminate.
DETAIL “A” - NON ELECTRONIC SURFACES
Seat
Surface
Safety Strap
Arm Rests
Base
DETAIL “B” - ELECTRONIC SURFACES
Push
Handles
Hand
Pendant
NOTE: Shoulder
Strap not shown.
Scale