2 chassis disassembly – Motorola PR400 User Manual
Page 76
July, 2004
6881096C24-A
7-8 Limited Keypad Model Disassembly and Re-assembly: Disassembling and Re-assembling the Radio — General
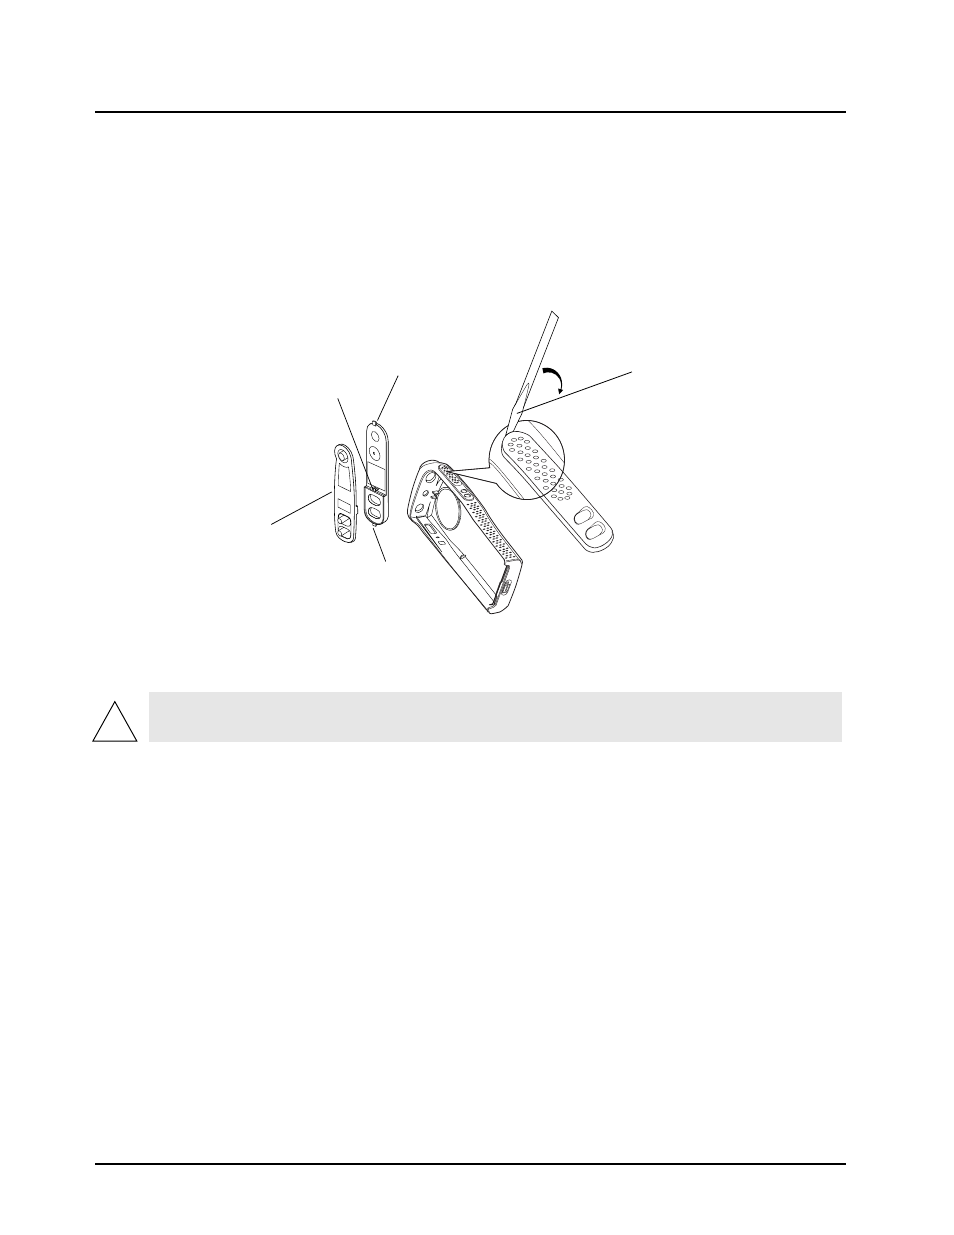
7.4.1.5 PTT Disassembly
1.
If required, the PTT (
) can be disassembly using a small screwdriver, as follows:
a.
Insert the tip of a small screwdriver underneath the PTT and unsnap the top tab.
b.
Pry the PTT away from the radio housing.
c.
Inspect the two hooks. If bent or broken, the PTT must be replaced.
d.
Remove the PTT seal.
7.4.2
Chassis Disassembly
1.
Remove the O-ring.
2.
Use a Torx™ screwdriver with a T6 bit to remove the four screws (
) holding the main
board to the chassis.
3.
The audio jack shroud can be removed from the main board.
4.
Lift the main board from the chassis (
5.
Remove the battery contact seal.
Figure 7-9. PTT Removal
CAUTION: Refer to the CMOS CAUTION paragraph (see 3.3) before removing the main board. Be sure
to use Electrostatic Discharge protection when handling circuit boards.
Screwdriver
PTT Seal
Tab
Tab
Hooks
!
- T6220 (70 pages)
- MOTOTRBO XPR 4580 (60 pages)
- Kem-ml34301 (5 pages)
- XV1100 (35 pages)
- RDM2080D (78 pages)
- CLP1060 (56 pages)
- FV200 (2 pages)
- HT1550 XLS (30 pages)
- HT1250 (58 pages)
- T4300 (32 pages)
- RDX SERIES RDV5100 (99 pages)
- 4580 (92 pages)
- T5820 (42 pages)
- and T6220 (70 pages)
- RDX RDU4160D (15 pages)
- CLS1110 (60 pages)
- CLS1410 (60 pages)
- GP644 (2 pages)
- Motorla Digital on-site two-way radios and accessories DTR650 (7 pages)
- CLS1110 CLS1410 (30 pages)
- T7400 (41 pages)
- T5300 (36 pages)
- T5320 (40 pages)
- Two-Way Radio GP3188 (2 pages)
- XTN Series XU1100 (60 pages)
- T9650 (2 pages)
- 200 (32 pages)
- T6550 (38 pages)
- Professional Series Portable Two-way Radio GP338 XLS (4 pages)
- RADIUS GM300 (8 pages)
- MTP810 EX (59 pages)
- APX 7500 (8 pages)
- XTNID (69 pages)
- PROFESSIONAL MOBILE RADIO GM338LS (4 pages)
- MBP15 (32 pages)
- XV2600 (60 pages)
- RDU4160D (104 pages)
- T5950 (36 pages)
- CDM1550 LS (5 pages)
- KEM-PK14190-74 (2 pages)
- CP040 (292 pages)
- MOTOTRBO Professional Digital Two-Way Radio System (20 pages)
- TALKABOUT FV300 (2 pages)
- T289 (22 pages)
- IMPRES THE INTELLIGENT PORTABLE RADIO ENERGY SYSTEM MTP750 (4 pages)