Removing the usb pcb, Removing the display unit, Removing the lcd front cabinet – Matsushita CF-74ECBAXBM User Manual
Page 27: Removing the lcd and the inverter
9-5
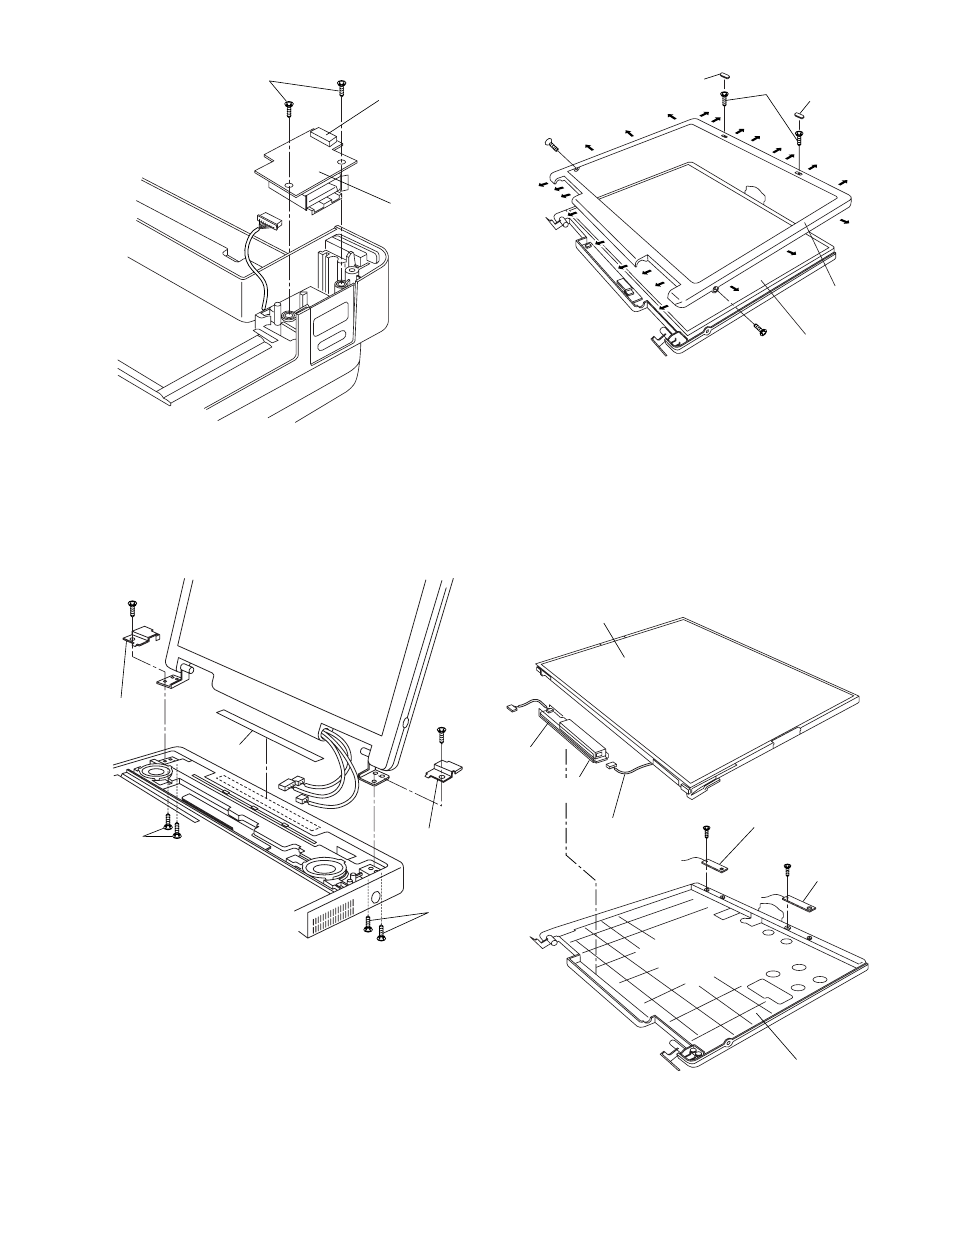
9.1.14. Removing the USB PCB
1. Disconnect the Cable from the Connector (CN1701).
2. Remove the two Screws
3. Remove the USB PCB.
Screws
9.1.15. Removing the Display unit
1. Remove the four Screws
side.
2. Remove the two Screws
side.
3. Remove the Display Unit.
4. Remove the Hinge Screw Cover L and R.
5. Remove the Gasket.
Screws.
9.1.16. Removing the LCD Front Cabinet
1. Remove the two LCD Leg Rubbers, and then the two
Screws
2. Remove the two Screws
3. Release the 23 Hooks joining the LCD Front and Rear
Cabinet on the LCD Front Cabinet outward. (See the Fig-
ure),
4. Remove the LCD Front Cabinet.
Screws
Screws
9.1.17. Removing the LCD and the Inverter
USB PCB
CN1701
Display Unit
Gasket
Hinge
Screw
Cover L
Hinge
Screw
Cover R
LCD Leg
Rubber
LCD Front
Cabinet
LCD Unit
LCD Leg Rubber
LCD/INV. Cable
Inverter
Inverter Case
LCD Unit
LCD Rear Cabinet
W-LAN PCB L
W-LAN PCB R