Miomare 103467-14-01 User Manual
Page 8
12 GB/MT
13
GB/MT
Stainless steel riser rail
Q
Intended use
Suitable for use with all pressure-resistant hot water
systems such as central heating, continuous-flow
water heater, pressure boiler etc. It is not suitable
for low-pressure water heaters such as wood-fired
or coal-fired hot-water heaters, oil-fired or gas-fired
heaters, open electrical storage heaters. If in doubt,
please consult a plumber or specialist. The product
is intended for personal use only and not for medi-
cal or commercial use. The manufacturer does not
accept any liability for any damage caused by
improper use.
Q
Description of parts
1
Hand shower
2
Gaskets
3
Shower hose
4
Water-saving insert
5
Upper wall bracket
6
Lower wall bracket
7
Screws (approx.
ø
3.6 x 34 mm)
8
Covering caps
9
Shower rod
10
Hand shower holder
11
Dowels (approx.
ø
6 mm)
12
Soap dish
13
Covering cap
14
Spray plate
15
Hand shower lever
16
Adjustment Knob
17
Screw (approx.
ø
3.8 x 10 mm)
Q
Technical data
Hand shower: approx. 28.5 x 15 cm (H x
ø
),
5 adjustable positions
Shower rod: approx. 70 cm, metal
Shower hose: approx. 150 cm, metal,
G1/2” (approx. 21 mm) stand-
ard connection
Safety advice
Avoid the risk of injury!
CAUTION! DANGER OF INJURY! Please
ensure that no parts are damaged and that all
parts are correctly assembled. Incorrect assem-
bly or fitting may lead to injury. Damaged
parts can adversely affect safety and proper
function.
CAUTION! RISK OF SCALDING! When
making the hot water setting please ensure that
the temperature of the water is not too high.
CAUTION! RISK OF SCALDING! Using
the water stop function may alter the tempera-
ture of the water. Check the water temperature
before stepping into the shower.
J
The shower rod
9
should not be used to attach
or support anything, as the fixings and the rod
9
are designed to support only their own weight.
CAUTION! RISK OF SCALDING! Adjusting
the hand shower
1
may change the tempera-
ture of the water coming out. Check the water
temperature before stepping into the shower.
Avoid damage to property!
J
Assembly should only be carried out by an
experienced person!
J
Before wall mounting, check that the wall can
take the weight of the shower rod set. If in doubt,
ask in a specialist shop.
J
CAUTION! WATER DAMAGE! Before drill-
ing, ensure that there are no water pipes where
you intend to drill.
J
Ensure that all gaskets
2
are correctly seated.
J
Please note that gaskets
2
are wear parts and
therefore will require to be replaced from time
to time.
J
Examine the wall before installation and choose
suitable installation fixings. We have supplied
fixings suitable for an ordinary solid masonry wall.
Tip: The hand shower
1
has a water-
stop function: Slightly dripping water
will remind you to turn off the shower.
Q
Mounting
Tip: For fittings with 26.4mm (3/4”) connection,
use an adaptor with 26.4mm (3/4”) inner thread
and 21mm (1/2”) outer thread, available in DIY
store or bathroom shops.
Tip: A water-saving insert
4
is included in your
shower rod set.
Q
Operation
Q
How to adjust the hand shower
j
Adjust the height of the hand shower holder
10
by using the adjustment knob
16
.
j
Adjust the angle at which the hand shower
1
is tilted by using the hand shower holder
10
.
Q
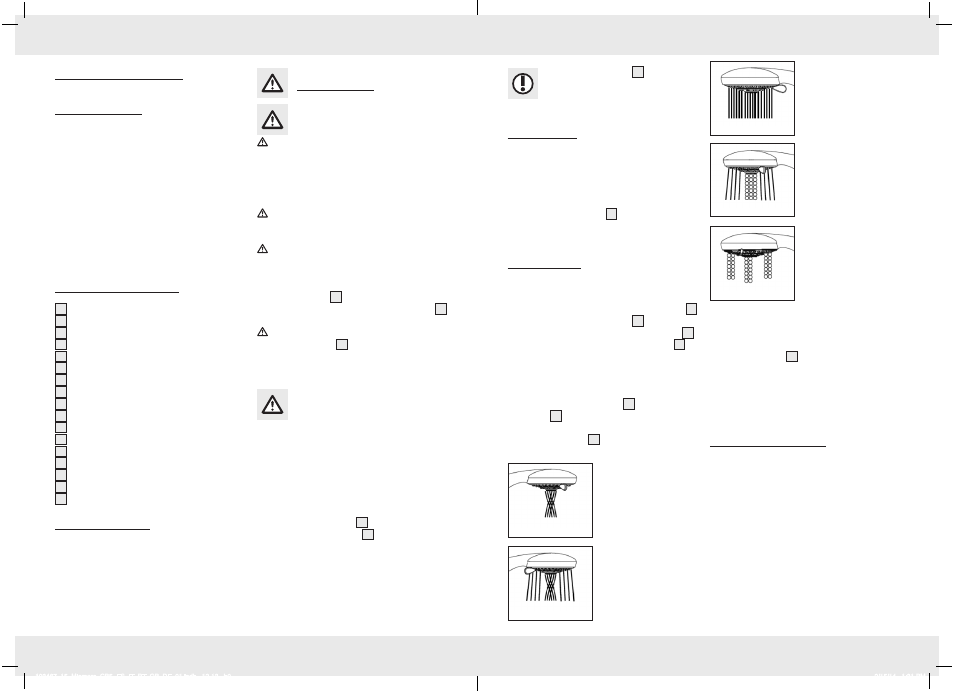
Shower functions
j
Turn the hand shower lever
15
to set the hand
shower
1
function you wish to have (see Fig. E).
The hand shower
1
has the following
functions:
Massage
Spray + Massage
Spray
Spray + Bubbling
Bubbling
Q
Water-saving insert
The water-saving insert
4
reduces the flow of water. This
may have an effect on how your continuous-flow
water heater works. If the flow of water is too low,
your continuous-flow water heater will automatically
switch off.
Q
Cleaning and care
j
Clean the product with a soft, damp cloth and
use a mild cleaning agent if necessary.
j
Remove the limescale on the shower rod set
by using a commercially available limescale
remover. Please follow the directions for using
your cleaning agent.
103467_15_Miomare_CB5_ES_IT_PT_GB_DE_01.indb 12-13 b0
9/15/14 1:31 PM