Unpacking, Product identification, Safety information – Desa 280-IF User Manual
Page 3
www.desatech.com
3
114909-01A
18. Never move, handle, refuel or service a hot,
operating or plugged-in heater.
19. Never attach heater to external fuel tank.
20. Heaters used in the vicinity of tarpaulins,
canvas or similar enclosure materials shall be
located a safe distance from such materials.
The recommended minimum safe distance is
10 feet (304.8cm). It is further recommended
that these enclosure materials be of a fire
retardant nature. These enclosure materials
shall be securely fastened to prevent them
from igniting or from upsetting the heater due
to wind action.
21. Unplug heater when not in use.
22. Never block air inlet (rear) or air outlet (front)
of heater.
UNPACKING
MODEL 160-IF
1. Remove all the materials used to package the
heater for shipment.
2. Open the carton from the top.
3. Remove the flue connection from carton (see
Figure 1).
4. Lift up and remove cardboard packaging.
5. Unscrew the locking screws on wheel-lock
straps (see Figure 1).
6. Insert the flue connection onto the flue outlet
tube (see Figure 4).
7. Carefully lower the heater from pallet.
SAFETY INFORMATION
Continued
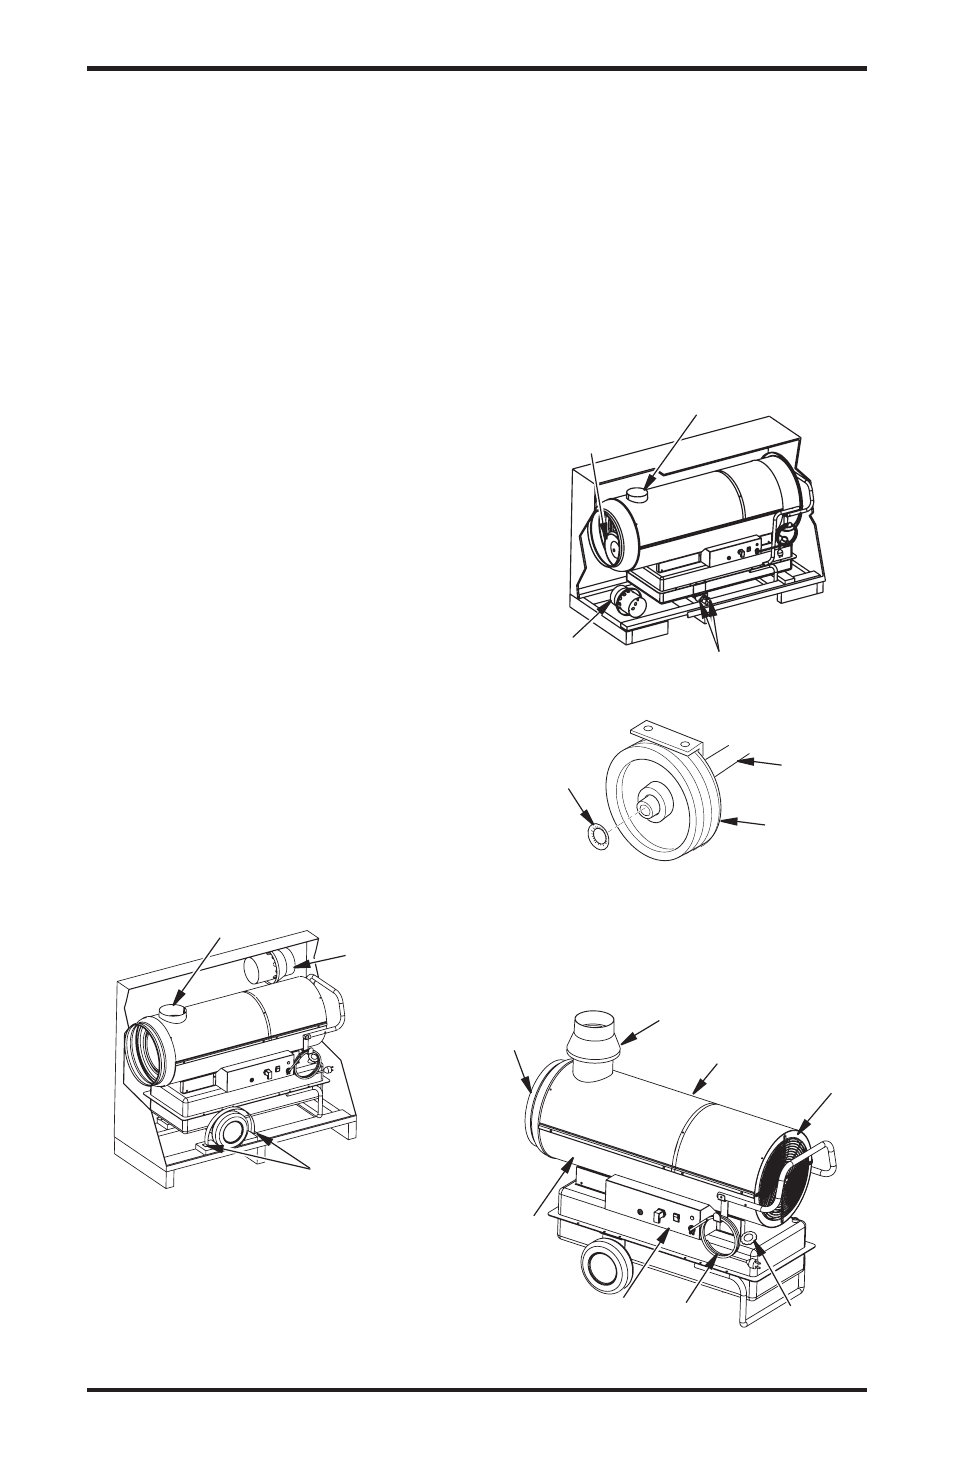
Hot Air
Output
Flue Connection
Upper
Shell
Fuel Tank
Cap
Power
Cable
Control
Panel
Lower
Shell
Fan
Guard
Figure 4 - Vented Portable Forced Air Heater
Figure 1 - Removing 160-IF from Carton
Figure 2 - Removing 280-IF from Carton
Flue
Connection
Locking Screws
Locking Screws
Flue
Connection
Wheels Stored
for Shipping
Flue Outlet Tube
Flue Outlet
Tube
Figure 3 - Wheel/Axle Assembly for
280-IF
Lock
Washer
Axle
Wheel
MODEL 280-IF
1. Remove all the materials used to package the
heater for shipment.
2. Open the carton from the top.
3. Lift up and remove cardboard packaging.
4. Unscrew the locking screws on hub locking
bar (see Figure 2).
5. Remove the wheels from the hot air outlet
(stored for shipping).
6. Lift the heater from the air outlet end.
7. Insert the wheels onto the axle.
8. Insert the locking washer (which is in the
documentation envelope) with the convex side
towards the exterior of the machine; using a
hammer and an appropriate-sized spanner, tap
it gently to fix it into position (see Figure 3).
9. Carefully lower the heater from pallet.
PRODUCT
IDENTIFICATION