2 software functions – Aplex Technology AHM-6086A User Manual
Page 79
AHM-6XX6A User Manual
78
5.2.2 Software Functions
Upon rebooting, the computer automatically finds the new 6000 controller board. The touch
screen is connected but not calibrated. Follow the procedures below to carry out calibration.
1. After installation, click the PenMount Monitor icon “PM” in the menu bar.
2. When the PenMount Control Panel appears, select a device to “Calibrate.”
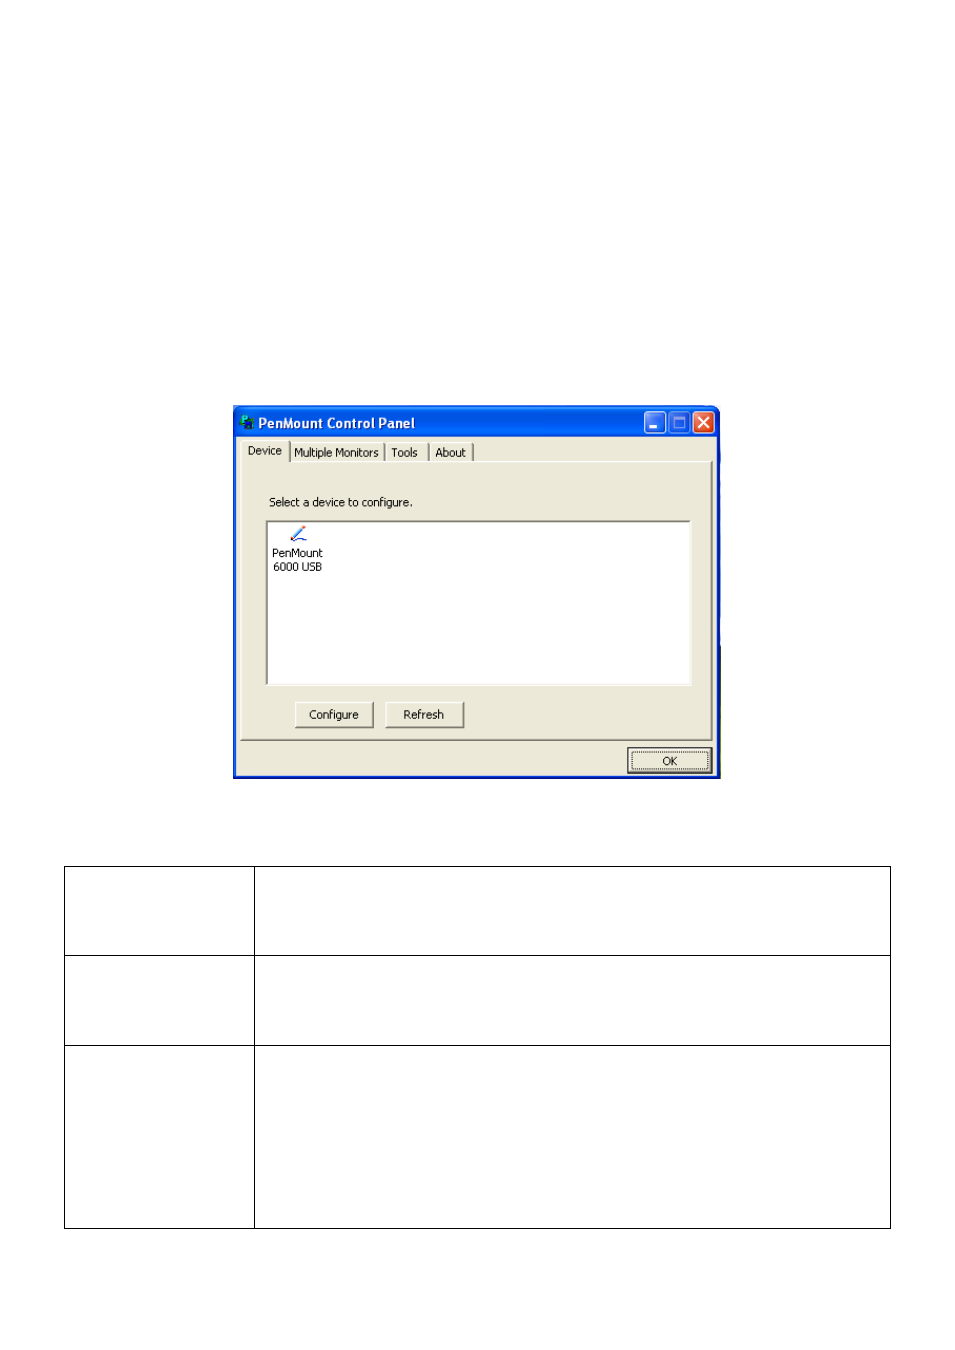
PenMount Control Panel
The functions of the PenMount Control Panel are Device, Multiple Monitors, Tools
and About, which are explained in the following sections.
Device:
In this window, you can find out that how many devices are detected on your system.
Calibrate
This function offers two ways to calibrate your touch screen. ‘Standard Calibration’
adjusts most touch screens. ‘Advanced Calibration’ adjusts aging touch screens.
Standard Calibration Click this button and arrows appear pointing to red squares. Use your finger
or stylus to touch the red squares in sequence. After the fifth red point
calibration is complete. To skip, press ‘ESC’.
Advanced Calibration Advanced Calibration uses 4, 9, 16 or 25 points to effectively calibrate touch
panel linearity of aged touch screens. Click this button and touch the red
squares in sequence with a stylus. To skip, press ESC’.
Command Calibration Command call calibration function. Use command mode call calibration
function, this can uses Standard, 4, 9, 16 or 25 points to calibrate E.g. Please
run ms-dos prompt or command prompt c:\Program Files\PenMount Universa
Driver\Dmcctrl.exe -calibration 0 ( Standard Calibration) Dmcctrl.exe -
calibration ($) 0= Standard Calibration 4=Advanced Calibration 4 9=Advanced
Calibration 9 16=Advanced Calibration 16 25=Advanced Calibration 25