12 3 understanding adaptec installation for, Wooden door – FingerTec AdapTec Plus User Manual
Page 14
14
WALL
WALL
WOODEN DOOR
OUTDOOR
4 feet / 1.2 meter
(recommended)
1
Screws
Back Steel
Plate
2
CEILING
INDOOR
Silver
Nut
Steel
Bar
Allen Key
Screw
Wooden Doorframe
CEILING
INDOOR
Screws
Magnet
Doorframe
Aluminum
Plate
Allen
Key
Screws
3
1
2
2
1
2
3
1
2
3
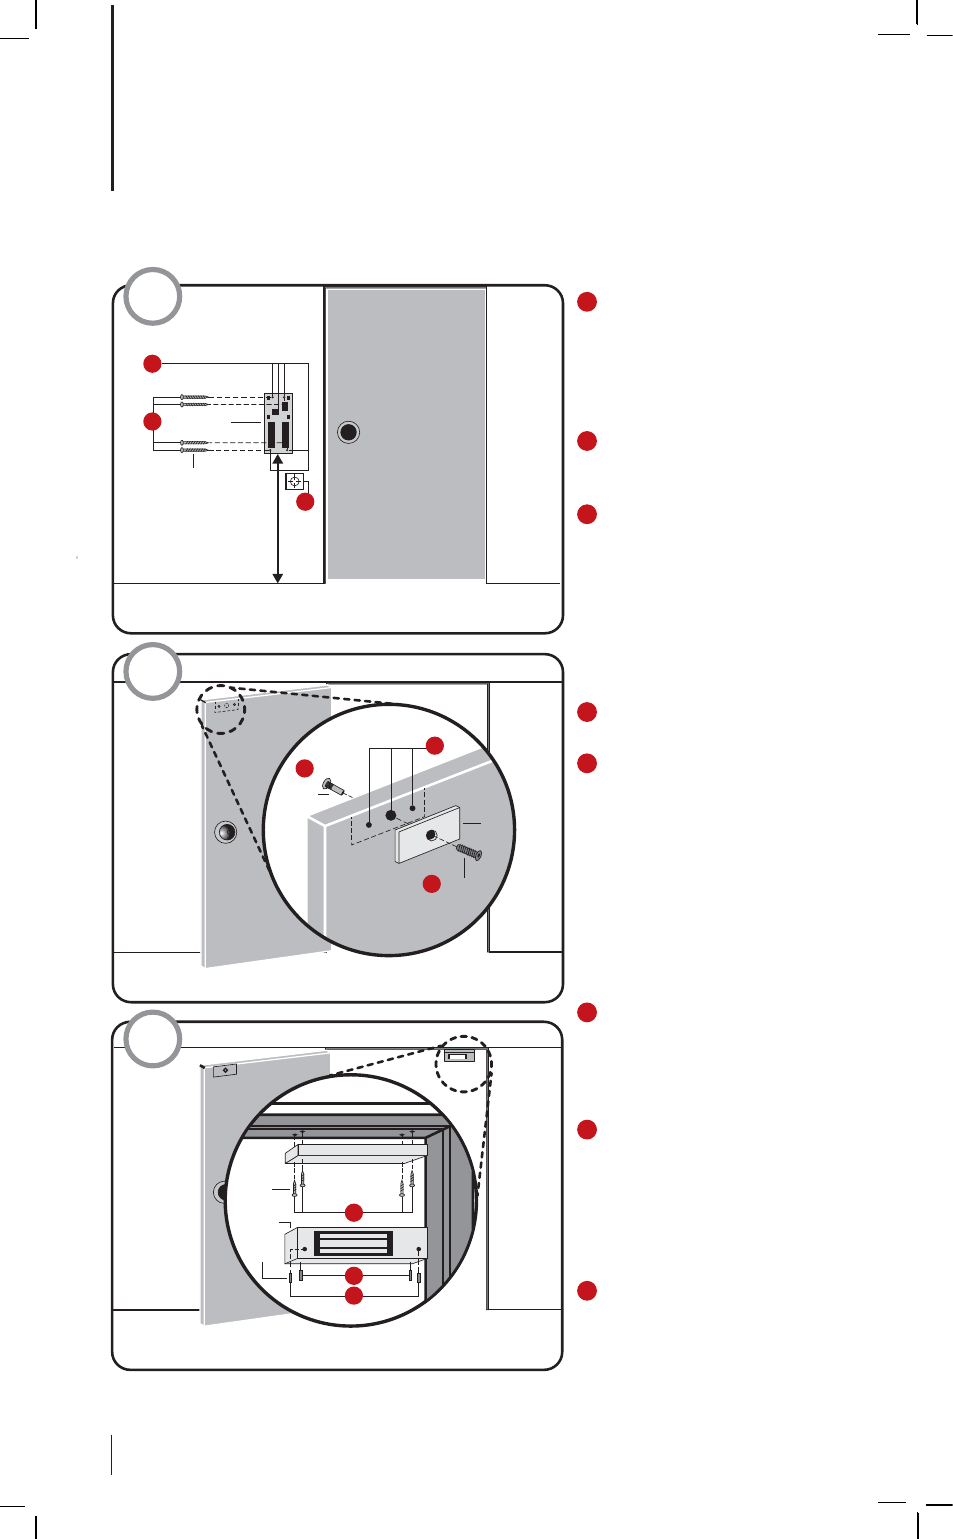
UNDERSTANDING ADAPTEC
INSTALLATION FOR •
Wooden Door
The diagrams below only highlight the use of an EM lock during installation. You may
opt to use a dropbolt/deadbolt/door strike instead. Please consult a qualifi ed techni-
cian/installer before proceeding with the installation.
1
To install FingerTec
AC900/R2 on a wall, drill
5 holes as shown. 4 small
holes are for the screws
and the bigger hole is for
the network cable.
2
Tighten the 4 screws to
fix the
Back Plate
on the
wall.
3
Install the keyswitch as
per instructions given in
the box. The keyswitch is
an override key in case of
a system failure or break-
down.
1
Drill 3 holes on the
wooden door.
2
Place the
Steel Bar
on
the door. Insert the Silver
Nut on one side and the
Allen Key Screw
on the
other side. Tighten the
screw to lock the
Steel
Bar
onto its position.
1
Drill 4 holes on the
wooden frame. Tighten
the 4 screws to fix the
Aluminum Plate
prop-
erly on the doorframe.
2
Use the Allen Key to
tighten the 2 screws at
the bottom of the
Mag-
net
. The Magnet will
stick to the
Aluminum
Plate
when the screws
are tightened .
3
Use the Allen Key to
tighten the other 2
screws on the sides of
the
Magnet.