Installing the trolling motor – MotorGuide Xi5 Wireless Trolling Motor User Manual
Page 14
Section 3 - Product Installation, Wiring, and Battery Information
Page 10
90-8M0082949
eng
JULY 2013
Installing the Trolling Motor
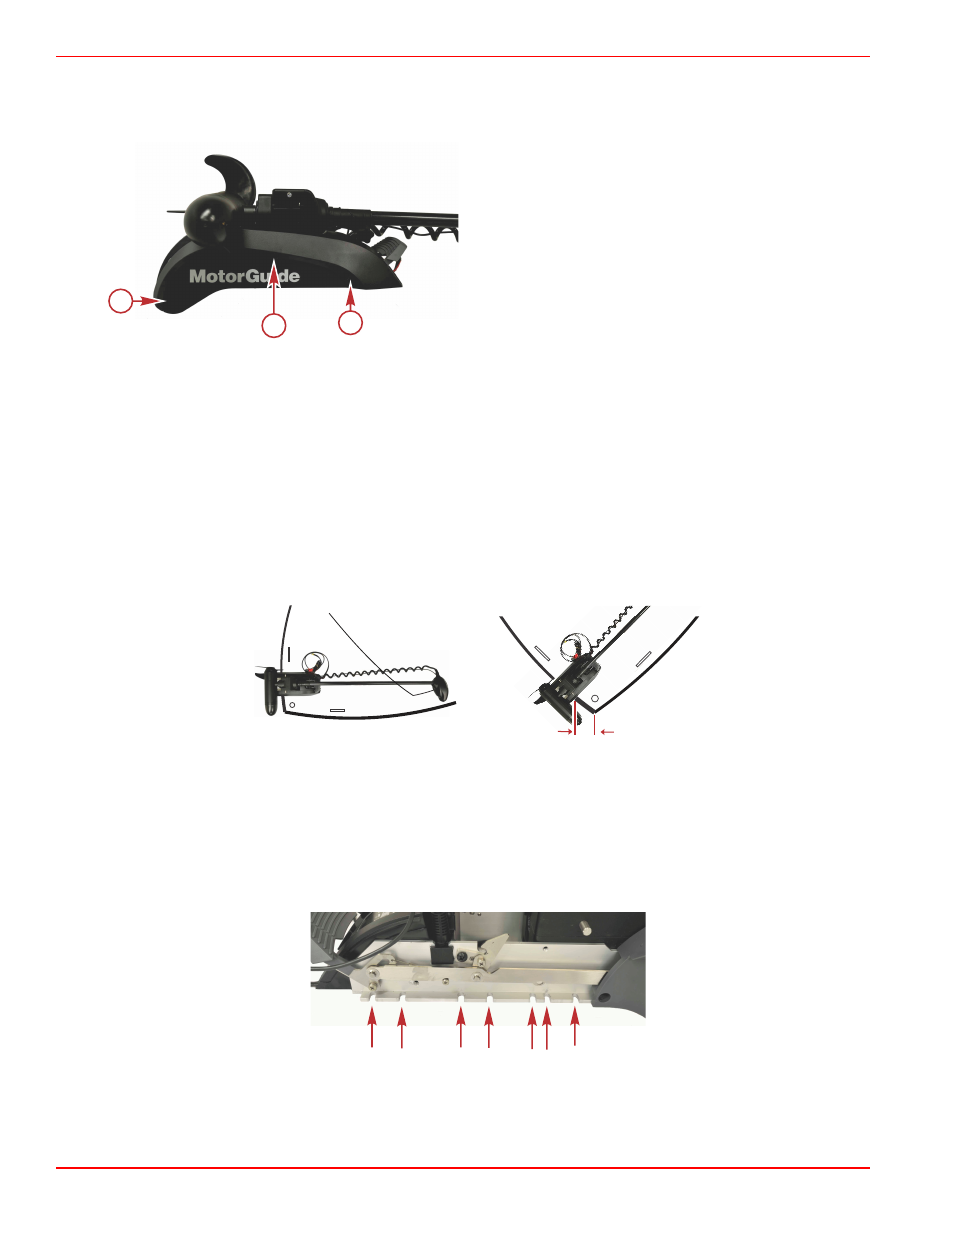
1. Remove the two side panel screws from each side of the deck mount. Gently pull the side panels away from the deck
mount, taking care not to damage the locating tabs, and remove the side panels from both sides of the trolling motor.
a -
Side panel screws
b -
Locating tab
2. If you are replacing an existing MotorGuide or competitive brand trolling motor on your current boat, check if the existing
mounting holes align with the new deck mount before drilling new holes. Ensure that the mounting location meets the
requirements listed in Step 4.
3. If new holes are not required to mount the trolling motor, skip ahead to Step 7.
4. Carefully select an appropriate area on the deck of the boat close to the centerline to install the trolling motor. Ensure that
the forward mounting bolts will not penetrate the hull. Have an assistant hold the trolling motor in position while the
mounting location is being selected.
IMPORTANT: The mounting position must be tested in the stowed and deployed positions before drilling the mounting
holes.
IMPORTANT: Choose an area on the deck with 10.2 cm (4.0 in.) of clearance between the bow of the boat and the deck
mount to prevent interference between the trolling motor and the bow roller when loading or unloading on a steep ramp.
IMPORTANT: Ensure that the head does not protrude beyond the beam of the boat when in the stowed position.
IMPORTANT: A minimum clearance of 13 mm (0.5 in.) is required between the motor column and the rub rail on the boat
when the trolling motor is deployed.
53447
Mounting position with 10.2 cm (4.0 in.) clearance from the bow
5. Place the trolling motor onto the deck of the boat at the selected location in the stowed position. Use the deck mounting
bracket as a template and mark the location of the mounting holes.
IMPORTANT: Four mounting holes (two on each side) are required to securely mount the trolling motor. There are seven
mounting hole positions to choose from on each side of the deck mounting bracket. Choose two hole positions on each
side that work the best with your boat configuration.
IMPORTANT: Select mounting hole locations as far apart as practical on each side of the deck mounting bracket for the
most secure mounting.
53448
Mounting hole locations—same on both sides
6. Drill the mounting holes with a 8 mm (5/16 in.) drill bit. Remove any debris.
a
a
53446
b