1 disassembling mpg401 – INFICON MPG40x ATM to Ultra-High Vacuum Gauge User Manual
Page 22
22
tina48e1-b (2008-10) MPG400-401.om
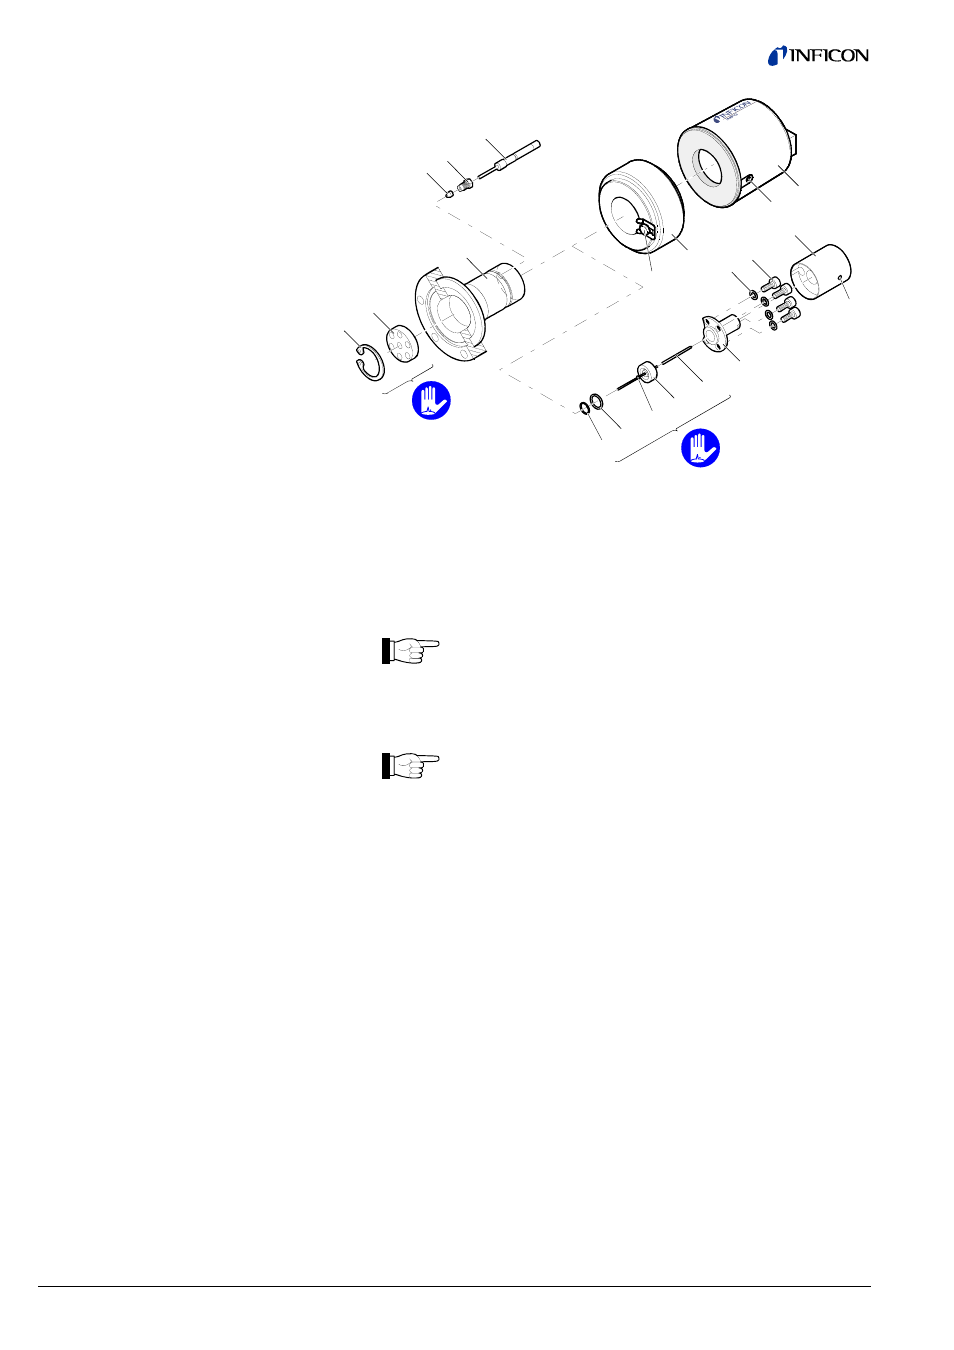
6
3
2
4
1
5
7
13
13a
8
8a
10
11
12
10a
13b
9a
9
9b
9c
Remove the gauge from the vacuum system (
→ 15).
Unfasten the hexagon socket set screw (1) on the electronics unit (2).
Remove the electronics unit without twisting it.
The cover of the electronics unit cannot be removed.
Unfasten the hexagon head screw (3) on the magnet unit (4) and remove
the magnet unit.
The magnetic force and the tendency to tilt make it more difficult
to separate the magnet unit and the measuring chamber (7).
Remove the circlip (5) and the polarity insert (6) from the measuring
chamber.
Unfasten the hexagon socket set screw (9c) and remove the insulator (9b)
without twisting it.
Remove the four hexagon socket screws (8) incl. lock washers (8a) on the
back of the measuring chamber.
Carefully remove the following parts in this order (without exerting stress on
the Pirani element (13)): pressure piece (9), anode extension piece (9a),
complete anode (10), metal seal (11) incl. centering ring (12).
Unfasten the screw fitting (13a) of the Pirani element and remove Pirani ele-
ment together with the copper seal (13b).
The parts can now be cleaned or replaced individually.
6.3.1 Disassembling MPG401