Assembly – Ariens SNO-THRO 926103-ST1332LE User Manual
Page 9
GB - 9
PACKAGE CONTENTS
ASSEMBLY
Tools Required:
•
Pliers
•
Open-End Wrenches: 3/8, 7/16, 1/2,
9/16 in. and/or Adjustable Wrench
•
Tire Gauge
Unfold Handlebar (Figure 4)
1. Remove the lower and loosen the upper wing
knobs on the handlebar assembly.
2. Loosen the wing nuts on the shift rod.
3. Put the speed selector lever in the first forward
position.
4. Rotate the handlebars into operating position.
5. Install and tighten all wing knobs and wing nuts
on the handlebar assembly and shift rod.
NOTE: The handlebar has two height positions. Adjust
the handlebar height to provide better operator
comfort. See Handlebar Height on page 22.
Install Discharge Chute and Discharge Chute
Crank
(Figure 5)
1. Grease underside of discharge chute ring (if not
already greased).
2. Remove mounting hardware from auger housing.
3. Install discharge chute over opening in the auger
housing. Finger tighten the mounting hardware
removed in step 2.
NOTE: Leave discharge chute pedestal loose to help
install the chute rod and connect it to the control
assembly.
ASSEMBLY
WARNING: AVOID INJURY. Read and
understand the entire Safety section before
proceeding.
WARNING: Dropping or tipping over boxed
unit could result in personal injury or damage
to unit.
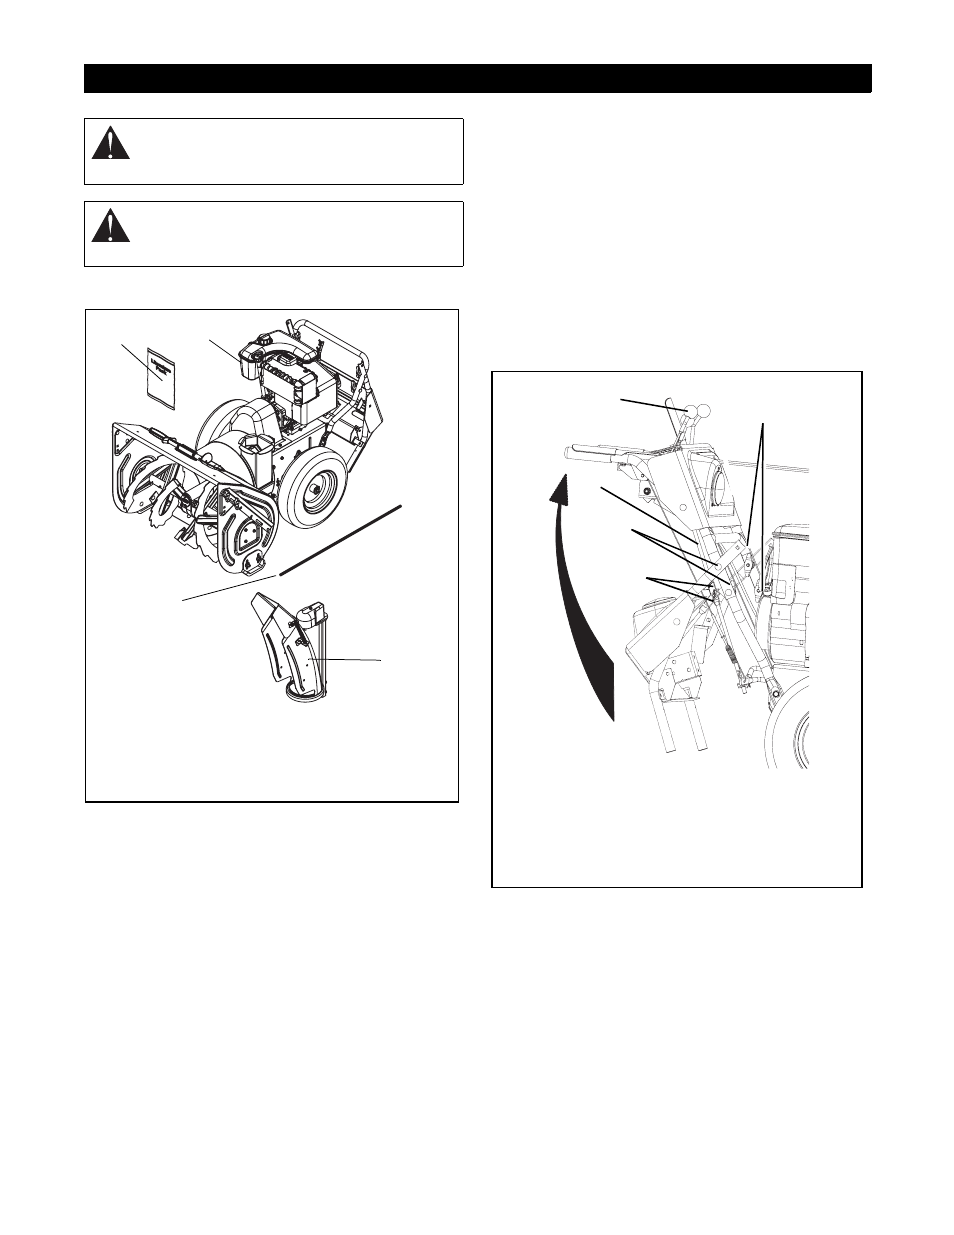
Figure 3
1. Sno-Thro Unit
2. Discharge Chute
3. Chute Rod
4. Literature Pack with
Extra Shear Bolts
1
2
4
3
OS7020
1. Wing Knobs
2. Wing Nut
3. Bolt
4. Shift Rod
5. Speed Selector
Lever
Figure 4
OS7030
1
1
4
2, 3
5
- SNO-THRO 926004-ST926DLE SNO-THRO 926101-ST926LE SNO-THRO 926300-ST11526DLE SNO-THRO 926302-ST1332LE SNO-THRO 926304-ST11528LE SNO-THRO 926303-ST1328LE SNO-THRO 926102-ST11528LE SNO-THRO 926006-ST1328DLE SNO-THRO 926001 ST926LE SNO-THRO 926005-ST11526DLE SNO-THRO 926500-ST1332DLE SNO-THRO 926002-ST11528LE SNO-THRO 926003-ST1332LE SNO-THRO 926301-ST926DLE