Aeromotive 17131 - 86-98.5 ELIMINATOR 5.0L MUSTANG STEALTH FUEL SYSTEM User Manual
Page 3
Section 1 - Fuel Tank Installation:
1-1. Once the engine has been allowed to cool, disconnect the negative battery cable and relieve the fuel system pressure.
1-2. Raise the vehicle and support it with jack stands.
1-3. Referring to the appropriate vehicle service manual for instructions, drain, disconnect any electrical and fuel
component connections and remove the OEM fuel tank. The removal of the vehicles exhaust system may be
necessary for fuel tank removal.
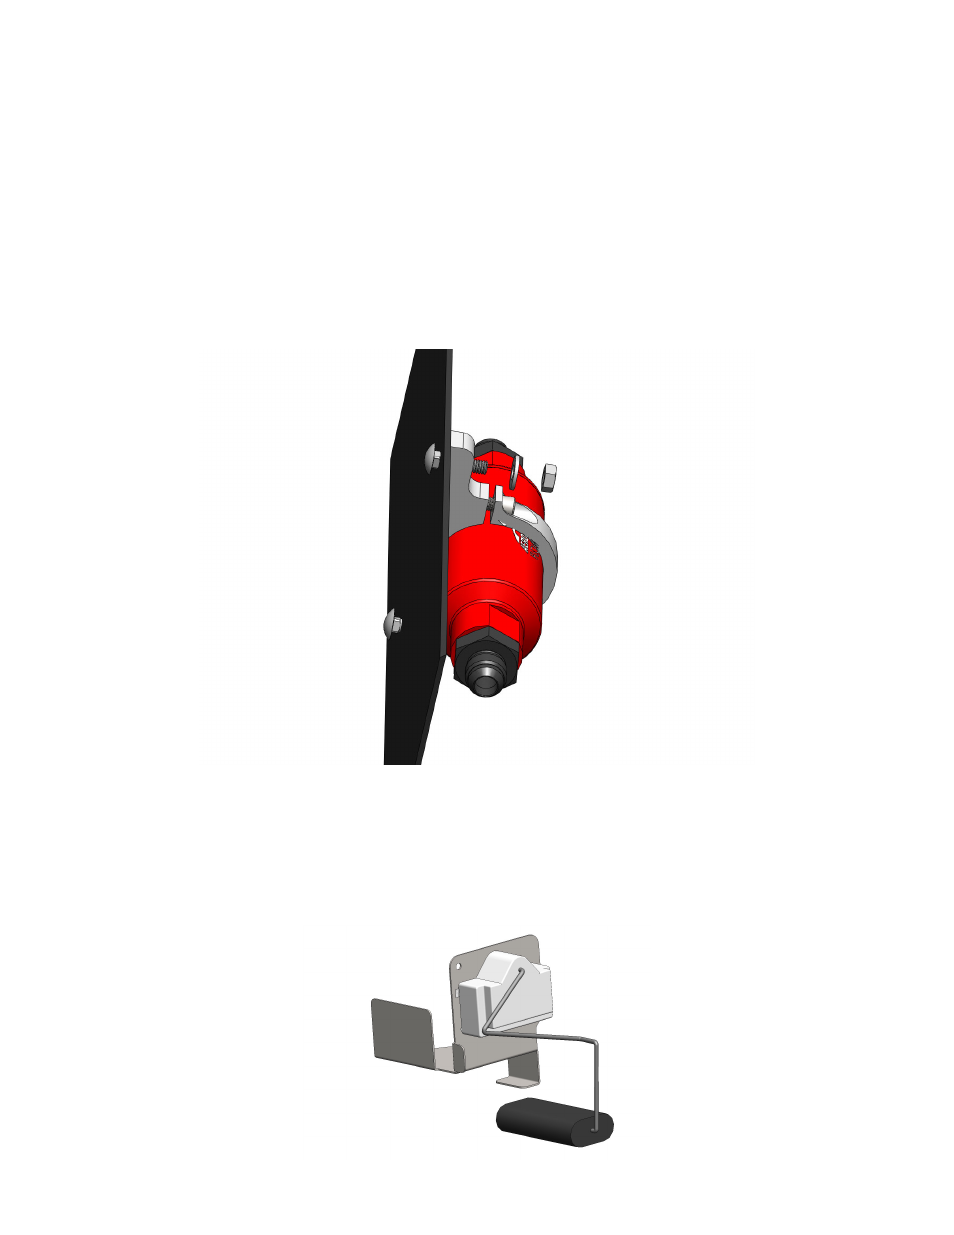
1-4. Once the OEM fuel tank has been removed, remove the plastic fuel tank shield from the bottom of the tank. Before
transferring the shield to the new Aeromotive tank, attach the 12305 filter bracket to the front side of the shield with the
two supplied carriage bolts, nuts and washers (bracket will be placed facing the rear differential cover) FIGURE 1-1.
Insert the 12301 filter into the bracket and tighten the socket head cap screw to secure the filter. Screw the two 15610
fittings with o-rings on the ORB-10 port side into each end of the filter.
FIGURE 1-1
1-5. Remove the new Aeromotive Stealth Tank from the box and then take the Aeromotive fuel pump assembly out in
order to gain access to the inside of the tank. Set fuel pump assembly to the side for later use.
1-6. From the old OEM fuel tank, remove the rubber grommet for the fill-neck, the fuel level sender and wiring harness, the
vent valve and vent grommet. Inspect all parts for damage, if none found, reinstall in the new Aeromotive tank. If any
of the OEM components are damaged replacement parts are available through your local Ford dealer or auto parts
store. Use FIGURE 1-2 to install the factory fuel level sender onto the provided mounting bracket.
FIGURE 1-2