Ricoh Aficio 3260C User Manual
Page 86
Copying
72
2
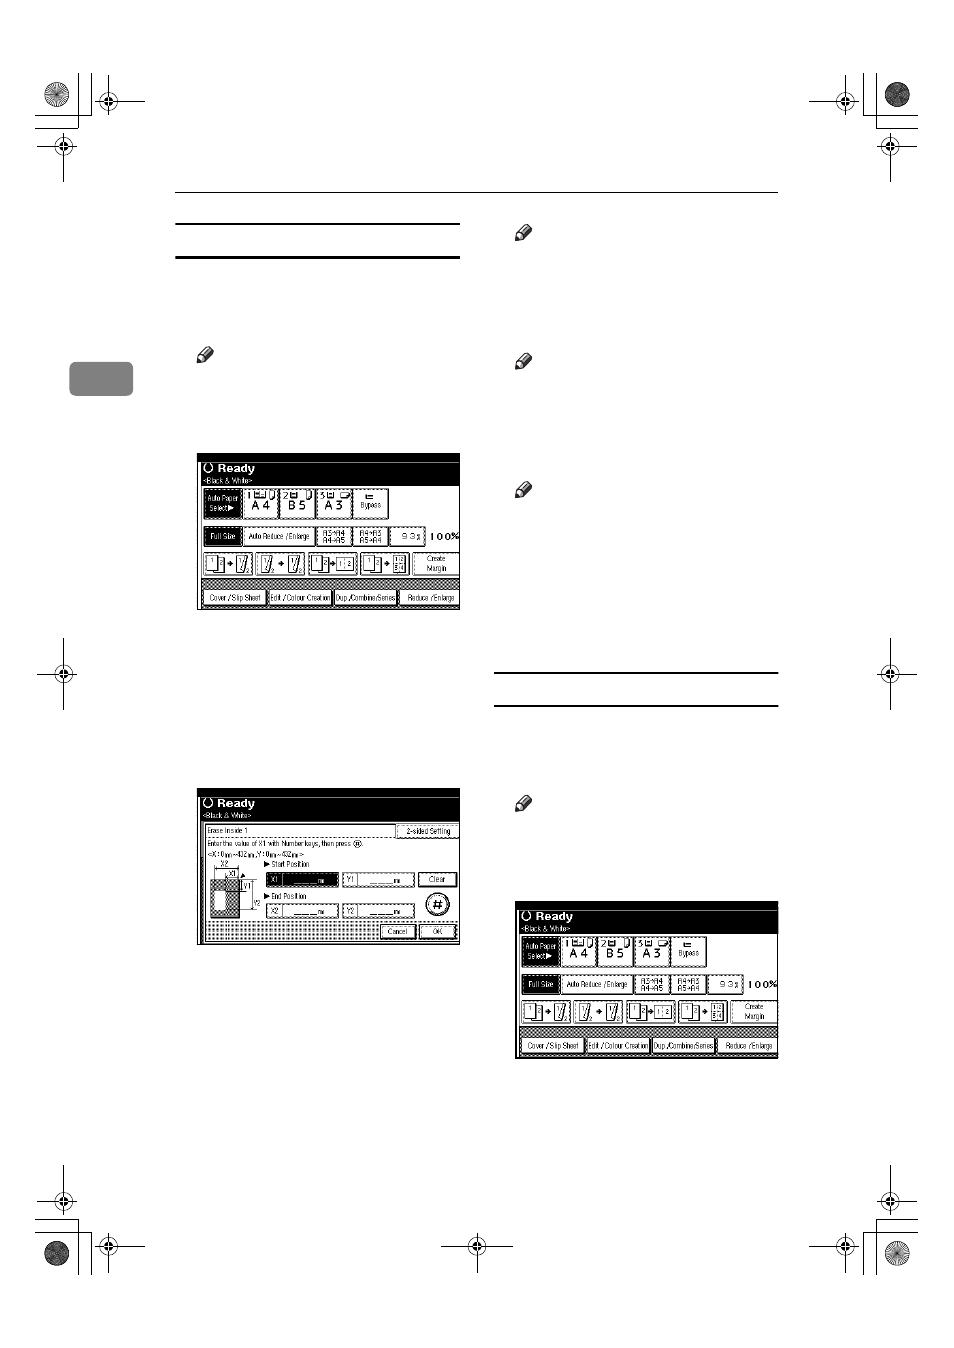
Inside Erase
AAAA
Specify the point where the ma-
chine starts scanning (X1, Y1) and
where it stops scanning (X2, Y2).
Note
❒ You can input lengths of 0 – 432
mm, 0 – 17".
BBBB
Press [Edit / Colour Creation].
CCCC
Press [Erase / Margin Adj.].
DDDD
Press [Erase Inside 1], [Erase Inside 2],
[Erase Inside 3], [Erase Inside 4] or
[Erase Inside 5]
.
EEEE
Enter the value of [X1] with the
number keys, and then press [#].
FFFF
Enter the value of [Y1] with the
number keys, and then press [#].
GGGG
Enter the value of [X2] with the
number keys, and then press [#].
HHHH
Enter the value of [Y2] with the
number keys, and then press [#].
IIII
Press [2 Sided Setting], and then
press [Back Side].
Note
❒ If you do not need to erase the
image on the back, go to step
K
.
JJJJ
Enter the values of [X1], [Y1], [X2]
and [Y2] for the back.
Note
❒ Erasing the image on the back is
valid when you copy 2-sided
originals.
KKKK
Press [OK].
Note
❒ If you want to go on to erase an-
other area, repeat from steps
D
to
K
.
LLLL
Press [OK] twice.
MMMM
Place the originals, and then press
the
{{{{Start}}}} key.
Outside Erase
AAAA
Specify the point where the ma-
chine starts scanning (X1, Y1) and
where it stops scanning (X2, Y2).
Note
❒ You can input lengths of 0 – 432
mm, 0 – 17".
BBBB
Press [Edit / Colour Creation].
CCCC
Press [Erase / Margin Adj.].
DDDD
Press [Erase Outside].
VenusC1_GB_Copy_F1_FM.book Page 72 Tuesday, January 17, 2006 3:43 PM