Brakes, adjusting - automatic hand control, Service steering and brakes – Scotts S1642 User Manual
Page 38
Service Steering and Brakes - 34
SERVICE STEERING AND BRAKES
•
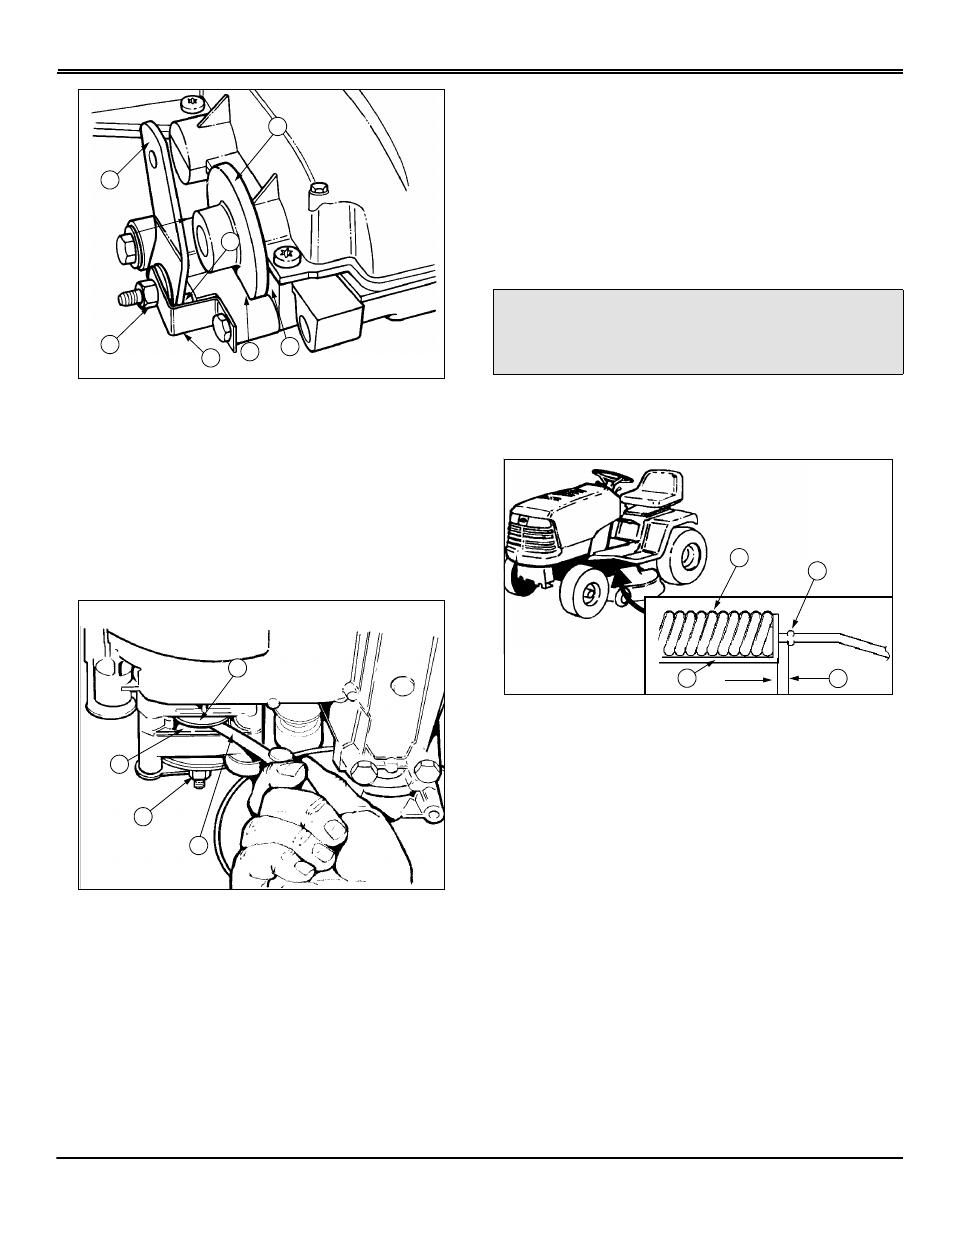
Brake disc (A) is contacting the case (B),
AND/OR
•
Brake lever (C) is contacting its mounting bracket (D),
top or bottom.
If so, REPLACE friction pucks and brake disc BEFORE
making adjustment. (See you Authorized Service
Center.)
3. Block the front and rear wheels, and release the parking
brake.
4. From the rear of the tractor, locate the brake disc (E),
lock nut (F), and friction puck (G).
5. Insert a 0.25 mm (0.010 in.) shim gauge (H) between
the disc and friction puck. The shim should slide with slight
interference.
IF THE SHIM WILL NOT FIT:
•
Loosen lock nut (F) until the shim slides in. Tighten the
lock nut until the shim has slight interference.
•
Remove the shim and cycle the brake pedal. Readjust if
needed.
IF THE SHIM SLIDES FREELY:
•
Install the shim and tighten lock nut (F) until there is
slight interference.
•
Remove the shim and cycle the brake pedal. Readjust if
needed.
Adjusting Brakes - Automatic Hand Control
1. Park tractor on flat, level surface. STOP engine, turn key
to the OFF position, and remove key.
2. UNLOCK the park brake and release brake pedal.
3. Measure distance from inside of brake rod stop tabs (A)
to outside of compression spring bracket (B) (located below
foot tread area on left-hand side of transmission). Distance
(C) should be 2 – 10 mm (0.08 – 0.40 in).
B
D
D
F
C
A
B
G
F
H
E
c
CAUTION: Avoid injury! Before adjusting
brakes: STOP engine. Remove key. Wait for all
moving parts to STOP.
A
C
B
E