Install the range, Installation instructions, Installing the anti-tip bracket – GE 131-10595-2 1-07 JR User Manual
Page 9
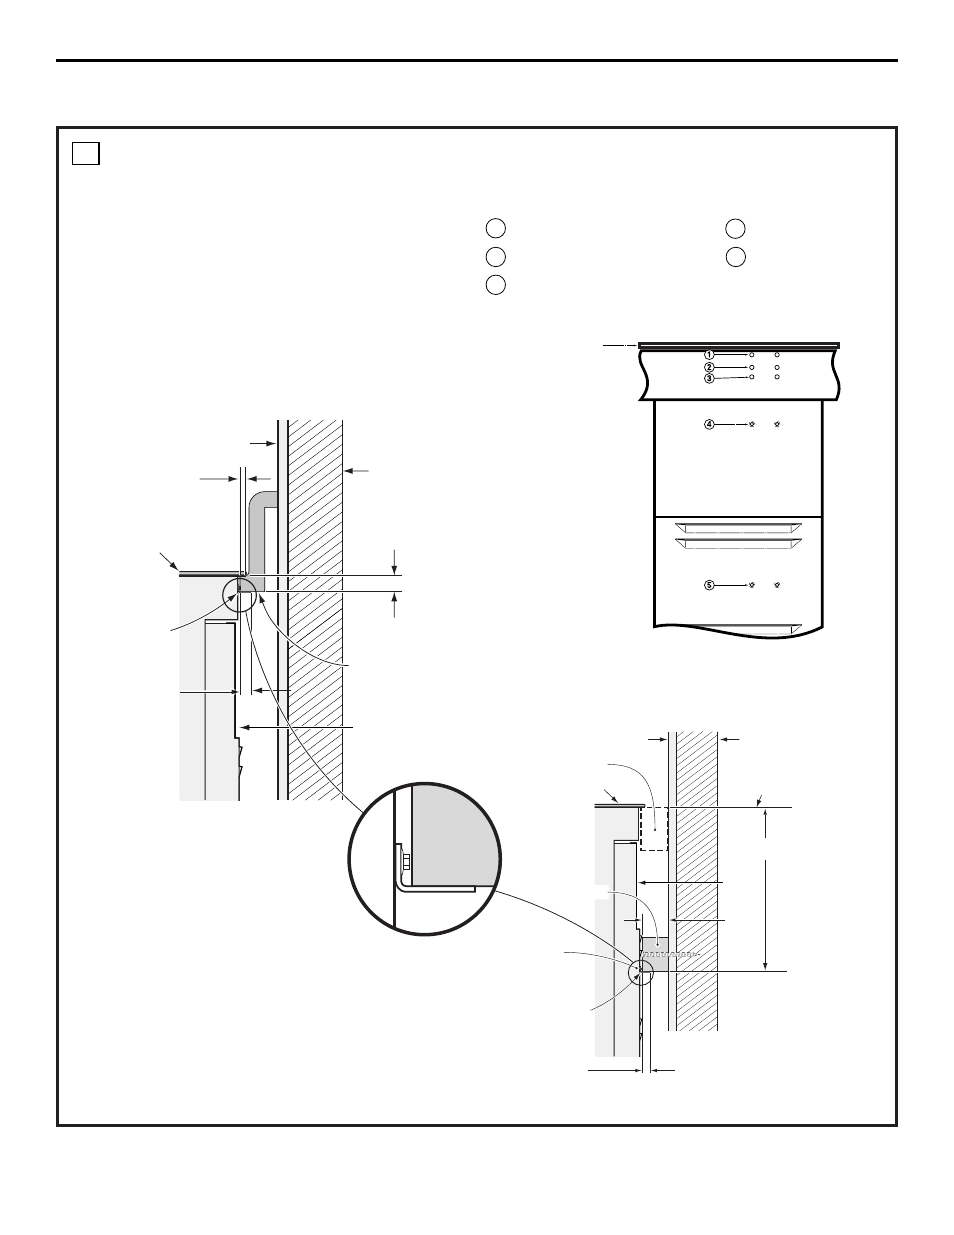
Select the proper position for the countertop
thickness and move bracket to proper position.
(Unit is supplied with bracket in position 1.)
INSTALL THE RANGE
INSTALLING THE ANTI-TIP
BRACKET
The anti-tip bracket is attached to the back of
the Drop-In Range. It is designed to fit under
the bottom of the countertop opening at the
rear. Measure counter thickness at back of
cutout to determine correct bracket location.
1
1 For 3/4” Counter
2 For 1.18” (3 cm) Counter
3 For 1.5” Counter
4 For 3.5”
5 Alternate
(shown below)
Anti-tip bracket location
(rear of range)
Cooktop
ANTI-TIP INSTALLATION
ALTERNATE
ANTI-TIP INSTALLATION
Interior wall
1/4” min. flat area
Wall stud
Countertop
thickness
Bottom of
countertop
Wire cover
Maintop
Anti-tip
bracket
Bottom of
countertop
to engage
bracket by
1/2” min.
Wall stud
10-3/8”
1-1/2”
Countertop
surface
Interior wall
Wire
cover
Attachment
anchored to
wall stud is
required
Anti-tip bracket
Attachment
Non-kit application
Maintop
Position #5
non-kit
application
*Attachment
to engage
bracket by 1/2” min.
9
Installation Instructions